How to Check Your Battery Capacity on Windows and MacOS

When you spend hours charging your laptop only for it to die faster than it did when you first got it, that’s a clear indicator that you’re facing a battery problem. Checking your laptop’s battery health will rule out whether or not this is in fact the case. While both MacOS and Windows devices will warn you when it’s time to replace the battery with a service pop-up or warning, this message normally comes a bit too late. If you’re noticing rapid battery drain, check on the health of your laptop battery yourself.
If you find your laptop’s battery not performing as it should, but you’re still satisfied with how your computer runs, don’t buy a new device—get a replacement battery instead.

Swapping out the battery is easy on most Windows laptops and MacBooks. With that said, older models can be a pain to work with due to their stronger adhesive. 

What to Do When You Need a Battery Replacement

Open macbook pro ready for battery replacement. When your laptop’s battery no longer holds a charge, or if its battery health falls below 25%, it’s time to replace it. Here’s what you can do.

1. Check Your Warranty

The warranty is the first thing you should check if your laptop’s battery is already defective. That’s because if your service warranty covers battery life and it’s still within the coverage period, then you can have the battery replaced for free.

2. Head to Your Nearest Authorized Service Center

Whether the warranty is still in force or not, this is the best place to have your battery replaced. While replacement may cost a bit more here, these authorized service centers ensure that you get an original or OEM battery.

These batteries will tend to last as long as the original one in your laptop did when it was new. And since they’re an authorized service center, they know the exact part number of the battery that your laptop needs. That way, you’re sure that they install the correct battery on your computer, avoiding the possibility of frying your laptop due to the installation of an incorrect or incompatible battery.

3. A Little Bit of DIY

If your laptop is out of warranty and has a removable battery, you no longer have to bring it to the service center. All you need is to find the correct part number and order it from the manufacturer. If the original maker no longer has it in stock, you can also search for OEM parts online—just ensure that you’re buying from a reputable shop and you’re good to go.

To ensure that you choose the correct battery for your laptop, you have to find its part number. You can usually find it printed on the battery itself. Unfortunately, battery part numbers are not usually included in the laptop’s user manual, so you must have the battery on hand to check it. Alternatively, you can contact your laptop’s service center and directly ask for the part number.

But if your laptop uses a permanently installed battery, you would need to disassemble it to get the information you need. Usually, you just need to remove its backplate to access the battery, so ensure you have the right tools available when taking your computer apart.

Once you can see the battery, you can then look for the correct part number and order it. You also have to check how to connect the battery to the motherboard, as that may require additional tools. But if you’re unsure about what you’re doing, it’s best to bring the laptop to a professional.

>>>>>>>>>>>>>>Laptop Battery

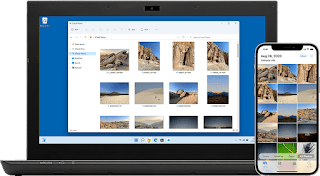
iPhone users with PCs can now access photos and videos through the Windows 11 Photos app – here’s how

 If you have an iPhone and PC, it’s now easier and faster to access photos and videos from your Apple devices. A PC isn’t the only place you can access your iPhone content right now; you can also interact with your photos and videos using any Xbox device, such as the Xbox Series X and Xbox Series S. You might be wondering, “This is great news! But how do I get started?” Luckily, we have a step-by-step guide on how to do it.

How to sync your iCloud photos and videos with the Windows 11 Photos app

There’s no way, but if you want to access your iCloud content on your PC, you’ll have to upgrade to Windows 11 (here’s how to install Windows 11). Once you’re ready for Windows 11, follow the instructions below to access your iPhone’s photos and videos on your PC.

1. Click the Microsoft Store icon on the Windows 11 desktop taskbar.

2. Type “iCloud” in the search bar and press Enter. This should open the iCloud for Windows app.

3. Click Get.

4. After installation, click Libraries.

5. Scroll down to iCloud, and then click Turn On.

6. You may receive a message: “Do you want to allow this app to make changes to your device?” Click “Yes”.

7. Enter your Apple ID and password.

8. For 2FA, you will be asked to enter a verification code sent to your Apple device.

9. After verification, the iCloud app will appear. Click Apply.

10. Next, click on the Photos app on the taskbar and you should see your iCloud photos and videos fully integrated with your Windows content by scrolling through the Favorites tab.

>>>>>>>>>>>>>Laptop’s battery

Windows 11 update causes PC to crash with blue screen of death – here’s the fix

 Windows 11 22H2 was released to the public on September 20 and needed to be put back into its original cage. Sketchy updates are breaking PCs. Not only did it drop frame rates for gamers with Nvidia GPUs, but it also caused a disastrous Blue Screen of Death (BSoD) for some users. If you’ve been having this problem, don’t worry; there’s a fix, let’s take a look!

Why does a Windows 11 update cause a blue screen of death?

The Windows 11 22H2 update has an incompatibility issue with some Intel Smart Sound Technology (SST) audio drivers on Rocket Lake processors. More specifically, according to a report published by Microsoft on September 22, the driver IntcAudioBus.sys with file version 10.29.0.5152 or 10.30.0.5152 is the culprit. As a result, the user got a BSoD, a stop error that caused the system to shut down due to a fatal failure.

What exactly is the Intel SST audio driver? It is an integrated digital signal processor that manages voice, voice and audio interactions. If you want to determine if this feature is available, navigate to Device Manager and search for Intel® Smart Sound Technology (Intel® SST) Audio Controller.

Thankfully, according to Windows Update, Microsoft has taken steps to prevent affected PCs from using the incompatible Windows 11 update.

How to fix Windows 11 update blue screen of death

To resolve this BSoD issue, Microsoft recommends updating the affected Intel SST driver, depending on your system manufacturer. Go to your OEM website for updates or navigate to Settings > Update & Security > Windows Update > View optional updates.

After updating to a version higher than 10.29.0.5152 or 10.30.0.5152, users should now have the opportunity to bypass the block and update Windows 11 without any issues.

According to the latest Windows news, Microsoft is working hard to roll out a new update to fix a dire issue with Windows 11 22H2.

>>>>>>>>>>>>>Laptop’s battery

Windows 11 vs Windows 10: What’s really different?

 Considering upgrading to Windows 11? Microsoft’s latest operating system completed a phased rollout earlier this year and is now available on compatible devices. While the two operating systems share many similarities, there are some major differences between Windows 10 and Windows 11. Newer versions offer a more Mac-like aesthetic and more productivity features—plus the chance to finally use Android apps on Windows-equipped computers.

Let’s take a look at Windows 10 vs. Windows 11: All the big differences in the new operating system!

Design and Interface

Windows 11 brings a new, more Mac-like interface to the operating system. It features a clean design with rounded corners and pastel tones. The iconic Start menu has also been moved to the center of the screen along with the taskbar. However, if you want, you can move them back to the left, where they were in Windows 10.

Android app integration

The Android app is now available for Windows 11 through the Microsoft Store and Amazon Appstore. (There are several ways to access Android apps on Windows 10, including if you have a Samsung Galaxy phone, but this will make it a native app.) It’s something Windows users have been waiting for for years, marking a move toward a merger Another step forward for mobile and laptop devices.

Better virtual desktop support

Windows 11 allows you to set up virtual desktops in a similar way to a Mac. It allows you to switch between multiple desktops at once for personal, work, school or gaming. In Windows 10, this feature is more difficult to set up and use.

Easier transition from monitor to laptop

The new operating system includes features called Snap Groups and Snap Layouts—collections of the apps you’re using that sit in the taskbar and can appear simultaneously or minimized for easy task switching. They also allow you to easily plug and unplug from the monitor without losing where your open windows are.

Add Microsoft Teams to the taskbar

Teams has had a makeover and is now integrated directly into the Windows 11 taskbar, making it more accessible. You can access Teams from Windows, Mac, Android, or iOS.

Small parts

While they’ve been around for a while, including in the recent Windows 10 update, you can now access widgets directly from the taskbar and personalize them to see whatever you like.

Enhanced touchscreen, voice and pen support

For tablets, Microsoft is aiming to improve the touch experience, with more space between icons on the taskbar and support for gestures. Windows 11 also adds haptics to your digital pen, so you can hear and feel vibrations when you use it to take notes or draw. Finally, the operating system introduced voice input and commands throughout the system.

Xbox technology that improves gaming

Windows 11 will get some of the features found in the Xbox console, like Auto HDR and DirectStorage, to improve gaming on Windows PCs. This marks another step for Microsoft to integrate PC and Xbox consoles.

>>>>>>>>>>>>>Computer battery

Windows 11 will soon let you see which apps may be spying on you

 Windows 11 has a brand new privacy tool, currently in beta, that allows you to see which apps have recently accessed sensitive bits of hardware, such as your webcam.

David Weston, Microsoft‘s vice president of enterprise and operating system security, took to Twitter to show off the privacy auditing feature, which appears in new preview builds of Windows 11 (tested in the Dev Channel, the earliest preview builds of the OS are going through their paces).

The feature is under Settings (in Privacy & Security > App Permissions), where you can see a list of recent activity, such as which apps have accessed your microphone in the past week, or your Cameras, another obvious point of call to check for any potentially suspicious activity.

It also keeps tabs on apps that have accessed your contacts, or details related to your location, phone, and more. In each case, the user is also informed of the exact time and date of access to the relevant hardware or feature.

Analysis: A useful way to keep an eye on your application

It’s great to see that the coverage provided here is quite extensive, keeping an eye on all sorts of sensitive information, from the obvious cameras and microphones to contacts and other such details.

This is a good piece of information in terms of transparency related to what the software on the system is doing. Regularly checking the privacy audits that exist in Settings may yield some interesting findings, flagging apps you didn’t know had their claws into some of the more sensitive aspects of the system (or highlighting malicious intent that was flying under the radar) content).

Microsoft has long had a bad reputation for privacy issues with Windows, especially since Windows 10, so it’s good to see the software giant taking a positive step forward on this front — which should help Windows 11 users stay better. Vigilance and overall security of your PC.

>>>>>>>>>>>>Laptop’s battery

Running out of Windows 11 storage? Here’s how to free up disk space on your PC

 The last thing you want is a hard drive with little or no storage space. A nearly full hard drive can negatively affect your entire computer, which will inevitably slow it down and cause your applications to crash more frequently. The only fix is ​​to clean the drive and delete the large files that are taking up the most space, and Windows 11 makes it easy to get rid of unwanted files.

Instead of downloading third-party software to free up disk space, Windows 11 can configure some settings to quickly delete temporary and system files and old downloads. If you’re worried about deleting important files, don’t worry. Windows 11 will help you decide which files to delete to improve your PC’s performance.

How to Automatically Free Up Space on Windows 11

On a Windows 11 computer, go to Settings -> System -> Storage. If this is your first time accessing this setting, please wait a few seconds for your computer to analyze your data storage. Once Windows has gathered what it needs to know, you can see your total free memory at the top of the page. Below it, you’ll see a breakdown of storage, divided into Apps & Features, Temporary Files, and Others. You can also click Show more categories to see further breakdowns.

However, the setting we’re interested in is Storage Sense, which automatically frees up space on your computer when you’re running low on disk space. It does this by deleting temporary files, emptying the recycle bin, and getting rid of old downloads in the background without you having to do it manually.

To turn on Storage Sense, just turn it on here. If you click Settings, you can configure several functions:

1. Run Storage Sense: Run Storage Sense when disk space is low (default) or on a daily, weekly or monthly basis.

2. Delete files from My Recycle Bin if they have existed for more than 1 day, 14 days, 30 days (default) or 60 days.

3. Delete files in My Downloads folder if they haven’t been opened for more than the following time: select Never (default), 1 day, 14 days, 30 days, or 60 days.

These Storage Sense settings can help you limit which files are deleted and when, so you don’t have to worry about any important files getting wiped from your computer.

At the bottom of the page, you can click Run Storage Sense Now to use the feature.

If you want to delete more files to free up space, use the cleaning suggestions below Storage Sense. If you click it, it will scan your system and recommend files you manually delete, such as temporary files, large or unused files, files synced with your cloud, and unused applications.

>>>>>>>>>>Laptop battery

If Windows is upgraded, Windows won’t shut down! how to fix

 The lore of PCs that no longer boot after a simple update has been lost, even requiring a full format to get up and running again! Fortunately, things are very different with Windows 10: Updates are tested for a long time, well-timed patches are released every month, and traffic accidents are very rare.

But that doesn’t mean that bugs don’t happen even today: if we are one of the unfortunate users, the PC is blocked after an update or doesn’t shut down in the update screen. Below we’ll show you all the steps to take to get back up and running in no time without having to proceed with the risky disk formatting.

Force restart

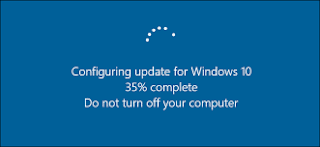
If our computer stops on the “Preparing Windows, do not turn off the computer” screen for more than an hour, then there is a problem with the updater. In this case, we disregard the advice of the computer itself and press the restart key or hold down the power key for a few seconds on a stationary PC to get a forced restart or shutdown.

On the next system boot, if the problem is temporary, we will see the same screen again and probably finish the process. If the update screen is still blocked, let’s wait at least an hour to rule out any heavy updates: if the system is still blocked, we can proceed with one of the other suggestions in the guide.

Remove stuck updates

If the PC fails to boot properly due to an update error, we force restart the system three times in a row: doing so will launch the Emergency Recovery Console, which you can use to delete this pending update.

In the window that will appear, click the Advanced Options button, click Troubleshooting, then click Advanced Options again, and finally click Command Prompt to open the prompt window.

At the prompt, we type the following command:

dism/image: C:\/cleanup-image/revertpendingactions

We press Enter or Enter on the keyboard to confirm. All pending updates will be removed, so you can restart your system immediately without locking the screen again. To exit the console, go back to the first screen and press Continue .

When the system starts, Windows may ask you to install the update again: currently we can avoid installing it by blocking Windows Update, even though this process is not recommended.

boot repair

To proceed with Startup Recovery, open Recovery Console, press Troubleshoot, then Advanced Options, and finally Startup Repair.

As soon as the item is clicked, the Windows Diagnostics tool will start: at this stage we don’t have to do anything but wait to restore the settings needed to boot the operating system properly. After a few minutes of recovery attempts, the system will reboot and it can be accessed again without any blocking.

system Restore

If we had the foresight to activate System Restore before the crash, we could have solved all our problems at once by returning to a known working Windows configuration. System restore usually creates an image before the update, otherwise we would have to use one of the restore points we created.

To continue, we force restart the PC three times in a row, click Advanced Options, then Troubleshoot, select Advanced Options again, and click System Recovery. In the new screen, press the account on the PC, enter the password if necessary, and select the restore point to use in the recovery tool window. After a few minutes, your PC will be up and running again without a crash on startup.

Fully restore Windows 10

If the procedures indicated so far are unsuccessful and the system remains locked, you have no choice but to try to restore Windows, keeping your personal files. To continue in this sense, we start the Recovery Console again, press Troubleshoot again, and click Reset PC.

After pressing Reset PC, we choose to keep personal files , and we confirm the recovery operation. In the latest version of Windows 10, you will also be asked if you want to download an updated version of Windows 10 from the cloud: we also confirmed this opportunity, so you can update your system without downloading another update.

>>>>>>>>>>>>Windows battery

Thanks for reading, hope it helps!

Friendly reminder: If you need to replace the battery of your device, this battery store will be a good choice: www.batteryforpc.co.uk

Windows 11 hidden features will make your computer better serve you

 These features can help you save battery and get the most out of Microsoft’s latest updates. Whether you use your computer for work or personal life, now is a great time to master some of Windows’ productivity features. These built-in tricks can help you with everything from setting up taskbar shortcuts to saving battery power. Microsoft isn’t usually as candid about its hidden features as Apple, which can sometimes make it harder to figure out how to take advantage of all that Windows has to offer. But we’re here to give you our list of hidden features you can start using today to get the most out of Windows 11. Let’s have a look!

1. Minimize every window except the active window

If your desktop screen is overcrowded with open windows, you can quickly minimize them all except the one you’re currently using. You’ll need to turn this feature on in Windows 11 by going to Settings, System, Multitasking and turning on Window Shaking in Title Bar. Just click on the title bar of the window you want to keep open to select it. Then, hold down the mouse and quickly move the window back and forth — basically shaking it. After a few quick shakes, all other open windows are minimized, leaving only the one you shaken.

2. Open the “Secret” start menu

You know that to get to the Start menu, you need to click the Windows icon at the bottom left of the screen or on the keyboard. But Windows 11 includes a little-known second Start menu, which you can access in two different ways, by pressing Windows key + X or by right-clicking the Windows icon/Start button.

3. Screenshot on Windows 11

There are at least eight different ways to take screenshots with Windows. If you want to capture and save a picture of the entire screen, the easiest way is to press the Windows key + Print Screen key, and the picture will be saved to the Pictures > Screenshots folder.

To capture only a portion of the screen, press Windows key + Shift + S to open a tool called Snip & Sketch, which allows you to click and drag to create a screenshot and save it to the clipboard.

4. Use keyboard shortcuts to open pinned items from the taskbar

If you’ve pinned programs to the taskbar at the bottom of the screen to create shortcuts, you don’t need to click an icon to open them. Instead, use the keyboard shortcut Windows key + [number keys], which correspond to the location of pinned programs on the taskbar.

5. Know how much space an app takes up

The computer starts to run slower due to lack of space. A quick way to speed them up might be to get rid of apps that take up more space than they should, especially if you don’t use them often. To see how much space apps, temporary files, and documents are taking up, navigate to Settings > System > Storage. Click Show more categories to see the full list. To find out what to throw, click Cleaning suggestions to see Windows 11 suggestions.

6. Close background apps to save battery

To control which apps run in the background and save some battery power and data, go to Settings > System > Power & Battery. Tap Battery Saver, then make adjustments to limit certain notifications and background activities while Battery Saver is on.

7. Use background scrolling for multiple windows

The feature should be on by default, but if not, go to Settings > Bluetooth & devices > Mouse and toggle Scroll inactive windows to On when I hover over them. You can then mouse over the window in the background and use the wheel to scroll.

8. Show File Extensions in File Explorer

Microsoft hides file extensions by default, making it difficult for people who need to find certain types of files. To view file extensions in File Explorer:

1. Using Search in the taskbar, type File Explorer Options, and then click it.

2. In the pop-up window, click the View tab.

3. If checked, uncheck the Hide extensions for known file types box. Click Apply, and then click OK.

You can also use the File Explorer options menu to choose to show empty drives, hide files and folders, and more.

9. Use Focus Assist to reduce distractions

It’s frustrating trying to get work done when you’re constantly interrupted by notifications. You can determine how much you get with Focus Assist.

Set it up by going to Settings > System > Focus assistant. Choose from three options: Off, Priority Only (view only selected notifications from your customized priority list, and send the rest to your Action Center), and Alerts Only (hide all notifications except alerts ).

>>>>>>>>>>Laptop battery

Thanks for reading, hope it helps!

Friendly reminder: If you need to replace the battery of device, this battery store will be a good choice: www.batteryforpc.co.uk

How to Sync Your iPhone with Windows 10

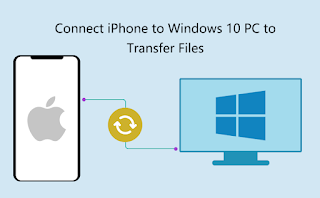
 Just because iPhones perform better on MacBooks doesn’t mean they won’t work on Windows 10 laptops. Syncing your data on Windows 10 requires a bit more expertise (as opposed to macOS’s plug-and-play sync, or how you drag and drop files with Android on Windows 10). Let’s take a look below!

Copy to iPhone

Syncing music, photos, movies and TV shows means getting familiar with iTunes. If you’re already using it, you’re ready to go. If not, you can download and import your music by going to File > Add Folder to Library to move your current music into iTunes. Once you’re ready to sync, follow these steps:

1. Connect your iPhone to your laptop with a Lightning cable.

2. Click Continue when asked if the computer can access the phone.

3. Click the phone icon in the top bar.

4. Click Sync. Depending on the amount of data you’re syncing, this may take a while.

5. Check your photos, music, apps, and videos to confirm that they arrived on your phone from Windows 10.

Copy from iPhone

This is where things get tricky. To avoid piracy, it’s not that easy to sync from an iPhone and send data to it. Fortunately, there are some workarounds.

Music and Movies: This puts you in Apple‘s cab. While you can move non-iTunes media files from your PC to your phone, you can’t send them from your phone to your computer. However, if you buy media from iTunes on your iPhone, you can get it on your desktop via the cloud. As long as you have an Apple ID, you can download all your songs and movies again from iTunes on your PC at no extra cost.

Files: The cloud is your friend for syncing files. While I personally use Dropbox, you can also use iCloud.

Here’s our guide to using iCloud on Windows. It’s perfect for those who love Apple software, including Pages, Numbers, and Keynote. If you’re a Dropbox user, you can use the iPhone app and desktop app to view files or photos on any device. If you’re a Google user, you can use Sheets, Slides, and Docs.

>>>>>>>>Apple battery

Thanks for reading, hope it helps!

Friendly reminder: If you need to replace the battery of your device, this battery store will be a good choice: www.batteryforpc.co.uk

How to Set Up a New Windows Laptop: Out-of-the-Box Tips

When you buy a new Windows laptop, you need to adjust the new laptop to make it easier for you to use in the future. So are you still struggling with how to set up your new Windows laptop? Here are some things to consider when setting up a new laptop. Let’s take a look together!

Run all windows updates

Your computer may download a series of Windows 10 updates on its own, so why not force them to install manually to get it done? Steps:

1. Enter “update” in the search box.

2. Click Check for Updates.

Windows will begin searching for and downloading updates, but you don’t need to wait for the process to complete before moving on to the next task.

3. If Windows does not automatically search for updates, select the Check for Updates box.

Uninstall bloatware

Most PC vendors pre-install annoying third-party software on your computer. These outdated software are ready to suck up valuable system resources. To uninstall it:

1. Navigate to Settings. You can get there from the start menu.

2. Select System.

3. Select Apps & Features from the left menu. If you don’t see this option, press and enter Apps in the search box, then select Apps & Features.

4. Select the application you want to uninstall.

5. Click Uninstall.

6. Click the second Uninstall button that appears.

Copy or sync your files

There are several possible ways to move your documents, photos, videos, and other critical files from your old computer.

OneDrive sync: If your important files are stored in OneDrive, they will automatically download to the new PC when you sign in with your Microsoft account.

Dropbox or Google Drive: These services work just like OneDrive, but don’t come with Windows preinstalled. If you used them to store files on the old computer, install them on the new computer.

Manually copy files: Select all files under the Documents, Music, Video, and Photos library, copy them to an external drive, and then copy them to the new machine.

Install antivirus software

If you accidentally click on a wrong link, your entire computer can fall victim to a malware infection – a horrific situation that can usually be avoided with some good antivirus software. The point of antivirus software is to prevent such situations from happening before they happen, and if they fail, to fix them right after. It is vital to have some kind of antivirus software to protect your PC from threats.

With Bitdefender, you can prevent problems before they happen; if anything harmful manages to get into your computer, you can also scan for and eliminate threats after the fact. Here’s a quick guide on how to install Bitdefender Free Antivirus:

1. Click the big green “Free Download” button on the Bitdefender website.

2. Go to your downloads folder and find the bitdefender_online.exe file you just downloaded. click it. Then it will install Bitdefender.

3. To avoid annoying pop-up reminders or any potential long-term issues with Bitdefender functionality, please create a Bitdefender account. It’s as easy as providing your name, email and creating a password. From there, Bitdefender will operate autonomously, allowing you to conduct your internet activities with peace of mind, always protecting you.

Set up Windows Hello fingerprint or face login

Many current laptops come with fingerprint readers or infrared cameras for facial recognition. You should set up Windows Hello, a feature that lets you log in with your finger or with a glance, so you can avoid the hassle of using common passwords. This is another great security feature that protects your files.

1. Navigate to Settings.

2. Click Account.

3. Select the login option.

4. Click the Settings button under Fingerprint or Face Recognition.

5. Click Start.

6. Slide your finger or stare at the camera as instructed. If you don’t have a fingerprint reader or infrared camera, Windows 10 won’t let you continue.

7. Click Set PIN. Windows 10 requires you to have a PIN as a backup in case your finger or face fails to register. If you already have a PIN, you won’t be asked to do this.

8. Enter the PIN and click OK.

Install the browser of your choice

Microsoft‘s Edge browser is fast, lightweight and definitely worth considering. But if you’re used to Chrome and Firefox extensions, you’ll want your favorite browser right away. To set a new browser as the default browser, follow the steps below.

1. Download and run the browser installer of your choice. Chrome at https://www.google.com/chrome/browser/desktop/

2. Navigate to Settings. You can get there from the start menu.

3. Click System.

4. Select Default Applications in the left pane.

5. Click the icon under Web Browser. It might say “Choose a default”, or it might have an icon for the current default browser.

6. Select your browser in the pop-up menu that appears.

>>>>>>>>>>>Laptop battery