Dell XPS 13 Plus vs Apple MacBook Air M1

 The Dell XPS 13 Plus represents half of the new 13-inch XPS lineup, offering higher performance and a more innovative machine than the more affordable XPS 13. Both are among the best laptops on the market. Apple’s MacBook Air M1 is an old-school option with an affordable design that’s been refined over the years to become one of the best MacBooks you can buy.

While the XPS 13 Plus is more expensive than the MacBook Air M1, the difference isn’t huge. So if you’re looking for portable power supplies, you might have them both on your shortlist. But which is better?

Price and configuration

The MacBook Air M1 is the lowest-priced MacBook you can buy, starting at $1,000 for an 8-core CPU/7-core GPU M1 processor, 8GB of RAM, and a 256GB SSD. You can spend up to $2,000 for the same CPU with 16GB of RAM and a 2TB SSD.

The XPS 13 Plus is a more expensive machine, starting at $1,300 in an entry-level configuration with a Core i5-1240P, 8GB of RAM, a 512GB SSD, and a Full HD+ non-touch IPS display. The most expensive model with a Core i7-1280P, 32GB RAM, 2TB SSD, and a 3.5K OLED or UHD+ IPS panel is $2,400.

While the MacBook Air M1 is still a high-end laptop, it’s less expensive overall.

Design

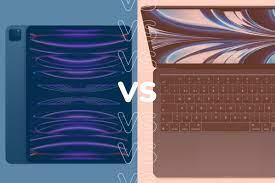
The design of the MacBook Air M1 is impeccable, as its tapered chassis started the trend for thin and light laptops. The new MacBook Air M2 takes the blocky look of the latest MacBook Pro, but without any issues with the original aluminum machine. And the build quality is second to none. The XPS 13 Plus looks a lot like previous XPS 13 models, with a streamlined aluminum chassis and dual-anodized chrome edges. Open it up, though, and Dell‘s latest looks futuristic with a bezel-less keyboard, LED function keys, and a glossy glass palm rest with a hidden touchpad. It’s also very well-made, and choosing between the designs of these two laptops comes down to very personal taste.

Speaking of the keyboard, the XPS 13 Plus has large keycaps and a comfortable layout with switches that aren’t very deep, but offer quick, precise responses. However, the MacBook Air M1 features Apple’s Magic Keyboard, and it’s the best. The switches are also shallow, but offer a more precise feel and excellent feedback. You can type quickly and accurately on both keyboards, but the MacBook is better. Both laptops also have tactile touchpads, with Dell’s version responsive across the entire surface and mimicking physical buttons. Thanks to Apple’s years of technical experience, the Force Touchpad for the MacBook Air is even better. The XPS 13 Plus has LED function keys that don’t offer any advantage to the user, but are there to keep the chassis slim.

Both laptops are limited to two USB-C ports with Thunderbolt 4, but the MacBook Air M1 retains the 3.5mm audio jack that the XPS 13 Plus ditched. Meanwhile, the Dell has more advanced wireless connectivity. One advantage of the XPS 13 Plus is its ability to natively drive two external displays, while the MacBook Air M1 is limited to just one.

Finally, both machines feature 720p webcams, while the XPS 13 Plus has an IR camera that enables passwordless Windows 11 Hello logins via facial recognition. The MacBook Air M1 uses the Touch ID fingerprint reader on the power button. Both methods are fast and reliable for logging in.

Display and Audio

The MacBook Air M1 features a 13.3-inch 16:10 Liquid Retina IPS display with a resolution of 2,560 x 1600. It’s great for productivity work, with adequate brightness and contrast, and decent colors. However, the XPS 13 Plus’ 13.4-inch 3456 x 2160 OLED touch panel is spectacular. It’s just as bright, but with incredibly broad and accurate colors and strong contrast with jet blacks.

The XPS 13 Plus also has a choice of Full HD+ non-touch and touch IPS displays and UHD+ touch IPS displays. However, there is no doubt that OLED displays have advantages in terms of productivity, creativity and media streaming needs. Both laptops have dual speakers that deliver clean sound with adequate volume.

Portability

The XPS 13 Plus is smaller in all dimensions than the MacBook Air M1, and a little lighter. Where the MacBook wins out is the efficiency of Apple’s M1 processor. In our web browsing and local video battery tests, the MacBook Air M1 lasted nearly twice as long as the XPS 13 Plus and lasted more than a day of work, while the Dell didn’t.

The MacBook Air M1 is simpler but cheaper

You can get several of the XPS 13 Plus’ innovations for a higher price, especially its beautiful OLED display, and its better productivity performance. However, you’re paying more, and the MacBook Air M1 has better battery life and just as good build quality.

If you’re choosing between these two laptops and just want a solid productivity machine for the least amount of money, the MacBook Air M1 is the better choice.

>>>>>>>>>>>Laptop battery

MacBook Air vs Pro: Which should you buy?

 Choosing between the Apple MacBook Air and Pro can be difficult, as both are excellent laptops, and both are better than ever thanks to Apple chips. Comparing laptops is difficult but important because you need to know exactly what each laptop does when deciding which one is right for you.

When choosing between MacBook Air and Pro, here’s everything you need to know to find the best MacBook for you.

MacBook Air vs Pro: Design

The M1 MacBook Air and Pro share a machined aluminum casing, come in silver and space gray, and both have a small lip on the front of the base to easily open the screen. The Air, as always, has a tapered wedge shape.

The new MacBook Pro offers slim bezels and ditches the Touch Bar in favor of a dedicated feature row. The 1080p webcam has a notch at the top, but it’s not a distraction. The design of the M2 MacBook Air 2022 is more similar to the 2021 MacBook Pro, ditching the tapered design. It also has thinner bezels and a notch for the camera. The design of the M2 MacBook Pro is identical to its M1 predecessor.

In terms of portability, the 2.7-pound MacBook Air 2022 is the lightest, followed by the 3-pound 13-inch MacBook Pro. But at 3.5 pounds, the 14-inch MacBook Pro is still fairly portable. Unfortunately, the new MacBook Pro is limited to silver and space gray.

MacBook Air vs MacBook Pro: Ports

If you want a lot of ports, the MacBook Air isn’t the best choice. It only offers two Thunderbolt 3 ports. The M1-powered 13-inch MacBook Pro also has only two Thunderbolt 3/USB-C ports. M2 powered machines share the same number of ports.

The new 14-inch and 16-inch MacBook Pros offer the most ports, including three Thunderbolt 4 ports, an HDMI port, and SD card slot. Plus, there’s MagSafe charging.

MacBook Air vs MacBook Pro: Display

The Retina displays in the MacBook Air and 13-inch MacBook Pro are sharp and colorful, and while they’re so close, there’s a reason to choose the Pro: Brightness.

The MacBook Air (M1) has a maximum brightness of 365.8 nits, while the M1 MacBook Pro (13-inch: 434.8 nits) is even brighter. The standard brightness of the M2 MacBook Pro is 474.6 nits, while the standard brightness of the MacBook Air 2022 is 489 nits.

In terms of color output, though, the M1 laptops are more similar. The Air (M1) earned an sRGB rating of 114.3% from our colorimeter, slightly higher than the 110.6% rating we got from the M1 13-inch Pro.

MacBook Air vs Pro: Performance

In the Handbrake video transcoding test, which converts 4K video to 1080p, the M1 MacBook Pro’s time of 7:44 beats the Air’s 9:15. The 2021 MacBook Pro beats both, with the 14-inch MacBook Pro transcoding time At 4 minutes 51 seconds, the 16-inch laptop’s transcoding time was 4 minutes and 48 seconds. The M2 MacBook Pro transcoded the video at 6:51 with impressive results. The MacBook Air 2022 was slightly behind, with a time of 7:52.

The SSD on the M1 Pro (13-inch) was impressive, with a BlackMagic Disk Speed ​​Test read rate of 2,824.9 MBps, beating the M1 Air’s 2,692 MBps and the 16-inch Pro’s 2,540 MBps. However (should be unsurprising at this point), the new MacBook Pro beat the 14-inch and 16-inch models with scores of 5,321 and 5,314, respectively. The M2-powered MacBook Pro’s score of 2,794 sits between the old and new M1 chips.

MacBook Air vs Pro: Battery Life

Battery life is another area where Apple turned to its own M1 processor for a big win. The M1 MacBook Air lasted 14 hours and 41 minutes on the battery test, while the M1 Pro (16:32) lasted longer. Left the 16-inch MacBook Pro (10:55) in the dust both times.

MacBook Air and Pro: Audio

While the MacBook Air and 13-inch MacBook Pro offer excellent stereo sound (the latter has more dynamic range), the new MacBook Pro is on another level.

That’s because the 14-inch and 16-inch MacBook Pros offer a six-speaker setup. Now you get more bass as well as lower octaves for a more powerful audio profile. Additionally, the new MacBook Pro supports Dolby Atmos in the speakers, not just the headphones.

MacBook Air vs Pro: Value and Price

The MacBook Air with the M1 remains the value leader, starting at $999, and it’s arguably a better deal than the 13-inch MacBook Pro in terms of performance. Both the new and old 13-inch Pros have better battery life, but that’s probably not enough to justify the $1,299 price.

The 14-inch MacBook Pro costs a lot more than the 13-inch, but at $1,999 you get a lot. That includes a faster M1 Pro chip, a bigger, better 14-inch mini-LED display with a 120Hz refresh rate, a more sculpted 1080p webcam, and more ports. However, you may have to take on a heavy workload to experience all these benefits.

>>>>>>>>>>>MacBook battery

iPad Pro 2022 vs MacBook Air 2022: Is a Tablet or Laptop Right for You?

 Last year, Apple announced a number of new hardware, including new additions to the iPad Pro and MacBook Air lineup. Some of the most anticipated improvements are the iPad Pro lineup, which came this year in the form of the iPad Pro M2. The MacBook Air lineup has also been upgraded with the M2 chipset, and the two devices are on par when it comes to processors.

Before we begin, it’s important to note that we haven’t been able to review the iPad Pro 2022, so we won’t make any definitive comments on its performance. However, we’ve been able to review the MacBook Air 2022, so we can make some educated guesses about which device is best for you. Let’s take a look below!

Design and Display

Starting with the iPad Pro, it comes with a 12.9-inch Liquid Retina XDR mini-LED backlit display. The resolution is 2732×2048, and Apple claims it can hit 600 points of brightness in normal use, 1,000 nits at maximum brightness, and 1,600 nits when playing HDR content. It also includes support for ProMotion, which means you’ll get a 120Hz refresh rate during intensive tasks like editing or scrolling, which drops off when it’s no longer needed to save battery.

It supports the second-generation Apple Pencil and, in terms of ports, has USB-C Thunderbolt 4 as well as a Nano-SIM tray on the cellular model. The Wi-Fi model weighs just 682 grams, while the cellular version is slightly heavier at 684 grams.

The iPad itself is available in two colors: silver and space gray. It has rounded edges and thin bezels, with few design changes compared to its predecessor, the iPad Pro (2021). There are four speakers, an integrated microphone and the usual volume switch and a top lock button.

The rear camera module is square and consists of wide-angle and ultra-wide-angle cameras, the former is 12MP at f/1,8 aperture, and the former is 10MP at f/2.4 aperture, with a field of view of 125 degrees.

The MacBook Air, meanwhile, is available in four colors: Silver, Starlight, Space Gray, and Midnight. We think it looks very similar to the MacBook Pro (2021) 14- and 16-inch models. This gives it a boxier look without the wedge-shaped design, and our review pointed out that it feels very portable thanks to its 1.24kg weight.

It comes with two Thunderbolt 3-capable USB-C ports, as well as a MagSafe 3 charging port and a 3.5mm audio jack, which is absent on the iPad Pro. The inclusion of MagSafe means you can charge your laptop without using any of the USB-C ports, but you’ll need to have a MagSafe charger handy.

According to Apple, the screen is 13.6 inches and features an LED-backlit display with a resolution of 2560×1664 and a brightness of up to 500 nits. We’re disappointed that the MacBook Air doesn’t feature ProMotion technology, sticking with a 60Hz refresh rate, which means on-screen motion may not be as smooth as the iPad Pro.

The screen has a notch since Apple thinned the top screen bezel, which we don’t really mind. We did note, however, that the notch would be more welcome if Apple decided to upgrade its 1080p front-facing webcam.

Glasses

Both the iPad Pro and MacBook Air are equipped with the M2 chipset. iPad Pro features an 8-core CPU, 10-core GPU, and 16-core Neural Engine. The MacBook Air comes in two variants, the first is the same as the iPad Pro, and the second has an 8-core CPU, 8-core GPU, and a 16-core Neural Engine.

Also, since the iPad model has the same features as the base MacBook Air, we think the iPad Pro is more than adequate for browsing and may be suitable for creative professionals who want to draw and edit on a tablet.

The iPad Pro does support USB-C Thunderbolt 4, which means it can easily connect to an external display and transfer files very quickly. The MacBook Air opts for Thunderbolt 3 technology, which still enables fast transfers.

Since we haven’t been able to review the iPad Pro, we can’t definitively claim which is more powerful, however, since they have the same processor configuration, we expect them to have similar performance. The real difference is in the interface, as the iPad runs on iPad OS 16 and is a dedicated tablet, while the MacBook Air is a laptop that runs on macOS and will support macOS Ventura.

Users who want a powerful tablet can also equip the iPad Pro with a compatible keyboard from Apple or third-party retailers and use it as a 2-in-1 device, making it more versatile than the MacBook Air.

>>>>>>>>>>>Apple battery

Acer Swift 5 vs MacBook Air M2 – The winner will shock you

 The latest Acer Swift 5 and the MacBook Air with M2 are both great laptops, but which one is the best? That’s the question we’ll try to answer here.

Each packs the latest Apple and Intel laptop-centric chipsets, making them two of the best laptops you can buy right now. So, which one should you buy? Let’s find out.

ACER SWIFT 5 VS MACBOOK AIR M2: PRICE AND VALUE

It’s definitely not surprising that Acer is offering more money than Apple. Of course, when you look at the lowest possible prices, the base MacBook Air M2 is $1,199, and the Acer Swift 5 is $1,549.

Considering the cost, the Acer Swift 5 comes with an Intel Core i7-1260P processor, 16GB LPDDR5 RAM, and a 1TB SSD. To get similar specs in the MacBook Air, you’ll need to shell out $1,899, because honestly, 256GB of storage isn’t enough in the base model.

ACER SWIFT 5 vs MACBOOK AIR M2: DESIGN

Apple moved decisively to make the Air look like a MacBook Pro. Gone are the sleek, stylish receding wedges that gave the Air a near-impossible size, replaced by a uniform thickness. Open the lid and you’ll see the full-size backlit keyboard at the top of the Starlight keyboard deck is slightly recessed. Directly below is a larger trackpad.

As for the Swift, Acer claims it has a “refined design,” although many OEMs tend to exaggerate with catchy buzzwords and enticing wording.

The Swift 5 measures 12.2 by 8.4 by 0.6 inches and weighs 2.7 pounds, while the MacBook Air is slightly smaller at 12 by 8.5 by 0.4 inches, but weighs the same, at 2.7 pounds.

ACER SWIFT 5 AND MACBOOK AIR M2: PORTS

The Acer Swift 5 wins handily with two Thunderbolt 4 ports, HDMI, two USB 3.2 Gen 1 Type-A ports, a headphone jack, and a Kensington Lock.

The M2 MacBook Air does improve slightly over its predecessor by moving charging to the dedicated MagSafe port, which leaves the two Thunderbolt 4 ports free next to the 3.5mm headphone jack.

ACER SWIFT 5 vs MACBOOK AIR M2: DISPLAY

In the Acer Swift 5 and MacBook Air, you get gorgeous, spacious screens with tiny bezels. Digging into the details will tell you exactly where Acer starts to lead slightly

The MacBook Air now has a 13.6-inch, 2560 x 1664p Liquid Retina display, compared to the previous version’s 13.3-inch. The aspect ratio is technically 3:2, but since the notch at the top forms part of the taskbar, you actually get a work area that’s closer to 16:10.

When passing our lab tests, the Air recorded a DCI-P3 color gamut of 75.9 percent and an impressive average brightness of 489 nits. In real-world use, as expected, the M2’s screen is rich in color and crisp in detail, enhanced by Apple’s proprietary TrueTone technology.

Meanwhile, the Acer Swift 5 features a 14-inch WQXGA 2560 x 1600 pixel Corning Gorilla Glass touchscreen with a 16:10 aspect ratio. The test results showed how the Acer fared in 93.3 percent of the DCI-P3 color gamut, but trailed the Air slightly at 457 nits of brightness. With numbers like these, monitors inevitably emit rich, saturated colors.

There will be people who would like the extra brightness, but in my workload the priority is always color accuracy, and the Acer gets away with it here. I can see myself working on Photoshop with ease and enjoying all kinds of vivid content, but the Swift 5 is clearly more realistic.

ACER SWIFT 5 vs MACBOOK AIR M2: PERFORMANCE

How does the laptop-centric M2 chipset stack up against similar competitors like the Intel Core i7-1260P? The answer may surprise you.

On Geekbench 5.4’s overall performance test, the Swift 5 scored a whopping 9,859, beating the average laptop average. Meanwhile, the M2 Air also performed well in our synthetic benchmarks, but fell behind in raw power, with a Geekbench score of 8,919.

The Swift 5 also leads in our HandBrake benchmark — transcoding a 4K video to 1080p in just 7 minutes 36 seconds, compared to the Air’s 7 minutes 52 seconds.

In real-world use, both systems are excellent working systems – handling multitasking with ease. But while the MacBook Air is better in the graphics department, we have to compare each system as a whole, with the Swift 5 going to be slightly faster for your productivity needs.

ACER SWIFT 5 vs MACBOOK AIR M2: BATTERY LIFE

The final round saw the M2 MacBook Air come to the fore, taking a toll on the Acer Swift 5. As you might have predicted, with Apple’s legendary laptop battery life and any system that uses its own silicon, the Air is the king of endurance.

It might be slightly shorter than the M1 MacBook Air, but at 14 hours and 6 minutes, it offers insanely long life for any commute or even a long flight. Meanwhile, the Acer Swift 5’s Laptop Mag Battery test came in pretty good at 11 hours and 24 minutes, but it clearly didn’t hold up to the Air’s prowess.

>>>>>>>>>>>>Laptop battery

MacBook Air M2 vs Surface Laptop 5: Which Laptop Is Best?

 The MacBook Air M2 and Surface Laptop 5, both come with ultra-sleek designs, a powerful power bank under the hood, and the battery life that keeps these machines for hours on the battlefield. Let’s take a look at the differences between them and who will win.

MACBOOK AIR M2 vs SURFACE LAPTOP 5: PRICE

Starting at $999/£999, the 13.5-inch Surface Laptop 5 is very similar to last year’s Surface Laptop 4.

Unlike the M1-powered MacBook Air with the $999/£999 deal sticker, the MacBook Air M2 starts at $1,199/£1,249.

MACBOOK AIR M2 AND SURFACE LAPTOP 5: DESIGN

The MacBook Air M2 and Surface Laptop 5 have a lot in common in terms of design. This year, however, Apple revamped the Air’s design to make it look more like its MacBook Pro 14 sibling.

Microsoft isn’t confusing the design of its new Surface Laptops, sticking with its famously refined all-aluminum chassis. But Apple’s redesigned MacBook Air now has more prominent bezels on the Surface. That said, the Surface Laptop 5 comes in two sizes: 13.5 inches and 15 inches. Whether you’re after something more portable or need a larger monitor, Microsoft has options for you.

The MacBook Air M2 measures 12 x 8.5 x 0.4 inches and weighs just 2.7 pounds. The 13.5-inch Surface Laptop 5 is slightly larger and heavier, measuring 12.1 x 8.8 x 0.57 inches and weighing 2.8 pounds. Of course, the 15 inches is bigger, measuring 13.4 by 9.6 by 0.58 inches and weighing 3.4 pounds.

The design shift presented by the MacBook Air M2 makes the Surface Laptop 5 look a bit dated now, as it offers a lighter, smaller laptop with a larger display.

MACBOOK AIR M2 AND SURFACE LAPTOP 5: PORTS

To be sure, ultralight laptops don’t have a ton of ports to choose from, but Microsoft’s Surface Laptop 5 has one that gives it an edge.

Both the 13.5-inch and 15-inch Surface Laptop models feature a USB-C port that supports USB4 and Thunderbolt 4, as well as a USB-A 3.1 slot, a 3.5mm headphone jack, and a Surface Connect port. Not many, but at least one USB-A port to connect a range of traditional PC peripherals.

As for the MacBook Air M2, you get two Thunderbolt 4 ports, a 3.5mm headphone jack and MagSafe charger. You get an extra Thunderbolt port, but we all need a USB-A port sometimes.

MACBOOK AIR M2 AND SURFACE LAPTOP 5: DISPLAY

The display is an essential part of any premium laptop, and the MacBook Air M2 and Surface Laptop 5 feature dazzling panels.

Either 13.5 inches or 15 inches. In the Surface Laptop 5, Microsoft brought more of the same, except with minor changes to the 15-inch model.

We’ll see the same 13.5-inch PixelSense touchscreen that supports 10-point multi-touch, but supports Dolby Vision IQ. However, the 15-inch model is slightly different, offering a 15-inch PixelSense touchscreen compared to last year’s model. They’ll still see the iconic 3:2 aspect ratio.

We haven’t tested the Surface Laptop 5, but given that it’s the same as the Surface Laptop 4, we know it’s a great panel that will stand up to anything without OLED.

The MacBook now has a 13.6-inch, 2560 x 1664 pixel Liquid Retina display. When we measured the color reproduction of the MacBook Air M2, the Air recorded 75.9 percent of the DCI-P3 color gamut. When it comes to brightness, the MacBook Air shines. It averaged 489 nits compared to the M1’s 366 nits. That beats the Surface Laptop 4’s 349 nits, so the next model will need to bump up its brightness capabilities to match it.

MACBOOK AIR M2 AND SURFACE LAPTOP 5: PERFORMANCE

This year, Microsoft installed its acclaimed 12th-generation Intel CPUs in both the 13.5-inch and 15-inch Surface Laptop 5 models.

There are two options for the 13.5-inch model, including a 12th Gen Intel Core i5-1235U processor or an i7-1255U CPU, while the 15-inch laptop comes with an i7-1255U chip. However, for commercial sales, you can expect an Intel 12th Gen i5-1245U CPU or i7-1265U processor. Microsoft claims it is 50% faster than its predecessor.

In the Handbrake test, the Air M2 transcoded 4K video to 1080p in 7 minutes and 52 seconds, beating the 10-minute average. When we ran the BlackMagic Disk Speed ​​Test, the M2 Air’s 1TB SSD had a read speed of 2,800.1 megabytes per second, while the M1 Air hit 2,692.9MBps.

MACBOOK AIR M2 AND SURFACE LAPTOP 5: BATTERY LIFE

Microsoft is likely to stand out when it comes to battery life, as it claims several hours more than the MacBook Air M2’s 14 hours, 6 minutes.

Microsoft says the Surface Laptop 5 13.5 offers up to 18 hours of battery life, while the 15-inch option offers up to 17 hours of battery life.

The Surface Laptop 5 also had to outperform the Air’s fast-charging capabilities. In our tests, using the 67W power adapter, the Air was able to get 50% charge in 30 minutes. The Surface Laptop comes with a 60W power supply, which means it might not be that fast.

>>>>>>>>>>Laptop battery

Acer’s new flagship laptop could be the best MacBook Pro alternative

 Acer has unveiled its latest flagship laptop, the Swift Edge, which competes with the LG Gram 16 in a niche category best defined as ultrabooks with large displays. As we all know, the SFA16-41 is only 13mm thick, has a 16-inch display, and weighs 1.17kg, which is about 30g lighter than its LG rivals; thanks to its magnesium alloy chassis.

It’s also one of the first mainstream laptops to feature the new AMD Ryzen PRO 6000 processor and Pluton, a new security feature implemented by Microsoft.

The Swift Edge comes with 16GB of LPDDR5 RAM (albeit on one slot) and a 1TB SSD, which is a lot more than others offer (for example, the LG Gram 16 starts with 8GB of RAM and a 256GB SSD).

Born for creativity

While the screen is spectacular, this isn’t the first time such a display has been shown on a laptop.

Before Acer, Lenovo, Gigabyte, Dell, and Asus bundled similarly sized 16:10 OLED displays in some of their laptops, users could enjoy the space the 3840 x 2400 resolution offered. Acer claims it supports 100 percent of the DCI-P3 color gamut and a peak brightness of 500 nits, which is what it calls “cinematic-quality visuals” — and for some users, it may well be the perfect laptop for Photoshop.

What makes this device stand out is the Ryzen 6800U, a powerful 8-core 16-thread processor based on AMD’s Zen 3+ technology and manufactured using a 6nm process. The end result is a frugal CPU with a TPD comparable to the Core i7-1260P (used in the LG Gram 16) but with performance comparable to more power-hungry processors like the Core i5-12500H (used in the Honor MagicBook 14) Comparable).

So far, only two models offer it: the stunning 1kg Asus Zenbook S 13 OLED and the amazingly priced Lenovo ThinkBook 13s Gen 4.

The rest of the specs include a Radeon 680M graphics card with an HDMI 2.1 port with 8K support, Wi-Fi 6e wireless networking, two USB 3.2 Gen 2 Type-C ports, two Type-A ports and an audio jack, all made up of a fairly small The 3-cell 54WHr battery, which Acer says can power the Swift Edge for up to 7.5 hours.

>>>>>>>>>>>>Acer Battery

5 Useful Mac Features You Might Not Know in 2022

 Apple’s line of Macs is full of features to help you stay productive, but some of these tools are easy to miss. In our Mac tips and tricks guide, we’ve rounded up five features you’ll find useful.

1. Start tasks on Mac and finish on iPhone

If you have both an Apple laptop and an iPhone, you can start tasks on one device and switch seamlessly to the other. For example, you might have opened a Safari page on your Mac and then decided to continue reading on the move. This is all done using a tool called Handoff.

Before you can use Handoff, you must activate it on your Mac and iPhone. Check the Apple website for details on which devices are compatible. Both devices also need to be signed into iCloud with the same Apple ID, with Bluetooth and Wi-Fi enabled.

Activate Handoff on Mac:

1. Click the Apple icon and select System Preferences

2. Select General

3. Select Allow switching between this Mac and your iCloud device

To activate Handoff on iPhone:

1. Go to settings

2. Select General > AirPlay & Handoff

3. Enable toggle

On a Mac, open Safari and navigate to which website. Then, on your iPhone, access the App Switcher by swiping up from the bottom of the screen. You should see a Safari banner – click it to open the same page you’re viewing on your Mac.

2. View two web pages at the same time

This is called split view, and you can place two web pages or even two apps side by side on the screen.

Hover over the green full screen button in the upper left corner of the window. From the drop-down menu, select Tile windows to the left of the screen or Tile windows to the right of the screen. Your window will then fill whichever side you choose. Then click the window on the other side of the screen to view it next to it.

To stop split view, click the green button again and the window will exit or swipe left or right with four fingers on the trackpad.

3. Use Do Not Disturb Mode

If you need to get things done on your Mac without distraction, Apple’s Focus Mode can help you stay on track. It works by temporarily hiding notifications that pop up in the corner of the screen.

To activate Focus, you can use the Control Center in the upper right corner of the screen. Click the Focus button to configure the tool. You can activate Do Not Disturb for an hour or until tonight.

In the same menu, you can select Focus Preferences, and you can see certain notifications—such as messages from friends or family—even when you’re in Do Not Disturb mode. You can also set tools to open automatically at specific times.

4. Change screen resolution to enlarge text

By default, your Mac automatically determines the “best” size for text and objects on the screen. However, if you wish to make the element larger, you can make some adjustments.

Click the Apple logo in the upper-left corner of the screen, then choose System Preferences. Select your monitor from here – you’ll see the computer image along with the screen resolution and brightness settings. Next to the Resolution menu, select Scale. Now you can choose to make the text bigger, or conversely, give yourself more screen real estate to use. Choose the setting that works best for you, then close the Display window to finish.

5. Interact with the text on the image

Since Live Text has been around on the Mac, you can select and interact with text embedded in images opened in Preview.

In the example above, you’ll see the phone number you can find highlighted in the picture. You can then add the phone number to your address book on your Mac, or dial the number from a connected iPhone.

Additional features of Live Text on Mac include:

1. Copy the text on the image and paste it into another document

2. Find the meaning of the text to open the dictionary

3. Translate the text into the language of your choice

4. Search the web for text

5. Share the text with others via email or text message.

>>>>>>>>>>Mac battery

Thanks for reading, hope it helps!

Friendly reminder: If you need to replace your device’s battery, this battery store is a good choice: www.batteryforpc.co.uk

How to turn an old MacBook into an emergency Wi-Fi hotspot

 The whole point of a Wi-Fi hotspot is to turn on your cellular data connection to other devices. It allows you to control when the connection is active and who can connect, but if you have any online activity, any online activity will count towards your data plan limit.

Why you should use your MacBook as a Wi-Fi hotspot

Turning your MacBook into a Wi-Fi hotspot isn’t quite the same as using your phone. Since MacBooks don’t currently offer cellular connectivity, the only way you can connect them to the internet is to already have an internet connection available. But in some cases, setting up a MacBook Wi-Fi hotspot can be useful.

This feature is handy if, for example, you’re in a location that doesn’t typically have Wi-Fi but does offer a physical Ethernet connection. Most pocket devices that can connect to the internet (i.e. smartphones) can’t just plug in an ethernet cable, and if you need to connect multiple ethernet-capable devices, a single connection won’t cut it. By plugging in your old MacBook and setting it up to share Wi-Fi, you’re essentially making it a makeshift wireless router to which your other devices can connect.

What you need to use your MacBook as a Wi-Fi hotspot

Turning a MacBook into a Wi-Fi hotspot isn’t very difficult, but it’s more than just the click of a button. Your MacBook needs to be running at least macOS 10.6 Snow Leopard, because that’s when Apple started including internet sharing options. You’ll also need to make sure your MacBook has access to an available internet connection, whether that means having the necessary ethernet connection or knowing the access password. After all, this feature won’t do you much good if you can’t get online in the first place.

Finally, you may need to take additional steps to secure your connection. If you wish to send or receive sensitive information, consider setting up a VPN to better protect your online privacy. At the very least, it is strongly recommended that you choose a more secure option when setting up a shared Internet connection.

How to Set Up a MacBook Wi-Fi Hotspot

The first step in setting up your MacBook as a Wi-Fi hotspot is to enable Internet Sharing in macOS. The process may vary slightly depending on the version of macOS you’re using, but in most cases it’s like this:

1. Open System Preferences.

2. Select Sharing > Internet Sharing.

3. Select the correct source device under “Share your connection from”.

4. Select how you want to share in the “Computer used” section.

Things get more nuanced when you decide how to share your connection. If you plan to share over Wi-Fi, when you go to step 3, you will need to select Ethernet, then Wi-Fi for step 4. Then open the Wi-Fi options to set your connection details, and select Start to start sharing your connection.

If you are using a Wi-Fi adapter, you need to configure it first, then select the Wi-Fi adapter in step 3. The rest of the process is the same as for regular Wi-Fi setup.

What about Bluetooth?

It’s possible to share a MacBook’s internet connection wirelessly via Bluetooth, but it’s not ideal, mainly because Bluetooth internet connections aren’t as fast as Wi-Fi and have more limited range. However, it will work in a pinch, so if that’s your only option, it will still get the job done. First, make sure that both your MacBook and the device you’re connecting to are available and have Bluetooth enabled.

1. Open System Preferences on your MacBook.

2. Select Sharing > Internet Sharing.

3. Select the correct source device under “Share your connection from”.

4. Select Bluetooth PAN as the sharing method.

5. Select Internet Sharing > Start to start sharing.

Keep in mind that not all MacBooks support Bluetooth PAN, especially newer models, since Wi-Fi has become so common. If your MacBook doesn’t offer a Bluetooth PAN, you’ll have to choose Wi-Fi, and if your device can’t connect to Wi-Fi, you may need to find another way to fully transfer the necessary material to your MacBook.

>>>>>>>>>>Apple battery

Thanks for reading, hope it helps!

Friendly reminder: If you need to replace the battery, this battery store will be a good choice: www.batteryforpc.co.uk

If you forget your Mac password, this method will still allow you to log back in

 We sometimes forget our passwords at some point. For online accounts, you just click a few links, enter your email address, and reset your password. But what happens when you forget your password to log into your Mac?

There are a few different methods you can use, and the way you unlock your Mac without a password may depend on whether you linked your Apple ID to a user account on your Mac during setup, or if you have one of the new M1 Max . If you didn’t link your Apple ID, that’s okay, there is another option to reset your account password. Here’s how to start regaining control of your Mac computer, let’s see!

Use your Apple ID to reset your Mac‘s password

Ideally, you’ll link your Apple ID to your user account on your Mac during initial setup, so you can reset your user password with just a few clicks.

After entering the wrong user password three times, you will be asked if you want to restart your computer to see password recovery options. After restarting, you will be asked to log in with your Apple ID, select the user account for which you want to reset the password, and enter the new user account password.

Unlock your Mac with another administrator account

If you share your Mac with a friend or family member and they forget their password, chances are you can reset the password for them. The key here is that you need access to an admin user account.

Usually, people setting up a Mac for the first time have an administrator account by default, but you can check by logging into your account and opening System Preferences > Users & Groups and looking at the list of user accounts on your Mac. Below the username will be the account type – if it says “Administrator”, you can reset the user’s password.

To do this, in the same Users and Groups screen, click the lock and enter your administrator name and password when prompted. Next, select the user whose password you need to reset, then click the button labeled “Reset Password” and follow the instructions.

recovery mode

If none of these methods work, you’ll need to boot your Mac into recovery mode to access the password reset tool.

The process of entering recovery mode will depend on the type of Mac you have. For Macs with Intel processors, press and hold the Command and R keys on the keyboard, then press the power button. Press and hold Command+R until you see a progress bar appear below the Apple logo. You can also enter Recovery Mode by restarting your Mac and trying to time the Command+R keyboard combination, but in my experience, starting with shutting down the Mac is the most reliable method.

For the recently released Macbook Air, MacBook Pro, and Mac Mini with the Apple M1 processor, you need to shut down the computer, then press and hold the power button until the options button appears. Click on it and select Restore.

Now that your Mac is in recovery mode, click Utilities in the menu bar, then click Terminal. A new window will appear, waiting for you to enter a command. Type ” resetpassword ” as a single word without the quotation marks and press Return.

Close the terminal window and there you will find the reset password tool. Follow the prompts, including logging in with your Apple ID, and selecting the user account for which you need to change your password.

If FileVault is enabled on your Mac, you can still

FileVault is an optional MacOS feature that encrypts your Mac’s hard drive and all data stored on it. It’s usually turned on during initial setup, or you can turn it on later in System Preferences.

If you have FileVault turned on, you have two additional options to reset your user password. You can wait up to a minute on the user login screen for a prompt to press the power button to restart the Mac into recovery mode. Follow the instructions to restart your computer, after which you should see the Reset Password window appear.

Another option is to use the recovery key that should be noted when FileVault is enabled. You can enter your recovery key after three failed login attempts. Be sure to use capital letters and enter hyphens – they are required.

You can prevent this from happening, you just need to be more proactive in storing your recovery key and remembering your password during setup. Here’s how to lock your Mac.

>>>>>>>>>>>>>>>Apple battery

Thanks for reading, hope it helps!

Friendly reminder: If you need to replace the battery of your device, this battery store will be a good choice: www.batteryforpc.co.uk

There’s a new way to factory reset M1 and M2 Macs

 If you’ve bought a new MacBook Air, MacBook Pro iMac, Mac Studio, or Mac Mini within the past few years, it’s almost certainly using Apple’s own processor, the Apple Silicon M1 or Apple Silicon M2, rather than an Intel chip. In your day-to-day use, you probably won’t notice any difference in operation, which is a good thing. But when it’s time to reset a new Mac, whether it’s because you sold it, handed it over, or troubleshoot it, there are completely new steps to completely wipe out M1 and M2-based models.

More specifically, the steps to access Recovery Mode (the tool you need to reset your Mac) have changed. I’ll walk you through how to get into recovery mode and use all the options, and provide some workarounds for the issues I’m having. Let’s take a look below!

How to Access MacOS Recovery on Apple Silicon Macs

Click the Apple icon and shut down your Mac. After the computer shuts down completely, press and hold the power button. When the Apple logo first appears, you’ll see text below it, letting you know to keep pressing it to access startup options. Press it until the text switches to “Loading Boot Options,” which takes about five seconds. Next, click Options > Continue. Select a user with administrator privileges and enter the account password when asked.

New recovery tool gives you some options

After logging into your user account, you will see a list of apps available in recovery.

Restore from Time Machine: Use this option if you want to restore your Mac from a previous Time Machine backup. This is helpful if you’ve lost a lot of files, changed settings, or installed an application that’s causing serious problems with your Mac.

Reinstall MacOS Monterey: If you are having trouble with MacOS, you can try to reinstall the latest version of MacOS using this option without deleting any files or losing any data.

Safari: You can use Apple’s browser to search and resolve how to fix your Mac.

Disk Utility: Tools for repairing, troubleshooting, or erasing hard drives.

In the menu bar at the top of the screen, you can also access other applications and tools, such as Terminal, Shared Disk, and Boot Security Utility.

Erase the hard drive, reinstall MacOS

To completely remove all information from the hard drive and reinstall MacOS, open Disk Utility and select the internal disk labeled Macintosh HD. Check the box if there is an option called Erase Volume Group. Otherwise, click Erase and follow the prompts. The volume name and format are reserved, but for reference, the name is usually “Macintosh HD” and the format should use AFPS.

After a few seconds, the hard drive will be completely wiped, taking away all your files, user accounts, and applications. When done, close Disk Utility and select Reinstall MacOS from the list of options. You’ll be asked to choose where to install, which should be Macintosh HD (or whatever the name of the hard drive is if you decide to change it).

Your Mac will then download the latest version of MacOS, install it, and when it’s done, it’s like it’s never been set up.

If you are unable to create a new user account

I can’t create a new user account after reinstalling MacOS: My MacBook Pro freezes when I try to create a default user account. Basically, it’s because MacOS is looking for account information in a place that doesn’t exist anymore.

If the system doesn’t freeze, try rebooting again into recovery mode, launch Terminal, type “resetpassword” in the command line, select the reset password option, then launch Recovery Assistant from the menu bar and select Erase Mac or Erase with Disk Utility Data partition, as described in the previous comment.

If it freezes, you need to try accessing it from a second device. You can connect it to another Mac and follow the process described in this StackExchange thread or follow the instructions in this Reddit comment to remove the partition from your iPhone.

>>>>>>>>>>>Apple battery

Thanks for reading, hope it helps!

Friendly reminder: If you need to replace the battery of your device, this battery store will be a good choice: www.batteryforpc.co.uk