6 common mistakes first-time Mac users make

 Getting a Mac for the first time is exciting. Out of the box, it smells great, looks great, and is a solid and powerful machine. Sadly, many first-time Mac users end up making mistakes after damaging their Mac that they regret.

In this guide, we’ll help you prevent that from happening. From overcharging your Mac’s battery to installing unnecessary antivirus software, here are seven mistakes you should avoid as a first-time Mac user. Let’s take a look below!
1. Not physically protecting the Mac

Haven’t kept their Mac completely safe from day one. Since Macs are made of aluminum, they can dent if dropped. On top of that are Apple’s expensive repairs, which usually don’t extend to cover accidental damage like this.

In order to physically protect your Mac, you must ensure that it is always in a safe environment, has a physical cover, and is cleaned regularly. If the environment is not safe, your Mac can be dropped and damaged. But the presence of a physical protective case will minimize this damage. Likewise, if not cleaned regularly, dust can deposit in the keyboard and vents, affecting the performance of your Mac.

2. Charging your MacBook too much

The battery in a MacBook won’t overcharge, but staying plugged in can still affect its overall charge capacity. In other words, if your MacBook used to last about 8 hours, it probably won’t last long if you keep it plugged in until it only lasts 7 hours.

Also, it’s not a good practice to let the battery drain completely before plugging in the adapter, as this will also damage the battery. The best thing to do is to keep your MacBook’s battery between 20% and 80%. You should also keep it cool and monitor it from System Preferences > Battery, where you can also enable optimized battery mode.

3. Shutting down too often

Macs are expensive, and it’s natural for new users to shut them down too often because they don’t want to damage their computer by turning it on. However, here are a few reasons why you should always put your Mac to sleep:

1. It doesn’t break while sleeping, as modern Macs use SSDs instead of HDDs (hard disk drives), which has raised concerns in the past.

2. Compared to sleep, it does not save more energy when turned off.

3. It syncs and backs up all the data it processes in sleep mode, which is probably the most important reason to put your Mac in sleep mode.

Generally speaking, putting your Mac to sleep just makes your life easier. You don’t have to restart applications every time you start using your Mac. Of course, that doesn’t mean you’ll never shut down your Mac. Rebooting every once in a while to refresh the RAM is fine, but don’t overdo it.

4. Installing too many third-party apps

If you’ve been using a Windows computer before and have now switched to a Mac, you may want to install third-party applications now. Apple doesn’t restrict users from installing such apps, but you shouldn’t overuse them as they’re often redundant and slow down your Mac. The idea isn’t to say that you shouldn’t install third-party apps at all, it’s just that you don’t install apps for what your Mac provides.

5. Don’t use native apps

Not only do new Mac users install most of the unnecessary third-party apps, but they also miss out on using native apps. Apple regularly releases new and improved apps with macOS updates, which can replace the need for third-party apps.

The Pages, Keynote, and Numbers applications do not require Microsoft Office applications to be installed. Annual updates give us more reasons to use Safari, FaceTime, and Apple Maps than Chrome, Zoom, and Google Maps. Two reasons to stick with Apple apps are better continuity and battery optimization.

6. Install antivirus software

Security is a big selling point for Apple. So macOS includes an app called XProtect to protect against malware, which means you don’t need to install third-party antivirus software on your Mac.

In addition to established and well-known antivirus applications, many third-party antivirus applications are a threat in their own right.

>>>>>>>>>>>>Apple battery

Thanks for reading, hope it helps!

Friendly reminder: If you need to replace the battery of your device, this battery store will be a good choice: www.batteryforpc.co.uk

This Mac feature helps you multitask with just 2 clicks

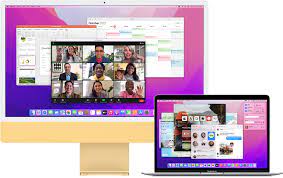
 A window doesn’t always cut it, especially if you work from home. Opening multiple windows makes it easier to switch back and forth between different tasks. Whether you need to browse data to write a report, keep a chat window open while browsing, or just watch a video while “working” a novel, sometimes you only need a few things open at once. But switching between full-screen windows can be tedious and time-consuming.

Fortunately, Macs offer a split-screen mode that allows you to stick two apps on different sides of the display. This way, you can navigate between windows without navigating with the mouse or pressing Command + Tab. Let’s take a closer look below!

How to Enter Split View on Mac

1. Make sure both windows you want to use are not in fullscreen mode.

2. In one of the windows you want to use, place the cursor on the green button in the upper left corner. Instead of clicking to maximize the window, hover over until you see the drop-down menu.

3. Select the tile on the left side of the screen or the tile on the right side of the screen. Your Mac will automatically enter split screen mode.

4. From there, other open windows will appear on the other side of the screen. Click on the desired window on the rest of the screen and it will fill the remaining half.

5. If you want to resize the window, use the slider in the center of the screen.

How to Exit Split Screen on Mac

If you’re done with the split screen layout, here’s how to get rid of it:

1. Move the cursor to the top of the screen until you see the resize buttons at the top left of each window.

2. Click the red button to close the window or the green button to exit split screen.

3. Don’t panic! Your other window is still open – it’s just hidden in fullscreen mode. To access it again, press the Mission Control button ( F3 ) on the top row of the keyboard.

4. You should see two options at the top of the screen: the desktop and any windows you have in split screen mode. Click on another window, and if you want to exit full screen mode, use the green resize button in the upper left corner.

If you’re the type of person who might need to have more than two windows open, you can always manually resize the windows to fit three or four on the screen at a time. The experience won’t be as visually clean as using tiled windows.

Why can’t my Mac split screen?

First, make sure you’re not currently in fullscreen mode. Split screen only works with normal windowed views. If that’s not the problem, go to System Preferences > Mission Control and check if the monitor has separate spaces enabled. If not, enable it.

If you don’t see this option in the Mission Control menu, make sure you’ve updated to MacOS 10.11 or later. You can check your current OS version by clicking the Apple icon in the upper left menu and selecting About this Mac. If you are using an earlier version, you must update by clicking the “Software Update” button on this screen.

Keep in mind that not all apps support split screen. If you’ve tried everything else and the app still doesn’t tile in split-screen mode, the app probably doesn’t offer split-screen mode.

How to split screen on Mac without full screen?

The official split screen feature on Mac automatically splits two windows in full screen. If you don’t want a full screen view, you can manually drag the window to fit the required space. This option gives you more customization than Split View.

>>>>>>>>>>>>Apple battery

How to Fix Apple Notes Not Syncing Through iCloud

 Apple Notes is a free note-taking solution with some very powerful features, but sometimes you may find that your notes refuse to sync between iPhone, iPad, and Mac. The problem might be with how you organize your notes, or it might be a bigger problem that’s left you scratching your head. Let’s take a look below!

First: Make sure iCloud Notes is enabled

To display notes on other devices, they need to be synced via iCloud. To do this, you’ll need to make sure Notes are enabled in your iCloud settings, and check that you’re putting your notes into your iCloud account instead of storing them locally on your iPhone, iPad, or Mac.

To check if you have iCloud sync enabled for the Notes app on your iPhone, open Settings on your iPhone or iPad and tap your name at the top of the list. Select “iCloud” and scroll down until you see Notes. Make sure the toggle next to the app is enabled.

You can do this on your Mac under System Preferences (or System Settings) > Apple ID. Select iCloud from the sidebar and make sure there is a checkbox next to the Notes app. You need to do this on all devices where you want to display your notes.

It’s also worth checking to see if you have enough iCloud storage for Notes to sync. Your device may warn you about running out of space, but you can check manually by looking at the colored iCloud storage bar in this menu on either device. If you’re running out of storage space, you’ll need to buy more.

Next: Check if you added notes in iCloud

After enabling Notes in iCloud, launch the Notes app and view the top folder screen or sidebar. You should see a section titled “iCloud,” but you may also see another section titled “On My iPhone” or “On My Mac.”

If your notes are stored on your iPhone, iPad, or Mac, they won’t sync across devices. You need to move them to iCloud for it to work. To do this on an iPhone or iPad, tap a folder, then use the ellipsis “…” context menu button in the corner of the screen to “move” Move Notes to your iCloud account. On a Mac, you can simply drag and drop folders to the iCloud section.

You can do this the same way with notes by opening them and moving them around using the context menu, or dragging them on your Mac.

To ensure that new notes go directly to iCloud by default, check that the Default Account option in the note settings is set to iCloud. Access it under Settings > Notes on an iPhone or iPad or on a Mac by launching the Notes app, then clicking Notes > Preferences in the menu bar at the top of the screen.

You may have to wait a while for your notes to sync, especially if you have a lot of images or large attachments in your notes.

Update your device to the latest version

Sometimes, the iCloud service doesn’t work properly, and one of the reasons might be outdated software.

For best results, make sure your device is running the latest versions of iOS, iPadOS, and macOS before making any changes. You can do this under Settings > General > Software Update on an iPhone or iPad, or under System Preferences (or System Settings) > Software Update on a Mac this action.

Test your connection and disable any VPN

Problems syncing with iCloud can be explained by connectivity issues. If you are using a VPN, consider turning it off to see if this helps with your upload or download issues. You can do this using your VPN provider’s app or any third-party app you’re using.

After disabling the VPN, test the problem again by uploading or creating a new note. You can also try restarting network hardware like your router or modem and see if that helps.

kill the app and restart the device

You can kill the Notes app on your iPhone by opening the app switcher and flicking over the Notes app. On Mac, right-click the Notes icon and choose Quit or hold down the Option key to force quit the application when it becomes unresponsive.

At this stage, it’s also worth considering whether iOS, iPadOS, or macOS is the culprit. A simple reboot of each affected device will rule out issues caused by system processes not functioning properly.

>>>>>>>>>>>Apple battery

Thanks for reading, hope it helps!

Friendly reminder: If you need to replace the battery of your device, this battery store will be a good choice: www.batteryforpc.co.uk
Warning signs of a possible problem with your Mac and how to fix them

 Does it bother you when your Mac crashes? If your Mac is experiencing these conditions, such as: freezes and app crashes, your Mac won’t boot, unstable fans, strange LED behavior, and power issues, it’s a reminder that your hemp cart may be crashing in the near future or errors, etc. How should these situations be resolved? Let’s take a look below!

Freezes and app crashes

Do you often see the spinning pinwheels of death? Is the application unresponsive, slow, or completely crashing? Did your Mac suddenly freeze for no apparent reason?

Many things can cause these problems, but some are more common than others. Running out of disk space can often cause performance issues, especially when you wake your Mac from sleep mode. Memory and storage issues, or simply a machine biting more than it can chew, could also be to blame.

If you encounter these issues, try the following possible fixes:

1. Create more disk space.

You might just need to give macOS some breathing room. Try to keep about 10 GB of free space on the drive for macOS housekeeping. You can delete and move files to free up more space on your Mac.

2. Run memtest86 to check your Mac‘s memory for problems.

You can also hold down the D key while your Mac starts up to run Apple Diagnostics and scan for other hardware problems.

3. Run Disk Utility.

If your machine has a hard drive, launch Disk Utility, select the drive, and click Verify Disk. If you see any errors, click Repair Disk. This isolates bad sectors, so macOS knows not to store data in these parts of the drive (a common cause of freezes).

4. Reinstall macOS.

 This will eliminate any software related issues and free up a lot of space. Then your Mac should run as fast as it can manage.

5. Remove resource-intensive applications.

If you suspect that these problems are caused by aging hardware, ditch apps like Chrome and opt for lighter options like Safari. Try SimpleNote and GIMP instead of Evernote and Photoshop.

Your Mac won’t start

Many of us panic when our computer fails to boot properly. You may see a solid black or gray screen, a black screen with question marks, or an error message about a problem with your machine. As with system crashes, there are a number of reasons why a Mac can have DOA. This could be a problem with cables, SMC, software updates, or a botched OS upgrade.

If your Mac won’t start up properly, try the following possible fixes:

1. Check the cables.

Make sure everything is plugged in and the wall outlet is turned on (if applicable). It’s always worth checking first.

2. Boot into safe mode.

To do this, hold down the Shift key while your Mac starts up. Safe Mode will verify your disk and then boot your machine with the bare minimum required to run. Then you can try to restart normally.

3. Reinstall macOS.

When all else fails, you can boot into recovery mode and reinstall the operating system from scratch.

Unstable fans, strange LED behavior, and power issues

The System Management Controller (SMC) is responsible for low-level operations that do not necessarily depend on the main operating system. These operations happen even before the operating system starts, and on Intel-based Macs, the SMC chip controls them.

If there is a problem with the SMC, you may experience a constantly running fan, a misbehaving battery and indicator LEDs, or a keyboard backlight that doesn’t respond to controls. You may also experience power issues such as sudden shutdowns and refusal to power on.

Even under low CPU load, the SMC can cause issues such as battery charging, undetected external peripherals, and poor performance. Most of these problems are just annoying, but some can seriously affect the way you use your machine.

Fortunately, the solution to this problem is relatively simple; just follow the instructions to reset your Mac’s SMC.

>>>>>>>>>>>>>>>Mac battery

Thanks for reading, hope it helps!

Friendly reminder: If you need to replace your phone battery, this battery store will be a good choice: www.batteryforpc.co.uk

Causes and solutions for Mac’s frequent restarts and battery drop

 Sudden and frequent Mac restarts, especially those accompanied by on-screen warnings, are known as kernel panics. This is the Microsoft equivalent of the Blue Screen of Death, and you’ll often see the “Your computer restarted because something went wrong” error when your machine restarts.

Many things can cause a kernel panic. It may indicate a hardware problem, such as RAM or CPU. Unreliable peripherals you connect to your Mac could also cause a kernel panic, or it could just be a case of running out of disk space. Kernel panics happen occasionally, but if you don’t encounter them often, you shouldn’t worry too much about it.

If your Mac experiences frequent kernel crashes, try the following possible fixes:

1. Remove any peripherals that may be causing the problem.

For example, if the panic only happens when your webcam is plugged in, run your machine without it for a week and see how it goes.

2. Check if you have enough free space.

 If you need more space, you can delete files to create more

3. Run memtest86 to test your Mac’s memory.

You need to create a bootable USB flash drive and test your computer’s memory outside of the macOS environment. If you notice any problems with the RAM, you can try to replace it if possible.

4. Run the Apple Diagnostics.

To do this, hold down the D key while starting up your Mac and see if any hardware issues are detected.

5. Boot into Safe Mode.

 Hold down the Shift key as the system starts to boot into Safe Mode. See if the problem still exists. Safe Mode excludes any third-party kernel extensions that might cause problems. It will also scan your volume for errors and fix anything it finds.

6. Reinstall macOS from scratch.

This is the nuclear option, but it may clear any software that is causing the problem.

battery life drops

Batteries don’t last forever. They all show signs of aging over time. Power issues can also indicate a problem with the System Management Controller (SMC). This chip in Intel-based Macs is responsible for low-level operations, including charging LED behavior and fan control.

If you notice battery issues, try the following possible fixes:

1. Check the health of the battery.

The most common cause of poor battery life is poor battery condition. Fortunately, macOS can tell you exactly the condition of your battery, how many charge and discharge cycles it has gone through, and whether it needs to be replaced.

2. Reset the System Management Controller (SMC).

If the battery is in good condition, resetting the SMC may resolve some power-related issues, such as a Mac that won’t charge.

3. Extend the battery power of your Mac.

 This is a good idea if you frequently use your Mac for extended periods of time without mains power.

4. Adjust your habits when using battery power.

Launch Activity Monitor and click the Energy tab to see which apps are using your battery. Perform tasks like video and photo editing only when your Mac is plugged in. Use Safari to browse the web – it’s more efficient than Chrome or Firefox.

>>>>>>>>>>>>Mac battery

Thanks for reading, hope it helps!

Friendly reminder: If you need to replace the battery of your device, this battery store will be a good choice: www.batteryforpc.co.uk
Apple: Preview new iPhone and Mac accessibility features that could seriously change lives

 Apple has revealed a slew of new innovations for its hardware with a strong push for accessibility, features that will be implemented via software updates later in 2022.

New software features developed using machine learning include door detection for users who are blind or low-vision, and a real-time captioning system for those who are deaf or hearing impaired, and Apple Watch Mirroring for those with physical and visual impairments, movement disorders, and smartwatch control via iPhone Ability.

Let’s take a deeper look at these features, starting with door detection, which, as the name suggests, allows iPhone and iPad users to locate doors when they arrive at a new place.

The feature uses lidar, so requires a device with a lidar scanner (iPhone 12 and iPhone 13 – Pro and Pro Max – phones, and various iPad Pro models), built into the Magnifier app. It can determine whether a door is open or closed, if the latter, how it opened, and the user’s distance from the door, plus it can read any signs or characters on the door.

The magnifying glass will gain a new detection mode that will play the role of door detection and will also provide features like person detection and image description.

People who are deaf or hard of hearing can access Live Captions on iPhone, iPad, and Mac computers, allowing captions to be generated on-device for everything from video chats to watching streaming content. In FaceTime, captions are automatically attributed to the person in the call, while on Mac users have the option to type in a reply and have them read it aloud in real time.

Note on device support that only supports Macs with an Apple chip, or you need an iPhone 11 or later, or for an iPad, models with an A12 Bionic chip. Initially, Live Captions will debut in beta form (and thus still in testing — Apple observes that the accuracy of captions “may vary”) only in English.

The last major accessibility revelation Apple made here was the introduction of Apple Watch Mirroring, which allows people to use their iPhone to control their watch. In other words, users can benefit from smartphone accessibility features such as voice control and switch controls when interacting with the Apple Watch, voice commands to turn on the watch, head tracking, and more.

The new Quick Actions for Apple Watch also allow users to control with simple gestures, such as answering (or ending) a call with a double-pinch gesture.

Note that you need an Apple Watch Series 6 or newer to benefit from the mirroring feature.

>>>>>>>>>>>Apple battery

How to Take a Screenshot on Mac: 4 Ways to Take a Screenshot

 Knowing how to take a screenshot is an essential skill if you want to capture what’s currently on your Mac, whether it’s an event ticket, an email you just received, or just a snapshot of your desktop.

If you own a Mac of any kind, there are three ways you can take a screenshot using keyboard shortcuts—and a fourth if you own a MacBook with the Touch Bar. Below we’ll show you the various keyboard shortcuts you need to take screenshots on your Mac. Let’s take a look together!

Command-Shift-3

This keyboard shortcut captures a screenshot of the entire screen.

Shift-Command-4

Use this keyboard combination to turn the cursor into a crosshair that you can drag to select a portion of the screen to capture. Release the mouse button or trackpad to shoot.

After pressing Shift-Command-4, you have many other options:

Press and release the space bar: The crosshair turns into a small camera icon that you can move over any open window. Click on the desired window to take a screenshot of it. The screenshot captured by this method has a white border around the window with a little shadow.

Press and hold the spacebar (after dragging to highlight an area but before releasing the mouse button or trackpad): This locks the shape and size of the selection, but lets you reposition it on the screen. This is handy if your initial selection is off by a few pixels; just hold down the spacebar to reposition it, then release the mouse button to take a screenshot.

Hold down the Shift key (after dragging to highlight the area but before releasing the mouse button or trackpad): This locks each side of the selection area made with the crosshairs, saving the bottom edge and letting you go up or down Move the mouse down to the bottom edge of the position.

Without releasing the mouse button, release the Shift key and press it again to reposition the right edge of the selection. You can toggle between moving the bottom edge and the right edge by holding down the mouse button or touchpad and pressing the Shift key.

Shift-Command-5

Introduced in MacOS Mojave (2018), this combination invokes a small panel with screen capture options at the bottom of your monitor. There are three screenshot buttons that allow you to capture the entire screen, a window, or your screen selection.

Likewise, two video recording buttons allow you to record the entire screen or part of it. On the left is the X button, which closes the screenshot panel, but you can also just press Escape to exit.

On the right is an option button. It allows you to choose where to save your screenshots – Desktop, Documents, Clipboard, Mail, Messages, Preview or other, and set a 5 or 10 second delay so you can line up items that might disappear while you’re using the screenshot tool .

By default, the “Show Floating Thumbnails” option is enabled, which places a small preview thumbnail of the screenshot just captured in the bottom right corner of the screen, similar to the iOS screenshot process. Unlike your iPhone, you can turn off this preview thumbnail on your Mac. Finally, you can choose to display the mouse pointer in the screenshot or video.

If the screenshot panel is blocking your view, you can grab its left edge and drag it to a new location on the screen.

Touch Bar MacBook Bonus: Command-Shift-6

If you have a 16-inch MacBook Pro or other model with a Touch Bar, did you know you can take a screenshot of what’s currently displayed on the Touch Bar? Just press Command-Shift-6 to take a very wide and narrow screenshot of your Touch Bar.

Annotate with ease

If you accept floating thumbnails, then you’ll have quick access to markup tools to annotate your screenshots. You can slide the floating thumbnail away, or let it slide away on its own, and it will save to where you last saved your screenshot. Click on the floating thumbnail and it will open in the Marker View preview window with all the markup tools you get in the preview.

You can right-click a floating thumbnail to do the following:

Save screenshots to desktop, documents folder or clipboard

Open it in Mail, Messages, Preview or Photos

Show in Finder

delete

Open in the above marker preview window

close (and save)

Longtime Mac screenshotters may be slow to adopt the new Command-Shift-5 shortcut, but I find myself using it more to annotate screenshots without having to open Preview and quickly delete I know right away I screwed up screenshot.

>>>>>>>>>>>Apple battery

Thanks for reading, hope it helps!

Friendly reminder: If you need to replace the battery, this battery store will be a good choice: www.batteryforpc.co.uk

8 MacOS Settings You Need to Change Right Now

 If you’ve ever used a Mac, you’ve probably realized that Apple puts a lot of emphasis on making its computers easy to use, intuitive, and secure. Many of your Mac’s default settings help make using your device as easy and convenient as possible, but you also have many options to adjust settings and customize your experience beyond the defaults. If you want to enhance privacy and productivity on your Mac, you can change some MacOS settings. Here’s how to change them and why they’re important.

Here are eight MacOS settings you can change if you want to improve productivity and privacy. Let’s have a look!

Automatic software updates

Keeping your MacOS up to date is one of the easiest and most effective ways to stay safe and improve your online privacy. It’s important to keep your operating system up to date, as updates will patch known security holes and protect you from people who might exploit vulnerabilities on your Mac.

To enable automatic updates, click the Apple icon > About This Mac > Software Update > Automatically keep my Mac up to date. From the Advanced menu, you can also set your Mac to automatically download and install MacOS and app updates from the App Store.

hot corner

Hot Corners are customizable shortcuts that make it easier to navigate and activate certain features on your Mac. Once set up, accessing Hot Corners is as simple as moving the cursor to one of the four corners of the screen.

To activate hot corners, click the Apple icon > System Preferences > Desktop & Screen Saver > Hot Corners. You can then choose your preferences for what to do with each corner of the screen.

Adjust battery settings

 Mac‘s optimized battery charging features help you get the most out of your device’s lifespan. This feature learns your daily charging habits and pauses when it’s more than 80% charged until you need a battery-powered Mac.

To enable this setting, click the Apple icon > System Preferences > Battery > Optimize battery charging.

Require password immediately after sleep or screen saver

Make sure your Mac is locked when you leave, and you need to enter your password to get back in after it goes to sleep or activates a screen saver. If you don’t enable this setting, anyone with physical access to your Mac can also access files on the device, any apps or services you’re signed into, and other information.

To enable this setting, click the Apple icon > System Preferences > Security & Privacy > General. Then check the box next to Require password after sleep or screen saver starts and set it to Immediately.

Encrypt your disk with FileVault

Make sure your disk is encrypted so you can protect your files and sensitive information from loss or theft of your Mac.

To enable FileVault, click the Apple icon > System Preferences > Security & Privacy > FileVault. Click the lock icon, enter your password, and click Open FileVault.

Enable night shift

Night Shift protects your eyes by shifting the display’s colors to the warmer end of the spectrum. You can set Night Shift to activate automatically from sunset to sunrise, on a custom schedule, or manually at any time.

To enable Night Shift, click the Apple icon > System Preferences > Displays > Night Shift.

Do not disturb automatically

Use Do Not Disturb mode to eliminate daily distractions, or to make sure you’re not disturbed after get off work.

To automate Do Not Disturb on your Mac, click the Apple icon > System Preferences > Notifications > Do Not Disturb. From this window, you can set the feature to automatically turn on at a certain time of day, when mirroring to a TV or when the screen is locked, or when the display is asleep.

Change default web browser

Your Mac comes with Apple‘s Safari browser preinstalled. However, if Safari isn’t your browser of choice, you can easily change your default browser to Chrome or a more privacy-focused browser.

To change the default browser, click the Apple icon > System Preferences > General. Then set your preferred browser from the drop-down menu next to Default web browser. Just make sure you’ve downloaded the browser of your choice so it will show up in the dropdown when you make changes.

>>>>>>>>>>>>Apple battery

4 Easy Steps to Factory Reset Your MacBook

 Are you looking to upgrade to a MacBook Pro 14 or 16, or you’re entering desktop territory by pre-ordering the newly released Mac Studio. You can even keep an eye out for the rumored M2 MacBook Pro that may arrive later this year. But before you buy a new MacBook, you can get some money by selling your old Mac to help cover the cost of your new Mac. However, you will need to migrate your data to the new Mac and wipe the old Mac clean first.

Whether you give your Mac to a friend or family member, recycle it, or donate it to an organization, you need to wipe your personal information and files before separating from it.

Here’s how to remove all traces of your data and restore your old Mac to its default factory settings, let’s take a look!

1. Sign out of your account

First, you need to log out of all accounts. Now you have to quit three apps individually – Music, TV and Books. Open any of these applications and go to Account > Authorizations > Deauthorize This Computer. You will need to enter your Apple ID and password, then click the Deauthorize button.

Next, you need to turn off Find My Mac and sign out of iCloud. Go to System Preferences > Apple ID, click iCloud in the left panel, and uncheck Find My Mac. Next, click on Overview in the left panel, then click the Exit button.

Finally, you need to exit Messages. Open the Messages app, go to Messages > Preferences, click the iMessage tab, and then click Sign Out.

2. Bluetooth unpairing

If you’re giving your old Mac to your kids or someone else in the house, it’s a good idea to unpair any of its Bluetooth devices so your mouse or keyboard can control the new Mac without interfering with the old one. Go to System Preferences > Bluetooth, hover over the device you want to unpair, click the X button to the right of its name, then click Remove.

3. Reset NVRAM

NVRAM is the memory your Mac uses to save the settings it needs before loading MacOS: things like screen resolution, time zone, volume, and startup disk selection. Sometimes these files can get corrupted, so give your Mac’s next owner a fresh start by resetting the NVRAM. To do this, turn off your Mac, then turn it on and immediately hold down four keys simultaneously: Option, Command, P, and R. You can release the keys after about 20 seconds. That’s it! Your Mac’s NVRAM has been reset.

4. Factory reset

You will need to put your MacBook into recovery mode to erase all data and reinstall MacOS. To enter Recovery Mode on an Intel-based Mac, restart it and immediately hold Command-R. Once you see the Apple logo, you can release the keys.

Next, you will see the MacOS Utilities window. Select Disk Utility, click Continue and select your startup disk – unless you renamed it, it will most likely be labeled Macintosh HD or something like that. Next, click the Erase button at the top of the Disk Utility window and fill in the following two fields:

Name: Choose a name for the fresh new volume.

Format: Select APFS.

If you’re trying to sell an older Mac with a mechanical hard drive instead of a solid-state drive, choose Mac OS Extended (Journaled) for formatting.

Next, click Erase Volume Group and when Disk Utility finishes, exit Disk Utility. You should return to the MacOS Utilities window. (If not, restart your Mac again, holding down Command-R as it restarts.) From the MacOS Utilities window, select Reinstall MacOS and follow the instructions to install the operating system. After you reinstall MacOS, the Setup Assistant will greet you, and you can log out and shut down your Mac. That’s it!

>>>>>>>>>>>>>Apple battery

Thanks for reading, hope it helps!

Friendly reminder: If you need to replace the battery of your device, this battery store will be a good choice: www.batteryforpc.co.uk
MacOS Monterey: Download Apple’s latest Mac update in 3 easy steps

 Whether you own a MacBook Pro, MacBook Air, or another Apple computer, we’ll show you how to get all the new features of MacOS Monterey.

MacOS Monterey launched last year with an update to Apple’s MacBook lineup, but if you haven’t updated your Mac yet, don’t worry. Installing the latest version of Apple’s Mac operating system is a fairly straightforward process that only takes a few steps. When sorting out your device for the new year, you might want to consider updating your iPhone or iPad to iOS 15.2, the latest version of Apple’s mobile operating system.

Monterey OS, also known as MacOS 12, adds some of the new features in iOS 15, such as spatial audio in FaceTime and Apple’s Focus feature, although we’re still waiting on Universal Control.

How to download and install MacOS Monterey?

1. Make sure your Mac is compatible with MacOS Monterey.

2. Backup your Mac for safety. You don’t want to risk losing everything when you upgrade.

3. On your Mac, go to System Preferences > Software Update and find MacOS Big Monterey. Click Upgrade Now. The download will begin immediately, but may take a while.

After downloading and installing the update and restarting your computer, you will be running on MacOS Monterey.

How do I download and install future MacOS public betas?

You no longer need to follow these steps to run MacOS Monterey. However, if you prefer to experience it for yourself, here’s how to get future MacOS public betas on your computer.

Note: You should never download beta builds on your main device as they are often buggy – we recommend that you only do this if a separate test device is available.

1. Backup your Mac for safety.

2. On a Mac, go to beta.apple.com.

3. Sign in with your Apple ID and select MacOS from the list of programs.

4. In the Getting Started section, click Register Your Mac.

5. On the next page, click the blue button with the beta version you’re looking for.

6. Open the downloaded file and follow the prompts.

7. After installing the utility, use the Update tool in System Preferences to check for software updates, then follow the prompts to download and install it.

After restarting your computer, you will be running the latest beta version.

>>>>>>>>>>>>>>>>Apple battery

Thanks for reading, hope it helps!

Friendly reminder: If you need to replace your device battery, this battery store will be a good choice: www.batteryforpc.co.uk