The fastest way to force restart your Mac if it freezes

 If your MacBook, MacBook Air, or MacBook Pro freezes completely and you don’t know what to do next, you might consider force restarting your Apple laptop. Often used as a last resort, a force restart is probably the fastest (and only) option to get your Mac up and running again. Let’s take a look below!
How to quickly force restart your Mac

Before taking this extreme, try restarting your Mac the classic way: click the Apple symbol in the upper-left corner of the screen and select Restart. If necessary, you can also force shut down your Mac by holding down the power button until your Mac shuts down.

If these methods don’t work for you, or your screen and cursor are stuck and you can’t select anything, try the force restart options below.

1. Press and hold the Command and Control keys with the power button.

The power button is also a Touch ID‌ / eject button, depending on the Mac model.

2. Your Mac screen should dim and your Mac should restart.

3. Log in to your computer and continue using it normally.

Note: On the 2018 MacBook Air and the new 14-inch and 16-inch MacBook Pros, the power button doubles as the Touch ID button in the upper right corner of the keyboard. On any MacBook Pro with a Touch Bar, it’s the “Touch ID” surface to the right of the Touch Bar.

What happens when you force restart?

Force restart is a quick solution to get your computer back to normal. Before you force restart your MacBook, rest assured that this process won’t wipe your computer’s data. It just restarts your device. However, when you force restart, you may lose unsaved changes in open documents, as your Mac will shut down completely. The screen will go black and when the machine restarts you will have to log back into your account.

How to Force Quit Apps on Mac

If an application you’re using freezes and your Mac is otherwise fine, try force-quitting the application instead of your laptop. You can hold down the Option (⌥) key, then right-click the problematic application icon in the Dock and select Force Quit. Or you can press all three keys at the same time: Option, Command, and Escape. The Force Quit window will open. Select the app you want to quit, then click Force Quit. You can also access the Force Quit panel from the Apple menu in the corner of the screen.

>>>>>>>>>>>Mac battery

Hope it helps you!

Friendly reminder: If you need to replace the battery of your device, this battery store will be a good choice: www.batteryforpc.co.uk


Split Screen on Mac: The Easiest Way to Multitask

 Sometimes you need multiple windows. But switching between multiple fullscreen windows is not very efficient. Instead, it’s easier to split the screen so you can have two windows open at the same time. Split-screen mode is great when you need to view report data, keep chat windows open while doing other things, or just play video on one side of the screen when multitasking.

Fortunately, Macs offer a split-screen mode that allows you to stick two apps on different sides of the display. This way, you can navigate between windows without navigating with the mouse or pressing Command + Tab. Let’s take a look below!

How to Enter Split View on Mac

1. Make sure both windows you want to use are not in fullscreen mode.

2. In one of the windows you want to use, place the cursor on the green button in the upper left corner. Instead of clicking to maximize the window, hover over until you see the drop-down menu.

3. Select the tile on the left side of the screen or the tile on the right side of the screen. Your Mac will automatically enter split screen mode.

4. From there, other open windows will appear on the other side of the screen. Click on the desired window on the rest of the screen and it will fill the remaining half.

5. If you want to resize the window, use the slider in the center of the screen.

In split view, you will be able to view two windows at the same time. Multitask away!

How to Exit Split Screen on Mac

If you’re done with the split screen layout, here’s how to get rid of it:

1. Move the cursor to the top of the screen until you see the resize buttons at the top left of each window.

2. Click the red button to close the window or the green button to exit split screen.

3. Don’t panic! Your other window is still open, it’s just hidden in fullscreen mode. To access it again, press the Mission Control button ( F3 ) on the top row of the keyboard.

4. You should see two options at the top of the screen: the desktop and any windows you have in split screen mode. Click on another window, and if you want to exit full screen mode, use the green resize button in the upper left corner.

If you’re the type of person who might need to have more than two windows open, you can always manually resize the windows to fit three or four on the screen at a time. The experience won’t be as visually clean as using tiled windows.

What are the shortcut keys for split screen on Mac?

There are many handy Mac keyboard shortcuts, including one for split screen. First use control + command + F to enter full screen mode. From there you can press F3 to pull up Mission Control and drag another app onto your currently full screen app. Click to go back to the newly tiled app and you’ll be in split view.

If the steps are still too many, you can create your own keyboard shortcuts. Go to System Preferences > Keyboard > Shortcuts > Application Shortcuts. You can click the + button to add a command called “Tile window to left side of screen” with the desired shortcut. After activating the shortcut, your active window will be tiled on the left side of the screen, and you can simply select a second window to add to the split screen.

Why can’t my Mac split screen?

First, make sure you’re not currently in fullscreen mode. Split screen only works with normal windowed views. If that’s not the problem, go to System Preferences > Mission Control and check if the monitor has separate spaces enabled. If not, enable it.

If you don’t see this option in the Mission Control menu, make sure you’ve updated to MacOS 10.11 or later. You can check your current OS version by clicking the Apple icon in the upper left menu and selecting About this Mac. If you are using an earlier version, you must update by clicking the “Software Update” button on this screen.

Keep in mind that not all apps support split screen. If you’ve tried everything else and the app still doesn’t tile in split-screen mode, the app probably doesn’t offer split-screen mode.

How to split screen on Mac without full screen?

The official split screen feature on the Mac (called “Split View”) automatically splits two windows in full screen. If you don’t want a full screen view (perhaps because you want to be able to quickly navigate between browser tabs), you can manually drag the window to fit the required space. This option gives you more customization than Split View.

>>>>>>>>>>>>>Mac battery

Use your iPad as a second monitor for your Mac. Here is how to set it up

 No matter how big your computer display is, sometimes a single screen isn’t enough. That’s why so many people need a second monitor, as another screen helps with gaming, streaming, multitasking, communication, organization, and overall efficiency. Having dual monitors is important for productivity — but that doesn’t necessarily mean you need to spend more to get it.

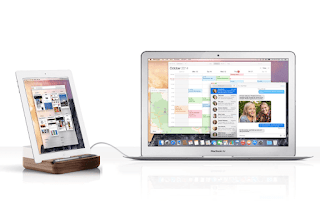
As long as you have a compatible Mac and iPad, you can quickly and easily connect two Apple devices and use your iPad as an additional display for your Mac computer. Using Sidecar built into supported devices, you can extend your MacOS desktop or mirror it to an iPad with touchscreen controls, seamlessly using both devices at the same time. Here’s what you need to know.

Requirements for using an iPad as a second monitor

As mentioned above, both of your devices need to support Sidecar, a feature that lets you use your iPad as a second display for your Mac. For your Mac, you must be running MacOS Catalina or later, and it must be one of the following models:

MacBook Pro (2016 or later), MacBook (2016 or later), MacBook Air (2018 or later), Mac (2017 or later and Retina 5K, 27-inch, Late 2015) , Mac Pro, Mac Mini (2018 or later), Mac Pro (2019 or later)

For your iPad, it must be running iPadOS 13 or later and be one of the following models: iPad Pro, iPad (6th generation or later), iPad Mini (5th generation or later), iPad Air ( 3rd generation or newer models) it is best to update your device to the latest software available to avoid any issues. Additionally, both devices must be signed into the same Apple ID account using two-factor authentication.

If you plan to use wireless, the two devices must be within 30 feet of each other. You can also connect two devices using USB, which has the advantage of charging the iPad while it’s being used as a second monitor.

Share your entire Mac desktop to iPad

Sharing your computer desktop to your tablet may vary depending on the software update on your computer. If you’re running MacOS Big Sur or later, click the Display icon in the upper-right menu bar. In the menu that appears, select your iPad.

If you’re using MacOS Catalina, you’ll instead click the AirPlay icon in the menu bar and select your iPad. If for some reason you don’t see the AirPlay icon, click the Apple menu in the upper right corner, then go to System Preferences > Displays, and check the Display Mirroring option in the menu bar.

Once your Mac and iPad are connected, you can choose from several options in the Display/AirPlay menu:

Mirror built-in Retina display: Mirror your exact desktop to your iPad. This will make your computer desktop look more like your iPad.

Use as a separate display: Use your iPad as an extension of your desktop. To use the iPad display, drag any window or file from your Mac computer to the right side of the screen, which takes you to the tablet. To get back to your computer, just drag the cursor back to where you were.

Share only one Mac window with the iPad

Or, you can quickly share a window instead of dragging it onto your iPad. To do this, just hover your mouse cursor over the green fullscreen button in the upper left corner of most windows. After hovering for a second, you should see an option that says “Move to iPad” and it will share the window to your tablet. You can share multiple windows to your iPad in succession.

Use sidebar controls, gestures, and the Touch Bar on iPad

After you share your screen to your iPad, a set of controls will appear on the left side of your iPad, these are the sidebar controls you’d typically see on a Mac. This includes, from top to bottom:

Menu Bar: Show or hide the menu bar when full screen

Dock : Show or hide the Dock

Command: Double-click the lock key

Option: Double tap lock key

Control: Double tap to lock key

Shift : double-click the lock key

Undo: Undo the last action

Keyboard: Show or hide the keyboard

Disconnect: Disconnect iPad from Mac

In addition to these Mac controls, you can also use some swipe gestures to control certain things on the second monitor. This includes two-finger swipe to scroll, three-finger pinch to copy, three-finger swipe left to undo, and more.

Finally, if the app on your iPad is compatible, you can also use the Touch Bar. You can also get rid of the Sidebar or Touch Bar controls if you don’t want to use them. On a Mac, click the Display icon in the menu bar, and under the connected iPad, you should see the Hide SideBar and Hide Touch Bar. Click one or both of the options to hide the controls in the iPad.

Use iPad when connected to Mac

Even if you’re using your iPad as a second display, you can still swipe up to exit the Sidecar app and use your iPad as usual. In your dock, you’ll see a blue icon with two monitors – this is the Sidecar. To return to using the iPad as a second display, tap the Sidecar app icon in the Dock.

>>>>>>>>>iPad battery

How to connect AirPods to iPhone, iPad, Mac, PC, and more

 Many people around the world love AirPods for their light weight, ease of use, amazing noise cancellation and sound quality.

So, we’ll show you how to automatically connect to your iPhone, iPad, or Mac device. Whether you have an iPhone SE or iPhone 14 Pro or an iPad Air or iPad Pro, you can connect your AirPods to them. We’ll also see how to manually connect them with an Android device via Bluetooth settings. Let’s take a look below!

How to connect AirPods to iPhone

The first and main thing to look out for when trying to connect your AirPods to your iPhone is to make sure your iPhone is updated to the latest version of iOS. Plus, the AirPods automatically connect with the iPhone, so the process is simple.

Just follow the step-by-step guide below to prompt this connection:

1. Unlock your device and leave it on your iPhone’s home screen.

2. Hold your iPhone close to the AirPods in the charging case and open the lid.

3. If you plan to reconnect your AirPods with your iPhone, press and hold the button on the back of the case to reset them.

4. A prompt will appear on the iPhone screen. Click Connect. When they’re connected, the status lights on the case flash and then stay the same. After following the on-screen instructions, tap Done.

How to connect AirPods to iPad

Connecting AirPods to an iPad is similar to connecting them to an iPhone. As long as you are also signed in with your Apple ID. The setup process should display a message on your device that the AirPods have automatically connected.

To confirm this, you can follow the guide above for connecting your AirPods to your iPhone. If it doesn’t work, try this:

1. Make sure bluetooth is turned on from the bluetooth menu in settings

2. Swipe down from the top right corner to navigate to Control Center. The audio controls should show an image of the connected AirPod.

3. If your AirPods are still not connected, press and hold the music control icon.

4. Tap the music source icon, then tap your AirPods.

This should do the trick.

How to connect AirPods to an Android phone

To manually connect your AirPods to your Android device, you must go to the Settings app on your device and follow these steps:

1. Navigate to your phone settings and select Bluetooth settings.

2. Put the AirPods in the charging case close to the phone and open the case cover.

3. Press and hold the button on the back of the case until you see a flashing white light.

4. Select AirPods from the list of Bluetooth devices on your phone’s screen and follow the on-screen instructions to pair them with the device.

While you can pair AirPods with non-Apple devices, you should be aware that these devices may reduce the quality of audio streaming to your AirPods. Significant sound enhancement and noise reduction may also not be available on some Android devices, mainly due to Apple’s proprietary version.

How to connect AirPods to MacBook

If you have a registered Apple ID, your AirPod is likely already listed on the Bluetooth menu bar or on the volume control buttons on your Mac. If not, follow the guide below:

To pair your Airpods with your Mac, disconnect them from your iPhone, then follow these steps:

1. Put the AirPods in the charging case and open the lid.

2. Press and hold the settings button or noise control button on the back of the charging case. Do this until you see the white status light blinking.

3. Go to the Apple menu bar on your Mac and select System Preferences.

4. Click on Bluetooth and select your AirPods in the list of devices displayed on your Mac. Then, click Connect.

Note: You can enable a preference to automatically connect the earbuds to your Mac. Additionally, users whose AirPods support Siri voice commands can enable it on their Macs.

How to connect AirPods to PC/Laptop (Windows)

Here’s how to connect your AirPods to a Windows PC:

1. Make sure your bluetooth is turned on by navigating from Settings to Devices

2. Click Add Bluetooth or other device, then click Bluetooth.

3. Open the lid of the AirPods case with your AirPods and press and hold the small button on the back of the case for a few seconds until you see a flashing white light.

4. Your earbuds should appear on your computer screen below the list of devices available for pairing. They may initially show up as Headphones, then switch to AirPods.

5. Click on the AirPod name, the lower right corner of the screen will show that the connection is successful.

>>>>>>>>>>>>>>>>>AirPods battery

Thanks for reading, hope it helps!

Friendly reminder: If you need to replace the battery of your device, this battery store will be a good choice: www.batteryforpc.co.uk
5 Useful Mac Features You Might Not Know in 2022

 Apple’s line of Macs is full of features to help you stay productive, but some of these tools are easy to miss. In our Mac tips and tricks guide, we’ve rounded up five features you’ll find useful.

1. Start tasks on Mac and finish on iPhone

If you have both an Apple laptop and an iPhone, you can start tasks on one device and switch seamlessly to the other. For example, you might have opened a Safari page on your Mac and then decided to continue reading on the move. This is all done using a tool called Handoff.

Before you can use Handoff, you must activate it on your Mac and iPhone. Check the Apple website for details on which devices are compatible. Both devices also need to be signed into iCloud with the same Apple ID, with Bluetooth and Wi-Fi enabled.

Activate Handoff on Mac:

1. Click the Apple icon and select System Preferences

2. Select General

3. Select Allow switching between this Mac and your iCloud device

To activate Handoff on iPhone:

1. Go to settings

2. Select General > AirPlay & Handoff

3. Enable toggle

On a Mac, open Safari and navigate to which website. Then, on your iPhone, access the App Switcher by swiping up from the bottom of the screen. You should see a Safari banner – click it to open the same page you’re viewing on your Mac.

2. View two web pages at the same time

This is called split view, and you can place two web pages or even two apps side by side on the screen.

Hover over the green full screen button in the upper left corner of the window. From the drop-down menu, select Tile windows to the left of the screen or Tile windows to the right of the screen. Your window will then fill whichever side you choose. Then click the window on the other side of the screen to view it next to it.

To stop split view, click the green button again and the window will exit or swipe left or right with four fingers on the trackpad.

3. Use Do Not Disturb Mode

If you need to get things done on your Mac without distraction, Apple’s Focus Mode can help you stay on track. It works by temporarily hiding notifications that pop up in the corner of the screen.

To activate Focus, you can use the Control Center in the upper right corner of the screen. Click the Focus button to configure the tool. You can activate Do Not Disturb for an hour or until tonight.

In the same menu, you can select Focus Preferences, and you can see certain notifications—such as messages from friends or family—even when you’re in Do Not Disturb mode. You can also set tools to open automatically at specific times.

4. Change screen resolution to enlarge text

By default, your Mac automatically determines the “best” size for text and objects on the screen. However, if you wish to make the element larger, you can make some adjustments.

Click the Apple logo in the upper-left corner of the screen, then choose System Preferences. Select your monitor from here – you’ll see the computer image along with the screen resolution and brightness settings. Next to the Resolution menu, select Scale. Now you can choose to make the text bigger, or conversely, give yourself more screen real estate to use. Choose the setting that works best for you, then close the Display window to finish.

5. Interact with the text on the image

Since Live Text has been around on the Mac, you can select and interact with text embedded in images opened in Preview.

In the example above, you’ll see the phone number you can find highlighted in the picture. You can then add the phone number to your address book on your Mac, or dial the number from a connected iPhone.

Additional features of Live Text on Mac include:

1. Copy the text on the image and paste it into another document

2. Find the meaning of the text to open the dictionary

3. Translate the text into the language of your choice

4. Search the web for text

5. Share the text with others via email or text message.

>>>>>>>>>>Mac battery

Thanks for reading, hope it helps!

Friendly reminder: If you need to replace your device’s battery, this battery store is a good choice: www.batteryforpc.co.uk

How to install MacOS apps that Apple doesn’t want you to install

 Apple takes privacy and protection very seriously, which has always included keeping malware and viruses away from MacOS desktops and laptops. Installing apps from Apple’s own Mac App Store is one way to minimize risk, but not everything you might want is available there. It’s also easy to install software downloaded directly from one of Apple’s “identified” developers, though there’s also a settings menu to turn the feature off and on.

But you may come across an app that Apple doesn’t think is from an identified developer, and you want to install on your Mac. This is where it gets tricky. MacOS comes with a feature called Gatekeeper. It helps protect your Mac from applications that can adversely affect system stability. Gatekeeper verifies downloaded applications before allowing them to run. By default, if you try to install an application that Gatekeeper does not recognize, it will not install.

Before MacOS Monterrey, there used to be an option in settings that would let you bypass Gatekeeper and install unrecognized apps. In addition to allowing apps from the App Store and identified developers, the third option is Anywhere, which is exactly what it means. Install any compatible software online from anywhere and take the chance.

But since MacOS Monterrey, the Anywhere option is gone. You can still do this, but it requires a few unobvious extra steps.

Start by opening System Preferences > Security & Privacy > General. Click the lock icon at the bottom left of the page (it reads: “Click the lock to make changes”). You must enter your system password. If not already checked, check the boxes that say App Store and identify the developer.

Now, if you install a downloaded app and get a message: “[This program] cannot be opened because the developer could not be verified”, this is what you do. Go back to System Preferences > Security & Privacy > General. You will now see a new option on the page asking if you want to open the app anyway. Click that, and you’re ready to download.

The steps for MacOS Ventura’s new settings interface are slightly different. However, if you have upgraded to Ventura from MacOS Monterey and this setting is enabled, it will still be in Ventura.

Click the Apple logo in the upper left corner and select System Settings.

Next click on Privacy and Security. Scroll down to the safety section. From there, select the App Store and identified developer.

You must enter your Mac‘s login password, or, if you have one, you can use your Apple Watch to unlock settings and continue.

When launching an unrecognized app, you get a message that it cannot be opened because the developer could not be verified. There will be two options, Move to Trash or Cancel.

Select Cancel, then go to the Settings > Privacy & Security > Security section and you will now see an option for the App Store and identify the developer with the app you are trying to install and an option to open it anyway button.

When installing third-party applications, you may compromise the stability of your system. Having said that, the click still opens. You will get a warning message with the option to open. Click Open and you’re done.

>>>>>>>>>>>>>Apple battery

Thanks for reading, hope it helps!

Friendly reminder: If you need to replace the battery, this battery store will be a good choice: www.batteryforpc.co.uk

If you forget your Mac password, this method will still allow you to log back in

 We sometimes forget our passwords at some point. For online accounts, you just click a few links, enter your email address, and reset your password. But what happens when you forget your password to log into your Mac?

There are a few different methods you can use, and the way you unlock your Mac without a password may depend on whether you linked your Apple ID to a user account on your Mac during setup, or if you have one of the new M1 Max . If you didn’t link your Apple ID, that’s okay, there is another option to reset your account password. Here’s how to start regaining control of your Mac computer, let’s see!

Use your Apple ID to reset your Mac‘s password

Ideally, you’ll link your Apple ID to your user account on your Mac during initial setup, so you can reset your user password with just a few clicks.

After entering the wrong user password three times, you will be asked if you want to restart your computer to see password recovery options. After restarting, you will be asked to log in with your Apple ID, select the user account for which you want to reset the password, and enter the new user account password.

Unlock your Mac with another administrator account

If you share your Mac with a friend or family member and they forget their password, chances are you can reset the password for them. The key here is that you need access to an admin user account.

Usually, people setting up a Mac for the first time have an administrator account by default, but you can check by logging into your account and opening System Preferences > Users & Groups and looking at the list of user accounts on your Mac. Below the username will be the account type – if it says “Administrator”, you can reset the user’s password.

To do this, in the same Users and Groups screen, click the lock and enter your administrator name and password when prompted. Next, select the user whose password you need to reset, then click the button labeled “Reset Password” and follow the instructions.

recovery mode

If none of these methods work, you’ll need to boot your Mac into recovery mode to access the password reset tool.

The process of entering recovery mode will depend on the type of Mac you have. For Macs with Intel processors, press and hold the Command and R keys on the keyboard, then press the power button. Press and hold Command+R until you see a progress bar appear below the Apple logo. You can also enter Recovery Mode by restarting your Mac and trying to time the Command+R keyboard combination, but in my experience, starting with shutting down the Mac is the most reliable method.

For the recently released Macbook Air, MacBook Pro, and Mac Mini with the Apple M1 processor, you need to shut down the computer, then press and hold the power button until the options button appears. Click on it and select Restore.

Now that your Mac is in recovery mode, click Utilities in the menu bar, then click Terminal. A new window will appear, waiting for you to enter a command. Type ” resetpassword ” as a single word without the quotation marks and press Return.

Close the terminal window and there you will find the reset password tool. Follow the prompts, including logging in with your Apple ID, and selecting the user account for which you need to change your password.

If FileVault is enabled on your Mac, you can still

FileVault is an optional MacOS feature that encrypts your Mac’s hard drive and all data stored on it. It’s usually turned on during initial setup, or you can turn it on later in System Preferences.

If you have FileVault turned on, you have two additional options to reset your user password. You can wait up to a minute on the user login screen for a prompt to press the power button to restart the Mac into recovery mode. Follow the instructions to restart your computer, after which you should see the Reset Password window appear.

Another option is to use the recovery key that should be noted when FileVault is enabled. You can enter your recovery key after three failed login attempts. Be sure to use capital letters and enter hyphens – they are required.

You can prevent this from happening, you just need to be more proactive in storing your recovery key and remembering your password during setup. Here’s how to lock your Mac.

>>>>>>>>>>>>>>>Apple battery

Thanks for reading, hope it helps!

Friendly reminder: If you need to replace the battery of your device, this battery store will be a good choice: www.batteryforpc.co.uk
There’s a new way to factory reset M1 and M2 Macs

 If you’ve bought a new MacBook Air, MacBook Pro iMac, Mac Studio, or Mac Mini within the past few years, it’s almost certainly using Apple’s own processor, the Apple Silicon M1 or Apple Silicon M2, rather than an Intel chip. In your day-to-day use, you probably won’t notice any difference in operation, which is a good thing. But when it’s time to reset a new Mac, whether it’s because you sold it, handed it over, or troubleshoot it, there are completely new steps to completely wipe out M1 and M2-based models.

More specifically, the steps to access Recovery Mode (the tool you need to reset your Mac) have changed. I’ll walk you through how to get into recovery mode and use all the options, and provide some workarounds for the issues I’m having. Let’s take a look below!

How to Access MacOS Recovery on Apple Silicon Macs

Click the Apple icon and shut down your Mac. After the computer shuts down completely, press and hold the power button. When the Apple logo first appears, you’ll see text below it, letting you know to keep pressing it to access startup options. Press it until the text switches to “Loading Boot Options,” which takes about five seconds. Next, click Options > Continue. Select a user with administrator privileges and enter the account password when asked.

New recovery tool gives you some options

After logging into your user account, you will see a list of apps available in recovery.

Restore from Time Machine: Use this option if you want to restore your Mac from a previous Time Machine backup. This is helpful if you’ve lost a lot of files, changed settings, or installed an application that’s causing serious problems with your Mac.

Reinstall MacOS Monterey: If you are having trouble with MacOS, you can try to reinstall the latest version of MacOS using this option without deleting any files or losing any data.

Safari: You can use Apple’s browser to search and resolve how to fix your Mac.

Disk Utility: Tools for repairing, troubleshooting, or erasing hard drives.

In the menu bar at the top of the screen, you can also access other applications and tools, such as Terminal, Shared Disk, and Boot Security Utility.

Erase the hard drive, reinstall MacOS

To completely remove all information from the hard drive and reinstall MacOS, open Disk Utility and select the internal disk labeled Macintosh HD. Check the box if there is an option called Erase Volume Group. Otherwise, click Erase and follow the prompts. The volume name and format are reserved, but for reference, the name is usually “Macintosh HD” and the format should use AFPS.

After a few seconds, the hard drive will be completely wiped, taking away all your files, user accounts, and applications. When done, close Disk Utility and select Reinstall MacOS from the list of options. You’ll be asked to choose where to install, which should be Macintosh HD (or whatever the name of the hard drive is if you decide to change it).

Your Mac will then download the latest version of MacOS, install it, and when it’s done, it’s like it’s never been set up.

If you are unable to create a new user account

I can’t create a new user account after reinstalling MacOS: My MacBook Pro freezes when I try to create a default user account. Basically, it’s because MacOS is looking for account information in a place that doesn’t exist anymore.

If the system doesn’t freeze, try rebooting again into recovery mode, launch Terminal, type “resetpassword” in the command line, select the reset password option, then launch Recovery Assistant from the menu bar and select Erase Mac or Erase with Disk Utility Data partition, as described in the previous comment.

If it freezes, you need to try accessing it from a second device. You can connect it to another Mac and follow the process described in this StackExchange thread or follow the instructions in this Reddit comment to remove the partition from your iPhone.

>>>>>>>>>>>Apple battery

Thanks for reading, hope it helps!

Friendly reminder: If you need to replace the battery of your device, this battery store will be a good choice: www.batteryforpc.co.uk

How to Remote Desktop on Mac

 There are many reasons to wonder how to remote desktop on a Mac. For starters, if you have multiple computers, you may need to access some files or applications on another Mac. Or, if you know someone who needs help with a Mac problem, it’s easier to use their computer directly, even if you’re far away. Here’s how you want to know, let’s take a look!

With screen sharing, remote access to your desktop is easy. You just need to know the Apple ID or hostname of the other Mac. From then on, just accept the method on another computer and decide what level of access you want. However, this means that someone has to have access to the other Mac.

To summarize, these are the steps:

1. Launch the screen sharing app

2. Enter the hostname or Apple ID

3. Accept incoming requests on another Mac

4. Tap Control My Screen

5. Close the window end

How to use screen sharing on Mac

1. Launch the screen sharing application on the Mac you want to use. You can do this via Spotlight Search if you press Command and Space on your keyboard – just type Screen Sharing.

2. Enter the hostname or Apple ID associated with the other Mac. In other words, the Apple ID of the computer you want to access. Click Connect.

You will now be told that you need to respond on another machine.

3. A message will appear on the Mac you want to connect to. To establish a connection, the person using the computer will need to click Options and select Accept.

4. A Mac is fully controllable. To do this, someone has to click “Control My Screen” on the Mac that will be accessed. Clicking Watch My Screen will not allow any applications to be opened or changes to be made to files.

5. You will now have remote access to the other Mac, which will appear in its own window. Simply close the window to stop access.

>>>>>>>>>>>>>Apple battery

Thanks for reading, hope it helps!

Friendly reminder: If you need to replace the battery of your device, this battery store will be a good choice: www.batteryforpc.co.uk
Apple preparing to launch high-end MacBook Pro, Mac mini with M2 chip

 Apple could expand its Mac portfolio later this year with a high-end MacBook Pro and a Mac mini with M2 silicon. M2 products currently include the 13-inch MacBook Pro and the improved MacBook Air.

According to Bloomberg’s Mark Gurman, MacBook sales will see a “massive increase.” “Apple will get more momentum later this year with a new Mac mini and a high-end MacBook Pro,” he said late Sunday. Earlier reports mentioned that MacBook Pro models with the M2 Pro and M2 Max will be available in the fall.

Rather than accepting any major shifts, the new Mac models will offer better internal specs. For Macs, Apple generated $7.4 billion in revenue despite supply constraints and a negative impact in the June quarter. Mac revenue fell 10% due to supply chain constraints and unfavorable foreign exchange rates. Apple released a redesigned MacBook Air last month with the company’s M2 chip.

“M2 offers faster CPUs, GPUs and Neural Engines, as well as new features like higher memory bandwidth and Pro Res acceleration. It continues Apple’s tremendous pace of innovation in Mac chips,” said Apple CEO Tim Cook. .

Cook acknowledged that the company continues to face supply constraints on Macs, saying “we are encouraged by the strong customer response to our incredible lineup.”

“Like Macs, demand for iPads continued to be strong in the June quarter despite continued supply constraints,” the Apple CEO said.

>>>>>>>>>>>>>Apple battery