The fastest way to charge your iPhone if you’re short on time

 Whether you have an iPhone 13, iPhone 12, or another model, realizing that it has a very low battery is never a good feeling, especially when you’re leaving a place where you can’t charge your device.

Let’s go over a few ways you can quickly fully charge your battery to get you through the next hour or so, if not longer. Some methods are tried and true, such as turning on airplane mode to reduce power consumption associated with cellular networks, and some newer methods, such as using a wireless MagSafe charger. These methods can also be mixed and matched, hopefully at least getting you enough power for basic tasks. Let’s take a look below!
If you have a fast charger, use it

The fastest way to charge your iPhone is to use a fast charger: connect the 20W power adapter with a USB-C to Lightning cable. As long as you own an iPhone 8 or newer, you can quickly charge your phone from dead to around 50% in about 30 minutes. If you have an hour to spare, you can fully charge it. Even just a 10-minute fast charge can boost your battery by double digits, so if you’re short on time, always opt for the fast charger option.

According to Apple, you can also use other compatible fast charging power bricks, but you will need at least a 20W power brick to fast charge iPhone 12 and later.

If you don’t have a fast charger, the wireless MagSafe charger is a good idea

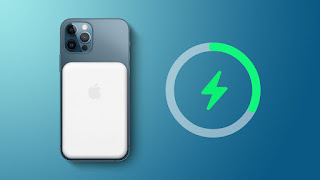
The second fastest way to charge your iPhone is to use Apple’s MagSafe charger and 20W power adapter, but for this to work, you must have an iPhone 12 or iPhone 13 to get the faster 15W wireless charging. If your iPhone dies, you should get about 30 percent charge in about 30 minutes of wireless charging.

However, that doesn’t mean you can use any industry-standard Qi wireless charger for fast charging. While the MagSafe charger supports 15W, the Qi charger will only give you a maximum of 7.5W, which is significantly slower than the MagSafe and only slightly faster than a traditional 5W wall charger. Note that magnetic wireless chargers that are not MagSafe certified will also charge at a slower 7.5W speed.

Do not use a laptop or desktop computer

A laptop is a very convenient way to charge your iPhone, especially if you spend most of your time in front of your computer and want to keep an eye on any incoming text messages and notifications. Unfortunately, your computer will always charge your phone slower than any wall charger or wireless charger.

Your computer’s USB port, whether it’s the larger and older USB-A or the newer, smaller USB-C, can’t provide the same amount of power as any wall outlet — not even a 5W power adapter. This is especially true if your old computer has a faulty USB port or an incompatible charging cable, both of which can further slow down the charging process.

And don’t use your iPhone while it’s charging

If you’re charging your iPhone while streaming a video or playing a mobile game, the battery will charge much slower, so don’t touch it if you can.

For better results, please turn off the phone while charging

Even when your screen is off, your phone is still working in the background, constantly refreshing apps, sending notifications, and turning the screen on—all of which wastes battery. If you want your iPhone to charge faster, your best bet is to turn it off.

You can also put it in airplane mode while charging

If you don’t want to turn off your iPhone, but still want to help it charge faster, you can turn on Airplane Mode, which disables all wireless transmissions like cellular, Wi-Fi, and Bluetooth. If they are off, your iPhone can charge faster. That way, you can also quickly turn off airplane mode to quickly see any text messages or calls you might be waiting on.

Use low power mode, dark mode and turn down the brightness

If you’re not going to turn it off, you can use these same features and settings to help charge your iPhone faster.

Low Power Mode: Turn it on to reduce or affect power-hungry features.

Dark Mode: The jury is still out on how much battery life Dark Mode saves, but it doesn’t hurt to have it on while charging your iPhone, especially if every percentage counts.

Decrease screen brightness: The brighter the screen, the faster the battery drains, so turn it down while charging.

Disable optimized battery charging feature

Apple has a built-in tool that can help prevent your iPhone‘s battery from degrading quickly, but the same feature can also make your device charge more slowly. While the feature usually only slows down your iPhone during long periods of charging, it may still be worth disabling when charging your phone. Go to Settings > Battery > Battery Health and turn off Optimize battery charging to turn off this feature.

>>>>>>>>>>>>>iPhone battery

Thanks for reading, hope it helps!

Friendly reminder: If you need to replace your phone battery, this battery store will be a good choice: www.batteryforpc.co.uk

Prevent AutoCorrect from Failing with This Hidden iPhone Trick

 AutoCorrect will only improve over time, but after 15 years of continuous development by Apple, it’s still far from perfect on the iPhone. However, there are some hidden features in iOS that can help avoid or mitigate future autocorrect failures, one of which warns you every time a word is changed.

This might shock you, but the little-known feature I’m talking about has been around since iOS 3 in 2009. That was before iOS was even called “iOS”, when Apple used the longer “iPhone OS” for its mobile operating system. This secret tool is still around in iOS 15 and iOS 16, and will likely be available in a future software update.

Its ability to help prevent autocorrect clutter in messages, mail, Twitter, and anywhere else you can enter text is nowhere near as good as keyboard settings. If you go to Settings -> General -> Keyboard, you won’t find it. Instead, go into the accessibility settings at:

Settings -> Accessibility -> Voice Content -> Input Feedback

There are various tools in the typing feedback menu to help you type on your iPhone. There’s “Speak Words”, which is a bit of an overkill because it speaks everything you type. “Hold to Speak Predictions” is cool, but it’s mostly only useful if you’re not sure how a word is spelled but know how it’s pronounced. What you want is to “speak automatic text”, so turn that switch on.

This guide assumes that you have “Auto-Capitalization” and “Auto-Correction” enabled in Settings -> General -> Keyboard. At least one or the other should be enabled to use Speak Auto Text.

Change speech rate and voice

Before testing the new features of AutoCorrect, you may need to adjust how fast iOS speaks words aloud. If you type very slowly, the default rate might be ok. For people who type faster, you may want to increase your speaking speed so that it doesn’t slow you down.

Go back to the main Spoken Content settings and adjust the Spoken Rate slider accordingly. Your adjustments will apply to the Speak Auto Text feature and other Speak Screen and Speak selection options. It doesn’t affect VoiceOver or Siri’s speaking rate. You can even change the voice your iPhone uses to speak to you. In the Voice Content settings, tap Sound, select your language, and choose a voice. Before saving your selections, you may need to download the voice file, which may be over 100 MB. Changing your voice here affects all Speak Screen and Speak Selection options, but not VoiceOver or Siri.

Make sure you can hear your iPhone talking

To benefit from Speak Auto Text, you need to be able to hear what it says. Make sure the ring/silent switch on the side of your iPhone is set to ring, then turn up the media volume on your headphones or built-in speakers.

Test the Speak Automatic Text Tool

Whenever AutoCorrect has a word suggestion, as long as you don’t hit space, carriage return, punctuation, etc., it will say it aloud so that the suggestion replaces what you actually typed. If you’re a fast typist, you’ll need to slow down a bit to give your iPhone enough time to speak the autocorrect suggestion before accidentally approving it.

Whenever a word in the predictive text field is highlighted, it speaks the word or automatically capitalizes it. If you have the predictive text bar disabled, it will speak whatever appears in the autocorrect bubble.

>>>>>>>>>>>>>>>>iPhone battery

4 annoying iOS 16 features and how to disable them

 Many of the new features in iOS 16 are a welcome addition to Apple’s latest mobile operating system, especially the fully customizable lock screen and the ability to unsend and edit text messages. However, some of these new additions, as well as older ones, are not always universally loved. For example, Apple doesn’t allow you to delete built-in apps, even if you never use them. Eventually, Apple reconsidered the decision, and you can now delete any app on iOS, but there are still other annoying features.

Fortunately, there is a way to get rid of or disable some of the more annoying features and settings in iOS 16. Let’s take a closer look below!

Stop Featured Photos and Memories from popping up on your iPhone

Apple’s artificial intelligence helps you display the photos and videos you might want to see everywhere on your iPhone, as friendly reminders for family vacations, couples photos and vacations—but you might not always want your personal photos to be unexpected Pops, especially if they are personal, embarrassing, or inappropriate.

Luckily, in iOS 16, you can now prevent Featured Photos and a Featured Collection called Memories from appearing in the Photos widget on the Home screen, as well as Search and Suggested for You in Photos section.

To block these custom photos, launch the Settings app, go to Photos and turn off “Show Featured Content”. All featured content will no longer appear on your device, but will only be available in your photo library and albums.

Prevent side keys from accidentally ending a call

The side/power button on the side of your iPhone lets you quickly sleep and wake your device, but if you accidentally press it during a call, you’ll end the call prematurely. If this is something you’ve encountered in the past, iOS 16 finally allows you to prevent that from happening.

In Settings, go to Accessibility > Touch and turn off “Lock End Call” to prevent the side button from ending a call. If you accidentally press the side button, your screen will go to sleep, but you will continue to receive calls without interruption.

Remove search button from home screen

Search on iPhone lets you quickly find what you’re looking for, whether it’s text messages, third-party apps, files, notes, and locations—just about anything on your device or on the web. The best thing about this feature is that it’s easily accessible from the home screen; all you need to do is swipe down anywhere on the screen and it will appear.

iOS 16 also adds another way to access Search from the home screen, via a small button just above the Dock. Unfortunately, it’s easy to accidentally trigger because it’s close to where your thumb might move as you swipe between the various home pages.

Luckily, like many new features on iOS 16, this one can also be disabled. Just launch the settings app, go to the home screen and turn off show on home screen to remove the search button from the home screen.

Go back to the old lock screen notifications

Apple‘s latest redesign brings widgets to the lock screen, customizable fonts and colors, a gallery of wallpapers and stylized date and time, and an overlooked notification change. Notifications now no longer appear at the top of the lock screen, but at the bottom, which you can then tap to go full screen.

However, not everyone is happy with the change. If you want to go back to how notifications are displayed on iOS 15, launch the Settings app and go to Notifications > Display As. Then you will see three options:

Count: Notifications appear as numbered counts at the bottom of the screen.

Stack: Notifications appear in a stack at the bottom of the screen.

List: Notifications appear entirely on your screen.

To return to the old notification style, select the list option.

>>>>>>>>>>>>>>Apple battery

Pixel 6A vs. iPhone SE: How Google’s $449 phone compares to Apple’s $429 iPhone

 Google’s new $449 Pixel 6A and $429 iPhone SE are both under $500. Google’s new phone, set to launch on July 28, packs many of the Pixel 6’s best attributes, including its two-tone design, Tensor chip, and photography capabilities. However, compared to the Pixel 6, the 6A has a smaller screen, a lower-resolution camera, and lacks wireless charging. Apple’s iPhone SE debuted in March with the same processor as the iPhone 13.

Google and Apple have taken similar but different approaches to their more affordable phones. The Pixel 6A is essentially a smaller, cheaper version of the Pixel 6, while the iPhone SE is better for those who prefer a small-screen classic iPhone model.

We’ve got a full review of both phones now, but here we want to directly compare Google’s cheaper Pixel to the 2022 iPhone SE based on what we know so far.

The Pixel 6A has a bigger screen

One of the biggest differences between the Pixel 6A and the iPhone SE is their size. Google’s new phone has a 6.1-inch display, roughly the same size as the iPhone 13. The iPhone SE looks almost identical to the iPhone 8, including a smaller 4.7-inch screen.

But it’s not just size. The Pixel 6A has a more modern design, with a nearly bezel-less screen and a fingerprint sensor located below the display. Some may prefer the retro look and feel of the iPhone SE. Google’s phone also has an OLED display panel, which typically offers bolder colors and contrast than the LCD screen on the iPhone SE.

Both phones have the latest processors

While there are differences between the iPhone SE and Pixel 6A, they do have something in common: Both phones feature the manufacturer’s latest processors. The iPhone SE has Apple’s A15 Bionic inside, while the Pixel 6A will feature Google’s Tensor chip, the company’s first in-house mobile processor.

In both cases, you’ll get fast performance and features that other companies don’t make on phones. For example, Google’s Tensor chips enable pixel-specific photography features such as the Magic Eraser, which removes unwanted objects, and Real Tone, which more accurately depicts skin tones. Meanwhile, the iPhone SE has certain iOS features not available on older iPhones with aging processors, such as Photo Styles and spatial audio in FaceTime.

Pixel 6A has an extra camera

Google’s new phone offers more flexibility when taking pictures, thanks to a secondary ultra-wide camera. The iPhone SE’s single-lens camera does a decent job, but it doesn’t have an ultra-wide-angle lens, which means your field of view will be more limited than on the Pixel 6A.

Google’s phone has a 12.2-megapixel main camera with an f/1.7 aperture and a 12-megapixel ultra-wide-angle camera with an f/2.2 aperture. The iPhone SE has a 12-megapixel main camera with an f/1.8 aperture. The term megapixel refers to the resolution of a camera sensor, while aperture describes the size of the camera opening used to let in light, both of which are important factors in image quality.

Photo quality is hard to predict based on specs alone. Image processing algorithms also play an important role in the resulting photos you see when you take them. The Pixel 6A’s ultra-wide-angle lens means you can choose to take photos from a wider angle than the iPhone SE. The Pixel 6A can also do up to 7x digital zoom, while the iPhone SE has 5x digital zoom, making it a better choice for close-up shots.

Pixel 6A may have better battery life, but lacks wireless charging

Google claims the Pixel 6A can last more than 24 hours on a single charge, while Apple says the iPhone SE should last up to 15 hours while streaming video. But this isn’t an apples-to-apples comparison, so it’s hard to tell how they stack up until we test the Pixel 6A. In CNET’s tests, the new iPhone SE lasted a full day on a single charge. We’ll have to see if the Pixel 6A meets Google’s requirements.

Both phones support wired fast charging, but you’ll have to buy a power adapter separately. But unlike the iPhone SE, you won’t be able to wirelessly charge the Pixel 6A. It’s one of the few compromises Google has made to keep the Pixel 6A competitively priced, and in keeping with previous A-series Pixel phones.

other details

One of the big advantages of the Pixel 6A over the iPhone SE is its storage capacity. With Google’s new phone, you’ll get 128GB of storage, compared to just 64GB on the cheapest iPhone SE. You have to spend $479 to get the 128GB iPhone SE. Neither phone supports expandable storage, so that’s a limitation.

According to Apple’s website, both phones are rated IP67 for water resistance, which means they should be able to be submerged in 1 meter of water for 30 minutes. Both phones also support 5G.

>>>>>>>>>>>Phone battery

Nothing Phone (1) vs iPhone SE 3: What’s the difference?

 Nothing Phone (1) is a powerful, good-looking mid-range Android phone. So how does it compare to Apple’s equivalent, the iPhone SE?

Nothing founder Carl Pei went head-to-head with Apple when it launched the first Nothing Phone, claiming that it and other tech giants are no longer innovating, and that Phone (1) is unique and unlike anything we’ve seen before. So, let’s put this claim to the test.

In this comparison, we compare Nothing Phone (1) to the iPhone SE 3. They’re nearly the same price; we’ll compare the two devices based on their build, cameras, memory, battery, performance, and display. Let’s have a look!

Dimensions and build quality

Without phone (1): 159.2 x 75.8 x 8.3 mm; 193.5 g; IP53 dust and water resistant

iPhone SE 3: 138.4 x 67.3 x 7.3 mm; 144 g; IP67 dust and water resistant

iPhone SE 3 is smaller, thinner and lighter than Nothing Phone (1). The former has the same design as the iPhone 8, which means it has curved edges, an aluminum frame, huge bezels, and weaker glass protection. But at least you get an excellent IP67 dust and water resistance rating.

The fan-favorite Glyph interface LED on the back looks cool, but isn’t necessary from a purely functional standpoint. Neither device has an audio jack.

processor

No phone (1): Snapdragon 778G+ 5G; 6nm manufacturing; Adrenaline 642L GPU

iPhone SE 3: Apple A15 Bionic; 5nm manufacturing; Apple 4-core GPU

In terms of performance, the 5nm A15 Bionic chip on the iPhone SE 3 handily beats the 6nm Snapdragon 778+ chip on the Nothing Phone (1). For reference, the former scores over 700K on AnTuTu (v9), while the latter scores around 530K on the same benchmark.

Nothing Phone (1) won’t give you the same functionality, although it’s not a weak chip by any means. The Snapdragon 778G+ is well known among Android enthusiasts for its stable performance, high energy efficiency, and virtually no throttling.

camera

No phone (1): 50MP f/1.9 main resolution, 4K video with OIS, PDAF, and 30fps; 50MP f/2.2 ultra-wide (114-degree FoV); Front: 16MP f/2.5, 1080p video, 30fps.

iPhone SE 3: 12MP f/1.8 main, 4K video with OIS, PDAF, and 60fps; front: 7MP f/2.2, 1080p video, 120fps

Both phones feature optical image stabilization for crisp photos.

exhibit

no phone(1): 6.55-inch; organic light-emitting diode; 120Hz refresh rate; HDR10+ support; 1080 x 2400 resolution; 20:9 aspect ratio; 402 PPI; 500 nits brightness (1200 nits peak); Gorilla Glass 5; 85.8% screen-to-body ratio

iPhone SE 3: 4.7 inches; Retina IPS LCD; 60Hz refresh rate; 750 x 1334 resolution; 16:9 aspect ratio; 326 PPI; 625 nits brightness; 65.4% screen-to-body ratio

If we compare the displays, Nothing Phone (1) is the clear winner. It has a 6.55-inch adaptive 120Hz FHD OLED display with HDR10+ color and 1200 nits of peak brightness. It also has uniform bezels we’ve never seen on even the best mid-range Android phones.

RAM and storage

No phone (1): 8/12GB RAM; 128GB/256GB storage

iPhone SE 3: 4GB RAM; 64GB/128GB/256GB storage

You probably already know that iPhones are more efficient at RAM management, so don’t need it like Android phones. While this is true, the 4GB RAM you get on the iPhone SE 3 will still be lower than the 8GB RAM you get on the Nothing Phone (1).

Software excellence can only mask hardware flaws for so long. Multitasking would be easier on the Nothing Phone (1); that phone also has 128GB of storage on the base model, but the iPhone SE 3 starts at 64GB, and the 128GB version costs $479.

Battery

No phone (1): 4500mAh battery; 33W fast wired charging, 15W wireless charging; 5W reverse wireless charging

iPhone SE 3: 2018mAh battery; 20W fast wired charging; 7.5W Qi wireless charging

Similar to the last point, iPhones consume less battery than Android phones, but the 2018mAh battery you get on the iPhone SE 3 will drain quickly, despite its efficiency, especially when you’re gaming. Thankfully, you get fast 20W wired and 7.5W wireless charging support.

In comparison, the 4500mAh battery on the Nothing Phone (1) lasts significantly longer and supports faster 33W wired and 15W wireless charging, as well as 5W reverse wireless charging.

>>>>>>>>>>>>>Phone battery

How to Use Apple’s Lockdown Mode to Protect Against Industrial iPhone Hacking

 For most of us, following basic privacy and security tips should be enough to keep ourselves and our data safe online. But if you think you’re the target of a state-sponsored cyberattack using industrial-grade spyware tools like Pegasus, the usual rules of staying safe may not be enough.

If you’re a journalist, politician or activist worried about your phone being the target of a state-sponsored cyber attack, Apple has released a security feature that everyone can use to protect their iPhone from such attacks .

Apple‘s new security tool, called Lockdown Mode, is built into iOS 16 and is designed to combat attacks from malware and spyware like Pegasus. Here’s what you need to know if you want to know how to enable lock mode on your iPhone.

What does Lockdown Mode do?

According to Apple, Lockdown Mode provides an “extreme, optional level of security for a very small number of users who, because of who they are or what they do, may be the individual targets of some of the most sophisticated digital threats.”

Essentially, Lockdown Mode increases security features on iOS by restricting certain features that may be vulnerable:

1. With the exception of images, most email attachments are blocked, and features like link previews are disabled.

2. Web technologies such as just-in-time JavaScript compilation are disabled unless you exclude it from lockdown mode.

3. If you have never called the person before, incoming invitations and service requests, such as FaceTime calls, are blocked.

4. All shared albums in Photos will be deleted and any new invitations to shared albums will be blocked.

5. Any wired connection between your iPhone and computer or accessories will be blocked.

6. Unable to install profiles, such as those from Apple’s public beta.

7. Your device cannot be registered for mobile device management.

Which devices support Lockdown Mode?

Currently, you can use Lockdown Mode on any Apple device running iOS 16, iPadOS 16, or MacOS Ventura. As of now, iOS 16 is only available as a developer beta, but it is expected to be available as a public beta soon.

How to Enable Lockdown Mode on iOS 16

As long as you’re running iOS 16, you can easily turn on lock mode in seconds. All you need to do is go to Settings > Privacy & Security > Lockdown Mode, read through the description, click Turn on Lockdown Mode and then Turn On & Restart.

Your iPhone will restart immediately, after which lock mode will be enabled. If you go into Safari, you should see a Lockdown Enabled or Lockdown Ready banner at the top of the page, indicating that Lockdown Mode is actually on and protecting your iPhone.

Configure Lockdown Mode Settings

While Lockdown Mode offers extensive security, you can tweak it to better suit your needs.

As mentioned above, websites in Safari are severely restricted in Lockdown Mode, but you can bypass these restrictions by excluding a website. To do this, launch Safari, go to the website you want to exclude, click AA > Website Settings, turn off Lockdown Mode, and click Turn Off . The banner at the top of the site should now read Lockdown Off.

To see all excluded sites, go to Settings > Privacy & Security > Lockdown Mode, then click Configure Web Browsing at the bottom of the page.

How to Disable Lockdown Mode

Go to Settings > Privacy & Security > Lockdown Mode, tap Turn off Lockdown Mode, and then tap Turn Off and Restart. When your iPhone restarts, lock mode will be disabled and you will be able to use your iPhone as usual again.

>>>>>>>>>>Apple battery

Should you upgrade to the iPhone 13? See how it compares to older models

 Apple’s iPhone 13 lineup brings improvements like longer battery life, a new processor, and new camera features, but it’s still hard to know if it’s time for an upgrade. A large part of the decision depends on which iPhone you currently own.

Should you upgrade to the iPhone 13?

The short answer is that most iPhone 12 and iPhone 11 users will probably skip this upgrade because their phones are likely in good condition and there isn’t much that can meaningfully change the experience. If you have an iPhone from the last two years, you should wait for the rumored iPhone 14, which is expected to launch in September. Here’s how the iPhone 13 compares to its predecessor, let’s take a look!

iPhone 13 vs iPhone 12, 12 Pro

If you have an iPhone 12, there’s little reason to upgrade right now. That’s because the iPhone 12 has a lot in common with the iPhone 13. They all support 5G, vibrant 6.1-inch OLED screens, fast processors, great cameras, and MagSafe accessory support. The biggest reasons to consider an upgrade are camera updates and better battery life.

All of Apple’s new iPhones, including the standard iPhone 13 and 13 Mini, will get a new video capture feature called Movie Mode, which automatically switches focus between subjects, giving shots a more cinematic aesthetic. This may seem like a neat trick for those who regularly use their phone for video projects. Apple says Movie Mode takes advantage of the new A15 Bionic processor, but it’s worth noting that Apple also has a history of bringing similar enhancements to previous iPhones via software updates.

Apple also introduced a new feature called “Photo Styles” that allows users to apply certain preferences to scenes in photos.

The iPhone 12 still features Apple’s 12-megapixel dual-camera system with wide-angle and ultra-wide-angle cameras, while the iPhone 12 Pro series has Apple’s 12-megapixel triple-lens setup with wide-angle, ultra-wide, and telephoto cameras. Aside from the new features mentioned above that are only available on the iPhone 13 series, most camera features are the same across generations.

 Compared to the iPhone 12’s A14 Bionic chip, the iPhone 13’s aforementioned A15 Bionic processor offers faster speeds and longer battery life. Specifically, the iPhone 13 should last about 2.5 hours longer than the iPhone 12, while the iPhone 13 Mini is 1.5 hours longer than last year’s 12 Mini. The iPhone 13 Pro will last 1.5 hours longer than the iPhone 12 Pro, while the iPhone 13 Pro Max will last 2.5 hours longer than its predecessor. The iPhone 13 Pro has up to 1TB of storage, while the iPhone 12 Pro maxes out at 512GB.

iPhone 13 vs iPhone 11, 11 Pro

The iPhone 11 is almost three years old, but it’s probably running smooth enough for most people. You can at least wait until the iPhone 14 arrives before upgrading. Compared to the iPhone 13, sticking with the iPhone 11 misses out on two major additions: 5G support and a better camera.

The iPhone 11 and 11 Pro phones also lack 5G support compared to the iPhone 12 and 13, but that’s not the main reason for the upgrade right now. Widely deployed 5G networks are only marginally better than 4G LTE networks, and there aren’t really any apps or services available that can take advantage of the faster speeds.

The iPhone 13 also features Apple’s A15 Bionic processor, while the iPhone 11 series uses Apple’s two-year-old A13 Bionic processor. Although it’s not the latest chip, the iPhone 11’s processor is still powerful enough. Apple even uses the same A13 Bionic chip in its new entry-level iPad, another sign that the processor is still capable.

Compared to the iPhone 11, the iPhone 13 also has two hours longer battery life when playing video, supports Apple’s MagSafe accessory, and has twice the storage capacity of the base level. According to Apple’s website, the standard iPhone 13 has similar battery life to the iPhone 11 Pro and Pro Max. But during video playback, the iPhone 13 Pro should last four hours longer than the iPhone 11 Pro and two hours longer than the iPhone 11 Pro Max.

The iPhone 11 also uses Apple‘s older design language, including rounded corners, with a smooth pastel finish on the standard model and a matte finish on the Pro model. By comparison, the iPhone 12 and newer have flatter edges, similar to the iPad Pro, and the Ceramic Shield coating should make it more durable, with a glossy glass back.

>>>>>>>>>>>iPhone battery

Google’s DIY Pixel fix, and it looks better than Apple’s iPhone version

 Not long ago, Apple started allowing iPhone users to fix certain glitches themselves, and now Google is starting to offer a similar service to Pixel users.

In partnership with iFixit, Google now offers parts and repair kits to meet the needs of myriad mobile ailments, from the original Pixel to the Pixel 6 series — though the exact selection of parts and supported phones seems to vary by country.

You can order kits online and it will come with the relevant replacement parts, as well as the tools needed to install them. iFixit also provides detailed repair manuals for all supported fixable issues; available fixes include replacing the screen, rear camera, battery, and in some cases charging components.

Depending on the equipment and the problem, these repair kits can cost anywhere from $22.99/£24.99 (Pixel 2 camera) to $192.99/£189.99/AU$252.99 (Pixel 6 Pro screen). At launch, these kits are available in the US, UK, Australia and EU countries where the Pixel line of products is available.

Of course, these repairs aren’t for everyone—in general, we recommend having your Pixel repaired by a professional unless you’re confident in your work. Either way, another manufacturer that officially supports right-to-repair is great.

It’s a handy option for those with technical know-how or who can’t easily get their phone repaired elsewhere for whatever reason, and will keep their Pixel phones lasting longer — which is good for our wallets and the environment .

Analysis: How does this compare to Apple‘s self-service repairs?

From their perspective, Google’s repair service appears to have some advantages over Apple’s.

For one thing, replacement Pixel parts often look cheaper—though that can vary, depending on the component and region involved.

A key difference between these Pixel repairs is that you buy the related tools from iFixit, whereas Apple Self-Service Repairs just let you rent them. The latter may be more sustainable, but in addition to paying for equipment rentals, you’ll have a hefty sum on your card if you don’t return the kit in full on time. Such a huge cost is because Apple sends a whole suite of tools that will send the same selection regardless of your problem, whereas iFixit only sends the tools you need for your device’s specific ailment.

Another difference between Google and iFixit is that Apple Self Service Repair is only available in the US, although that will change. Still, given The Verge’s hassles when it comes to doing your own iPhone repairs, you might want to skip it, and it remains to be seen if Google’s will be easier.

>>>>>>>>>>>Phone battery

How to Fix Apple Notes Not Syncing Through iCloud

 Apple Notes is a free note-taking solution with some very powerful features, but sometimes you may find that your notes refuse to sync between iPhone, iPad, and Mac. The problem might be with how you organize your notes, or it might be a bigger problem that’s left you scratching your head. Let’s take a look below!

First: Make sure iCloud Notes is enabled

To display notes on other devices, they need to be synced via iCloud. To do this, you’ll need to make sure Notes are enabled in your iCloud settings, and check that you’re putting your notes into your iCloud account instead of storing them locally on your iPhone, iPad, or Mac.

To check if you have iCloud sync enabled for the Notes app on your iPhone, open Settings on your iPhone or iPad and tap your name at the top of the list. Select “iCloud” and scroll down until you see Notes. Make sure the toggle next to the app is enabled.

You can do this on your Mac under System Preferences (or System Settings) > Apple ID. Select iCloud from the sidebar and make sure there is a checkbox next to the Notes app. You need to do this on all devices where you want to display your notes.

It’s also worth checking to see if you have enough iCloud storage for Notes to sync. Your device may warn you about running out of space, but you can check manually by looking at the colored iCloud storage bar in this menu on either device. If you’re running out of storage space, you’ll need to buy more.

Next: Check if you added notes in iCloud

After enabling Notes in iCloud, launch the Notes app and view the top folder screen or sidebar. You should see a section titled “iCloud,” but you may also see another section titled “On My iPhone” or “On My Mac.”

If your notes are stored on your iPhone, iPad, or Mac, they won’t sync across devices. You need to move them to iCloud for it to work. To do this on an iPhone or iPad, tap a folder, then use the ellipsis “…” context menu button in the corner of the screen to “move” Move Notes to your iCloud account. On a Mac, you can simply drag and drop folders to the iCloud section.

You can do this the same way with notes by opening them and moving them around using the context menu, or dragging them on your Mac.

To ensure that new notes go directly to iCloud by default, check that the Default Account option in the note settings is set to iCloud. Access it under Settings > Notes on an iPhone or iPad or on a Mac by launching the Notes app, then clicking Notes > Preferences in the menu bar at the top of the screen.

You may have to wait a while for your notes to sync, especially if you have a lot of images or large attachments in your notes.

Update your device to the latest version

Sometimes, the iCloud service doesn’t work properly, and one of the reasons might be outdated software.

For best results, make sure your device is running the latest versions of iOS, iPadOS, and macOS before making any changes. You can do this under Settings > General > Software Update on an iPhone or iPad, or under System Preferences (or System Settings) > Software Update on a Mac this action.

Test your connection and disable any VPN

Problems syncing with iCloud can be explained by connectivity issues. If you are using a VPN, consider turning it off to see if this helps with your upload or download issues. You can do this using your VPN provider’s app or any third-party app you’re using.

After disabling the VPN, test the problem again by uploading or creating a new note. You can also try restarting network hardware like your router or modem and see if that helps.

kill the app and restart the device

You can kill the Notes app on your iPhone by opening the app switcher and flicking over the Notes app. On Mac, right-click the Notes icon and choose Quit or hold down the Option key to force quit the application when it becomes unresponsive.

At this stage, it’s also worth considering whether iOS, iPadOS, or macOS is the culprit. A simple reboot of each affected device will rule out issues caused by system processes not functioning properly.

>>>>>>>>>>>Apple battery

Thanks for reading, hope it helps!

Friendly reminder: If you need to replace the battery of your device, this battery store will be a good choice: www.batteryforpc.co.uk
How to Transfer Data from Android Phone to iPhone

 Apple’s devices are notorious for their closed software. So when I moved from an Android phone to an iPhone a few weeks ago, my main concern was whether I could take my existing data with me. It turns out it is possible. With just a little work, you can easily transfer all your Android contacts, calendar appointments, pictures, videos, SMS texts and more to your new iPhone. You can move Android data to iPhone in the following four ways.

1. Set up your new iPhone with your Android data

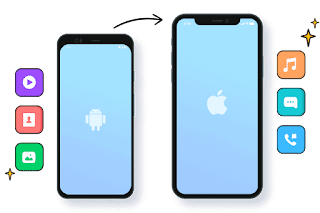
The best option for syncing Android data with iPhone is Apple’s “Move to iOS” app. When you configure your new iPhone for the first time, it lets you wirelessly import most of your important information to your new iPhone. So even before you start using your iPhone, it will be filled with your old Android data.

The only downside to the Move to iOS app is that it only works during the initialization phase of the iPhone. So if you’ve already set up your iPhone, you’ll have to reset it and start over to take advantage of Apple’s Android utility.

To get started with Move to iOS, continue through your iPhone’s setup until you reach the Apps & Data page. Here, select “Move data from Android”. On your Android phone, download “Move to iOS” and launch it. Enter the code displayed on your iPhone and choose what you want to sync. Your iPhone has imported your Android phone’s data. You can now proceed with the setup as usual.

2. Use MobileTrans to move Android data to iPhone

If you’re past the setup phase of your iPhone and can’t reset it, you can try a third-party desktop app called MobileTrans.

With MobileTrans, you can sync your Android’s contacts, media, calendar events, and more with your iPhone. However, unlike the Move to iOS app, MobileTrans requires you to plug both devices into your Windows PC or Macbook.

On the MobileTrans app, with your phone connected to your computer, select your Android device in the source dropdown on the left and your iPhone on the right. Next, choose what to copy to your iPhone and hit the “Start” button. Unlock your iPhone to start the transfer.

Because MobileTrans works locally rather than over a Wi-Fi connection, moving high-resolution images and videos is much faster and takes much less time than “move to iOS”. Disconnect your phone when the screen says “Your iPhone recovery is complete” and you’ll find your Android data synced with what’s already on your iPhone.

3. Sync Android Contacts and Calendar with iOS via Google Account

Your iPhone can also get your contacts and calendar data from the email provider of your choice.

On Android, to make sure all your contacts and calendar appointments are synced with your Google Account, go to Settings > Accounts. Click on your primary Google email address, then click on the “Account Sync” option. Open Calendar and Contacts.

In order to retrieve this data on your iPhone, you must add your Google email address to it. Go to Settings > Mail > Accounts. Select “Add Account” and follow the instructions below to configure your Google Account.

4. Switch to Apple Storage Service

You’ll find most Google apps on the iOS App Store, but none of them are as deeply integrated as Apple’s own services. Likewise, you can’t back up data from iOS apps like iPhone or WhatsApp to Google Drive.

So if you’re going all out to buy Apple products, you should consider importing existing data from your Google account into those products. Apple Photos can replace Google Photos, iCloud can replace Google Drive, and more.

Unfortunately, there is no direct channel that allows you to automate this switching. You have to manually export and import your Google data, which you can easily do with Google’s Takeout tool.

On the Google Takeout website, select Google Photos and Drive, then click Next to download your data archive from there. Visit the iCloud website on your computer and log in to your account. Go to the Photos tab and click the cloud-like button at the top to import your downloaded pictures and videos.

For iCloud Drive, the steps are the same​​. Return to the iCloud home page and go to iCloud Drive. Click the Import option to upload all the files you got from your Google Drive storage.

>>>>>>>>>>Phone battery

Thanks for reading, hope it helps!

Friendly reminder: If you need to replace the battery of your device, this battery store will be a good choice: www.batteryforpc.co.uk