iPhone in Permanent Low Power Mode: How to Do It and What You’ll Lose

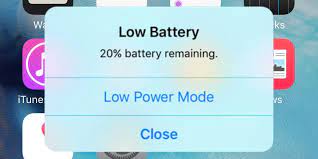
 Here’s every iPhone user’s least-favorite alert: “Low battery. 20% battery remaining,” and the option to tap “Low Power Mode” or enter a state of rejection by tapping “Off.” At least iPhone 14 Pro and Pro Max users now receive low battery alerts via Dynamic Island instead of intrusive pop-ups, but that’s still not a welcome message.

Once your iPhone is charged to 80%, Low Power Mode automatically turns off, but what if you want to keep it on all the time? How long will your battery last, how much faster will it charge, and how will it affect iPhone performance? Let’s take a look below!
What is iPhone Low Power Mode?

Low Power Mode is an iOS setting that disables certain iPhone features to save battery power when the battery is low. When the battery level drops to 20%, your iPhone will ask you if you want to turn on Low Power Mode, then turn it on again at 10%.

Apple says Low Power Mode reduces the amount of power the iPhone uses to extend battery life. You can tell when you are in low power mode because your battery icon will be yellow. Your iPhone automatically turns off Low Power Mode when the battery reaches 80% charge.

What features are disabled in iPhone Low Power Mode?

According to the official Apple support page, Low Power Mode makes the following changes to save battery power:

Turn off 5G (except video streaming), set your iPhone screen to turn off after 30 seconds of inactivity, reduce display brightness, use ProMotion to reduce iPhone display refresh rate, remove some visual effects, pause iCloud photo sync, pause automatic downloads, Pauses email fetching, prevents background app refresh, Low Power Mode also disables watching videos in HDR, turns off the Always On display in iPhone 14 Pro and Pro Max, disables video autoplay, and reduces CPU and GPU performance.

How to turn on iPhone Low Power Mode?

The manual way to stay in low power mode at all times is to put your iPhone in low power mode after each charge. You can turn it on manually by going to Settings > Battery and switching to Low Power Mode. You can also manually turn on Low Power Mode using the iPhone Control Center or Siri.

How to permanently turn on iPhone Low Power Mode?

To automatically keep your iPhone in low power mode all the time, you’ll need to put some thought into making your own personal automation using the Shortcuts app.

There are many ways to use Shortcuts to automatically set Low Power Mode, the easiest way is to turn on Low Power Mode when the battery is below 100%. That way, your iPhone is basically in low power mode all the time, but it can also create backups, complete downloads, and receive updates while it’s plugged in and charged at 100%.

On your iPhone home screen, scroll all the way to the right to get to your app library, then scroll down and tap Shortcuts. Once the app is running, select Automation at the bottom of the screen, then click the blue Create Personal Automation button.

On the New Animation screen, scroll down and select Battery Level. Click on the bottom option Falls below and move the slider all the way to the right 100%. Then click Next. You have set the conditions to trigger the action.

Now create an action to put the iPhone into low power mode. On the Actions screen, click the blue Add Action button. You can then type “Low” into the search box and click Set Low Power Mode, or click Scripting and find it under Device.

Once you have chosen to set up low power mode, it will appear as “Turn on low power mode” on your action screen. Click Next. On the new automation screen below, turn off Ask Before Run to automatically turn on Low Power Mode. If desired, you can request notification each time the automation runs.

Confirm “Don’t ask” and click Done to finish. You are all set. Every time your battery drops below 100%, your iPhone automatically switches to low power mode.

How much power does Low Power Mode save?

The value of Low Power Mode has been debated since the iPhone 9 was released. While some estimates suggest that battery life will be roughly one and a half times longer with Low Power Mode, others show little or no difference in battery usage.

If you’re worried about letting your iPhone battery last longer, you just have to try Low Power Mode yourself and see what the difference is.

How to get out of low power mode

If you find that Low Power Mode doesn’t save battery power, you can turn off the automation by going into the shortcut and turning off Enable this animation. To delete it completely, swipe left on the Low Power Mode automation on the main automation screen and tap the red delete button.

You can also create your own custom version of Low Power Mode by adjusting your iPhone settings to take some of the action that Low Power Mode does.

>>>>>>>>>>>>>iPhone battery

Samsung Galaxy S23 vs iPhone 14: Which flagship will win?

 When the battle between the Samsung Galaxy S23 and the iPhone 14 comes to a head early next year, it may be hard to say which one is the winner. We’ve seen modest upgrades to the iPhone 14, but generally high quality across the board. While it’s not as impressive as the iPhone 14 Pro, it’s still one of the best phones you can buy.

In the other corner, the Samsung Galaxy S23 is the successor to the upcoming Galaxy S22, which is already one of the best Android phones and one of the best phones overall. Rumors sound like not much will change between generations, leading us to expect another great phone, but none can beat the iPhone 14 without being special. This comparison is for the standard iPhone 14 and Galaxy S23 models.

Samsung Galaxy S23 vs iPhone 14: Price and availability

The iPhone 14 arrives in September 2022, starting at $799 for the 128GB model. That’s the same price as past generations of basic iPhones.

According to current rumors, the Galaxy S23 could arrive in January or early February, a little earlier than expected. Pricing is currently unknown, and there aren’t any rumors to fill in the gaps, so we’ll have to check out the background on the current generation. The Galaxy S22 series retails for $800, and we expect the S23 to sell for the same price.

Samsung Galaxy S23 vs iPhone 14: Design and presentation

In keeping with the past two generations of iPhones, the iPhone 14 features a flat 6.1-inch body with a notch on the front for unlocking with facial recognition, and the typical combination of power/volume buttons, Lightning port, and alert sliders around its edges. The back is made of glossy glass and is available in blue, purple, midnight, starlight or product red.

The Galaxy S23 should finally look a lot like the curved Galaxy S22, including maintaining its 6.1-inch size. However, we’ve heard of thicker bezels around the display and a possible new look on the back. Leaked-based renders show a new camera layout, just like the Galaxy S22 Ultra, with separate rear camera lenses.

Apple equipped the iPhone 14 with a sub-FHD 60Hz OLED display, which is a bit disappointing considering how much you’re paying for an iPhone. The Galaxy S22 already offers FHD resolution and a 120Hz refresh rate for its OLED panel, and unless any rumors seem to contradict us, we’re looking forward to seeing these again. While the iPhone 14’s screen is inherently good, we should see the S23 perform much better than the S22’s precedent.

Samsung Galaxy S23 vs iPhone 14: Cameras

The iPhone 14 doesn’t change its camera significantly either. It has three 12MP snappers covering main, ultrawide and selfie characters. New for this year, though, are Photon Engine processing for improved low-light images, autofocus for the selfie camera, and a larger primary sensor with a wider aperture.

The iPhone generally outperforms the Galaxy S22 in our comparisons, but Samsung does have a big advantage in the telephoto camera as well as the main and ultrawide sensors. That’s what Apple only offers Pro iPhones right now, so from a photography standpoint, the S22 offers better value.

We should expect a similar feature from the S23, as it has neither the ultra-wide nor the telephoto camera resolution changes. We haven’t heard rumors of a main camera yet, but we think this will stick with the current 50MP sensor. It may have a 12MP selfie camera instead of 10MP, though, which would help counter the new autofocus iPhone front-facing camera.

Samsung Galaxy S23 vs iPhone 14: Performance

It’s unlikely we’ll see the Galaxy S23 outperform the iPhone 14, even with the latter’s year-old A15 chipset. But the A15 still beats the Galaxy S22’s Snapdragon 8 Gen 1 chipset in benchmarks.

As for the S23’s chip, it’s likely to feature only the Snapdragon 8 Gen 2 chip globally, or the Exynos 2300 chip in most models sold outside the US. Either way, it’s still unlikely to beat the iPhone 14 in benchmarks.

In terms of storage, the iPhone 14 can be configured with 128GB, 256GB or 512GB of storage. We expect the S23 to come with 128GB or 256GB, just like the S22.

Samsung Galaxy S23 vs iPhone 14: Battery and charging

Apple has increased the battery size of the iPhone 14, but not by much. Still, its battery life is decent, and it’s more than an hour faster than the Galaxy S22, even with the S22’s display stuck at its base 60Hz.

The rumor mill claims that the S23 will have an increased battery, but that alone won’t be enough to beat the iPhone 14’s excellent battery life. If Samsung wants to keep up, Samsung will need to improve its energy efficiency elsewhere.

Samsung will still have the charging speed advantage, though. That’s still faster than the iPhone 14’s 20W charge, despite the assumption that the S23 will continue to charge at 25W for a year. The iPhone 14 can also charge wirelessly at 15W, as can the Galaxy S22.

>>>>>>>>>>>>Phone battery

Make your iPhone 14 Pro’s always-on display even better with this simple trick

 Apple’s new Always-On Display for the iPhone 14 Pro lineup, the feature only launched on iPhones this year, but the always-on display technology has been around for years on Android devices.

For example, on the Samsung Galaxy S22, the AOD exists as a separate entity from your usual lock screen, showing you limited information, such as the date and time, while your phone is still asleep. It works almost like a productivity feature, letting you quickly scan your phone for important stuff without bogging you down.

On the iPhone 14 Pro and iPhone 14 Pro Max, Apple redesigned what the always-on display should be, for better or worse, depending on who you ask.

In Apple‘s vision for iOS 16, the always-on display is essentially a dimmed version of the lock screen: the date and time light up, but you can still see notifications piled up at the bottom of the screen, and your wallpaper has a little bit of it.

For some, that always-on display feature might be perfect. It lets you see what’s going on without having to tap the screen or wake your phone.

But for me, it’s a big “but”. If you think of the always-on display more as a productivity feature, the iPhone 14 Pro and Pro Max don’t do that. It’s a little too distracting for me, with all the notifications piling up and waking up the screen, and it’s too bright, which is a problem if you’re sleeping with your iPhone on your nightstand.

Luckily, you can fix both by toggling a feature that not only completely blacks out most of your display, but also stops all notifications from distracting you — and it’s more than you might think more obvious.

How to make the iPhone‘s always-on display dimmer on iOS 16

To make your always-on display darker and less distracting, we’ll use Focus, which helps reduce distractions by muting most notifications on your iPhone, while allowing individual profiles and customization.

In the Settings app, go to Focus, then choose a profile: Do Not Disturb is the easiest option, but you can also choose Personal, Sleep, or Work. In any focus profile of your choice, tap Options, then toggle on Dim Lock Screen. Whenever this particular profile is enabled, your lock screen will dim, darker than usual.

To open your Focus profile, swipe down from the top right corner of the screen to close Control Center, then tap Do Not Disturb or hold your finger on Do Not Disturb to open your other Focus profiles.

With the correct Focus profile selected, your iPhone 14 Pro or Pro Max’s always-on display should now be completely black, showing only the date, time, and the Do Not Disturb icon.

>>>>>>>>>>>>iPhone battery

How to connect AirPods to iPhone, iPad, Mac, PC, and more

 Many people around the world love AirPods for their light weight, ease of use, amazing noise cancellation and sound quality.

So, we’ll show you how to automatically connect to your iPhone, iPad, or Mac device. Whether you have an iPhone SE or iPhone 14 Pro or an iPad Air or iPad Pro, you can connect your AirPods to them. We’ll also see how to manually connect them with an Android device via Bluetooth settings. Let’s take a look below!

How to connect AirPods to iPhone

The first and main thing to look out for when trying to connect your AirPods to your iPhone is to make sure your iPhone is updated to the latest version of iOS. Plus, the AirPods automatically connect with the iPhone, so the process is simple.

Just follow the step-by-step guide below to prompt this connection:

1. Unlock your device and leave it on your iPhone’s home screen.

2. Hold your iPhone close to the AirPods in the charging case and open the lid.

3. If you plan to reconnect your AirPods with your iPhone, press and hold the button on the back of the case to reset them.

4. A prompt will appear on the iPhone screen. Click Connect. When they’re connected, the status lights on the case flash and then stay the same. After following the on-screen instructions, tap Done.

How to connect AirPods to iPad

Connecting AirPods to an iPad is similar to connecting them to an iPhone. As long as you are also signed in with your Apple ID. The setup process should display a message on your device that the AirPods have automatically connected.

To confirm this, you can follow the guide above for connecting your AirPods to your iPhone. If it doesn’t work, try this:

1. Make sure bluetooth is turned on from the bluetooth menu in settings

2. Swipe down from the top right corner to navigate to Control Center. The audio controls should show an image of the connected AirPod.

3. If your AirPods are still not connected, press and hold the music control icon.

4. Tap the music source icon, then tap your AirPods.

This should do the trick.

How to connect AirPods to an Android phone

To manually connect your AirPods to your Android device, you must go to the Settings app on your device and follow these steps:

1. Navigate to your phone settings and select Bluetooth settings.

2. Put the AirPods in the charging case close to the phone and open the case cover.

3. Press and hold the button on the back of the case until you see a flashing white light.

4. Select AirPods from the list of Bluetooth devices on your phone’s screen and follow the on-screen instructions to pair them with the device.

While you can pair AirPods with non-Apple devices, you should be aware that these devices may reduce the quality of audio streaming to your AirPods. Significant sound enhancement and noise reduction may also not be available on some Android devices, mainly due to Apple’s proprietary version.

How to connect AirPods to MacBook

If you have a registered Apple ID, your AirPod is likely already listed on the Bluetooth menu bar or on the volume control buttons on your Mac. If not, follow the guide below:

To pair your Airpods with your Mac, disconnect them from your iPhone, then follow these steps:

1. Put the AirPods in the charging case and open the lid.

2. Press and hold the settings button or noise control button on the back of the charging case. Do this until you see the white status light blinking.

3. Go to the Apple menu bar on your Mac and select System Preferences.

4. Click on Bluetooth and select your AirPods in the list of devices displayed on your Mac. Then, click Connect.

Note: You can enable a preference to automatically connect the earbuds to your Mac. Additionally, users whose AirPods support Siri voice commands can enable it on their Macs.

How to connect AirPods to PC/Laptop (Windows)

Here’s how to connect your AirPods to a Windows PC:

1. Make sure your bluetooth is turned on by navigating from Settings to Devices

2. Click Add Bluetooth or other device, then click Bluetooth.

3. Open the lid of the AirPods case with your AirPods and press and hold the small button on the back of the case for a few seconds until you see a flashing white light.

4. Your earbuds should appear on your computer screen below the list of devices available for pairing. They may initially show up as Headphones, then switch to AirPods.

5. Click on the AirPod name, the lower right corner of the screen will show that the connection is successful.

>>>>>>>>>>>>>>>>>AirPods battery

Thanks for reading, hope it helps!

Friendly reminder: If you need to replace the battery of your device, this battery store will be a good choice: www.batteryforpc.co.uk

Missing some iOS 16 features? The age of your iPhone could be the culprit

 The new iOS 16 is now available for compatible iPhones, which means if you own an iPhone 8 or newer, you can download it right now. Unfortunately, even if your iPhone is capable of running iOS 16, that doesn’t mean it’s getting all the cool new features like a battery percentage icon in the status bar or the new drag-and-drop photo cropping trick.

Depending on your iPhone’s age and processor, your software update may be missing some of the new settings and features that others enjoy on iOS 16. Here’s how to find out if you might be missing any of these features too, let’s take a look!

Battery percentage in iPhone status bar

Apple used to show off battery percentages in the status bar until the iPhone X and notch were released. In iOS 16, the battery indicator has been reintroduced and redesigned, but not for everyone with the latest update.

According to this Apple support page, the status bar battery feature has been excluded from the iPhone XR, iPhone 11, iPhone 12 mini, and iPhone 13 Mini. If you want to see a visual indicator of battery level, you can add a battery widget to the home screen, or swipe down to see the numbers in the control center.

Elevate subject from photo background

On iOS 16, you can hold your finger on a clear subject in a photo to crop it out, then drag and drop it somewhere else, like in your notes, emails, or text messages. It does this using Apple’s Visual Look Up feature, which recognizes objects in photos, but both features require a newer iPhone model.

This feature is only available on iPhones with A12 Bionic and above (starting with iPhone XS/XR), not iPhone X and iPhone 8 series.

Wallpaper depth effect on lock screen

With the release of iOS 16, the lock screen adds major customization tools, allowing you to use fonts, colors, wallpaper profiles, widgets—and new depth effects. As long as your wallpaper has a clear theme in the foreground, the time on the lock screen may appear below the object, giving your wallpaper a layered effect. However, the feature also uses Visual Look Up to identify your theme, so it won’t work on every iPhone.

Again, this feature is only available on iPhones and later with the A12 Bionic chip, so iPhone XS/XR and later.

Live Text Copy text from video

Introduced in iOS 15, Live Text on iPhone allows you to copy text from an image and paste it elsewhere. In iOS 16, the feature has received an update, and now you can also copy text from paused videos, but only if you have a specific iPhone.

This feature is only available on iPhone XR/XS and later.

New and improved dictation experience

In iOS 16, Apple has redesigned how dictation works, making it easier to combine speech-to-text and keyboard for a smoother experience when sending text messages and drafting emails. This feature uses on-device machine learning, which unfortunately is not available on all iPhones.

Again, this feature is only available on iPhones with the A12 Bionic chip and above, which includes the iPhone XS/XR and above.

Live captions for FaceTime calls and videos

Live Captions for iOS 16 creates live captions for any video playing on your iPhone, whether it’s in your text messages or camera roll, or even a FaceTime call. The new accessibility feature is designed to improve communication for the hearing impaired, but not everyone will get the changes that enable it.

Like most of the features on this list, it’s only available on iPhone models with the A12 Bionic chip and above, which includes the iPhone XS/XR and above (excluding the iPhone 8 series and iPhone X).

Additional features not available on all iPhones running iOS 16

The above features aren’t the only new or updated features that won’t be on every iPhone with iOS 16. Here is the full list of missing features and which iPhone models are included:

Blur foreground objects in portrait photos: Available on iPhone 13 and iPhone 14.

Use your camera to track your medications in the Health app: iPhone XS/XR and later.

Hang up with your voice and other Siri improvements: iPhone XS/XR and later.

Use the camera to detect and describe nearby objects, such as doors: Available on iPhone 12 Pro, iPhone 13 Pro, and iPhone 14 Pro.

>>>>>>>>>>>>>iPhone battery

Got a new iPhone 14? This is the easiest way to transfer data

 If you bought one of the new iPhone 14 models today, you’re probably ready to tear open the box and start experiencing all the new features of iOS 16. While getting a new phone is exciting, take the time to make sure your new iPhone 14 is set up to your liking.

Depending on your situation, Apple offers several options for transferring data from iPhone to iPhone. For example, you can set it up as brand new, but you’ll start from scratch and no settings, messages, photos, apps, or accounts will be transferred. There’s also the option to transfer everything from your current phone to iPhone 14 — even if you’re a current Android user. Check it out as we explain four different ways to restore your phone from a recent backup of your current iPhone!

1. Restore the most recent iCloud backup to your new iPhone

The easiest and quickest way to set up a new iPhone is to restore from a recent iCloud backup. When you’re through the initial setup process, tap Restore from iCloud Backup, sign in with your Apple ID, and select the most recent backup of your old iPhone.

If the backup is more than a day or two, I recommend taking a few extra minutes to create a new backup. To do this, open the Settings app on your old phone and search for iCloud Backup (click the icon), then select Backup Now. When you’re done, go back to your new iPhone and select the backup you just created as the backup you’d like to restore from.

Your phone will then restore your settings and preferences, and you’ll be able to start using it in about 15 minutes while it finishes downloading installed apps. Once everything is restored, you will need to log back into any accounts you added to your phone, and go through your apps and make sure you are still logged in.

2. Use Apple’s direct transfer method

During setup, you’ll be asked if you want to transfer apps and information directly from your old iPhone to your new iPhone.

The tool is easy to use. Make sure you have two phones, preferably plugged in and charged, to make sure they don’t drain the battery, Wi-Fi connection and enough time to complete the process. The more information you have on your phone, the longer it will take.

3. Transfer data to iPhone using Mac or PC

The method I personally use with every new iPhone is to restore from an encrypted backup using a Mac or PC. Not only does this process transfer all your apps, settings, and preferences, it also means you don’t have to log into the myriad apps on your phone.

Before using this method, you need to create an encrypted backup of your current iPhone. I know this might sound intimidating or overly complicated, but it just means you have to check an extra box and enter your password.

On a Mac, you’ll use the Finder to back up your old iPhone. We outline the steps when Apple kills iTunes. Just make sure to check the Encrypt backup box and enter a password you will remember when prompted. Get your Mac to work and create a backup file.

On a PC, you’ll need to use iTunes to create backups. The process is explained here. Again, you need to make sure the Encrypt backup box is checked and enter a password.

To restore your new phone, open Finder or iTunes and connect your phone to your computer. Click Trust when prompted, then follow the prompts to select the backup you just created as the backup you want to use to restore your phone.

Once done, your new phone will be exactly the same as your old phone, and you won’t need to spend any time logging into apps or random accounts.

4. Android users? This app is your answer

Apple doesn’t list many Android apps on Google’s Play Store, but Move to iOS is one of them. This free app will connect your Android phone to your new iPhone and allow you to transfer your most important information from one phone to another.

>>>>>>>>>>>>>>iPhone battery

Thanks for reading, hope it helps!

Friendly reminder: If you need to replace the battery of your device, this battery store will be a good choice: www.batteryforpc.co.uk

iPhone 14 Pro: Everything you need to know

 Apple’s new iPhone 14 Pro and iPhone 14 Pro Max feature a new screen design, ditching the familiar notch and replacing it with a pill-shaped circular cutout on the screen, a sensor array that houses Face ID and cameras, a proximity sensor Now behind the monitor.

Apple calls this created long pill shape a dynamic island, and it expands and contracts based on what you’re doing on your phone. It can also display things like sports scores when you’re in other apps.

The iPhone 14 Pro and 14 Pro Max also have slightly slimmer bezels, but still measure 6.1 inches and 6.7 inches, and are the first iPhones we’ve seen on an Android phone in the past few years to support the always-on display feature, allowing even the screen Not fully opened, information such as time, date and notification can be seen at a glance.

Controversially, the iPhone 14 Pro will not have a SIM card tray in the US, meaning everyone who gets a SIM card will have to set up an eSIM.

What are the features and specifications of the iPhone 14 Pro and iPhone 14 Pro Max?

The latest high-end iPhones are the only models this year to feature the new A16 Bionic chipset. Apple says its 6-core CPU is “40 percent faster than the competition,” but doesn’t mention any competitors or compare it to last year’s A15.

The regular iPhone 14 and 14 Plus stick with the A15 from the iPhone 13 series, retain the now-classic iPhone notch, and don’t have an always-on display or 120Hz refresh rate.

Always-On Display is only available on the Pro models, and is in sync with the release of iOS 16, the main new feature of iOS 16 is widgets and generally more customization of the iPhone’s lock screen. That dynamic island has a weird name, but it’s funny because Apple’s trying to hide the holes in the display while making them useful and even playable with software animations around them.

The iPhone 14 Pro and 14 Pro Max are the first iPhones to feature more than 12Mp main cameras, up to 48Mp and a 65% larger sensor than the iPhone 13 Pro. The new phones use Apple’s new software intelligence called the Photonic Engine, which it claims can further improve optical performance compared to the iPhone 13 Pro.

There’s also a larger sensor 12Mp ultra-wide-angle lens that claims to be able to absorb more than three times as much light, which Apple says helps its macro photography. The telephoto lens is also 12Mp.

Apple says the A16 chip is needed to take full advantage of the Pro’s camera capabilities, although the low-light improvements are clearly thanks to new hardware, including a new front-facing camera with an f/1.9 aperture. The camera also features autofocus, a first for an iPhone selfie camera.

A new Action Mode aims to recreate what a physical gimbal device does for stabilized video capture, while Movie Mode, introduced on the iPhone 13, can now record in 4K. These are incremental upgrades to the smartphone cameras already done on the iPhone 13 Pro, but it’s interesting that Apple ended up going with a larger megapixel count on its main lens.

The iPhone 13 Pro Max has the best battery life we’ve seen in a smartphone, with Apple citing 28 hours of video playback. The company only promises an additional hour of video playback on the 14 Pro Max, while it says the regular 14 Pro can get 23 hours of playback.

The Pro models, as well as the regular iPhone 14 and 14 Plus, also get satellite emergency SOS for the first time. This allows people to make calls to emergency services without a cellular or WiFi connection. It also allows you to share your location with friends and family in the Find My app. Additionally, every new iPhone 14 comes with a car crash detection feature that can call emergency services.

The satellite service will launch in November and will be free for two years on iPhone 14 models. It’s also only available in the US and Canada.

>>>>>>>>>>>>iPhone battery

Samsung Galaxy S22 beats iPhone 14 in four major ways

 The iPhone 14 is here, and it’s already one of the best phones. You got the same great processor in last year’s iPhone 13 Pro, and the improved camera is an interesting new video action mode. New safety features such as emergency SOS and collision detection via satellite are in development, making this flagship even more compelling.

But as you’ll see in our iPhone 14 review, there’s definitely room for improvement. The Samsung Galaxy S22 has answered some of our criticisms of the iPhone 14, especially when it comes to the display and camera. Here’s how the Galaxy S22 beats the iPhone 14.

Galaxy S22 sports 120Hz display

Apple reserved the 120Hz ProMotion display for the iPhone 14 Pro and iPhone 14 Pro Max. The 120Hz screen provides smoother scrolling, smoother animations and better gaming experience. Unfortunately, the iPhone is sticking with a 60Hz OLED screen.

Meanwhile, the Galaxy S22 offers a 120Hz display that can be scaled down to 48Hz to save power. Plus, Samsung’s phones feature an always-on mode that lets you quickly check the time, battery status, and more without turning the phone on. This is another feature exclusive to the iPhone 14 Pro.

Galaxy S22 has telephoto zoom

Every time I bring this up, some people say they don’t care about zooming, but a telephoto lens gives you more shooting flexibility.

The Galaxy S22 offers 3x telephoto zoom and 30x space zoom so you can get closer to your subjects. The iPhone 14 doesn’t have a telephoto zoom, which is only available on the iPhone 14 Pro and Pro Max.

Galaxy S22 has faster charging (and USB-C)

The iPhone 14 uses the same 20W USB-C to Lightning charging as the iPhone 13. Therefore, the charging speed is not improved. When charging a depleted iPhone 14, we hit 54% in 30 minutes and 27% in 15 minutes. The Galaxy S22 and its 25W charger hit 30% and 60% in 15 minutes and 30 minutes, respectively.

It’s not a huge difference, but the Galaxy S22 still has the edge. Plus, you don’t have to worry about having a USB-to-lighting cable lying around.

Galaxy S22 has a SIM card tray

While phone makers are steadily adopting eSIM capabilities to add services to their phones, Apple’s move to ditch the SIM card slot entirely won’t be embraced by everyone. Granted, it’s easy to add a line to the iPhone 14, and you can have multiple lines active at the same time, which is great.

But some carriers have yet to adopt eSIMs, and some international travelers appreciate the convenience of simply inserting a new SIM card when arriving in a different country. Galaxy S22 gives you peace of mind.

>>>>>>>>>>>>>Phone battery

Now that you have iOS 16 installed, do these 3 things first

 Apple released iOS 16 on Monday, and if you haven’t installed the latest mobile software update on your compatible iPhone, there are plenty of great new features to explore, such as unsend and edit text messages and view all your saved Wi-Fi passwords .

On iOS 16, however, there are three things you should definitely do first, all of which will improve your experience on your iPhone. Here’s what you need to know.

1. Create a new wallpaper option for your lock screen

Apple completely redesigned the lock screen on iOS 16, allowing you to fully customize various elements such as date and time, adding widgets to keep you updated on the weather and top news, and creating multiple wallpaper profiles that you can easily switch between To and from. Then customizing your lock screen should be the first thing you do after installing iOS 16.

To customize the lock screen, press your finger anywhere on the screen while the screen is locked, then unlock your device when prompted. Once this is done, a brand new lock screen will appear where you can shuffle and customize various lock screen wallpapers.

If you click the + button in the lower right corner to create a new wallpaper, you can browse a variety of Apple wallpapers, including weather and astronomy, emoji, and more. Some of these wallpapers include built-in widgets, but you can also add them later.

If you choose to upload a photo of yourself, look for one that clearly shows a person or object in the foreground. If you adjust your image just right, you’ll be able to use the new depth effect feature, which defers time to the focal point of any object, creating a layered look. You can then click on any lock screen element to customize the appearance. If you click Add Widgets, you can add tiny transparent widgets to that part of the wallpaper.

When done, tap Add and choose whether to use the wallpaper only on the lock screen or on the home screen. Here’s how Apple changes the lock screen on the iPhone 14.

2. Set up a Focus profile so you’re not distracted by notifications

Last year, Apple introduced Focus, an evolution of Do Not Disturb, which you can configure to receive only important notifications and alerts, and block everything else. But productivity features have been heavily redesigned on iOS 16, and if you want to reduce distractions on your iPhone, it’s worth checking out and setting it up.

In Settings, go to Focus and select the profile or profiles you want to configure. In your Focus profile, you can choose to receive notifications from certain people and apps, show silent notifications on your lock screen, hide notification badges, and have them automatically change your lock screen and home screen wallpaper when your Focus profile is open.

Additionally, you can schedule when the Focus profile opens and closes. If you use the Health app, you can retrieve your sleep information to choose the appropriate Focus schedule.

Finally, you can use Focus filters to customize how applications and system settings interact with you. For example, you can add app filters to Safari so that only certain tabs appear, or to the Mail app so that only some email messages are sent to you. For system settings, you can add a filter to automatically turn on dark mode and low power mode when you open a Focus profile.

Once you’ve completed your Focus profile, you can swipe down from the top-right corner of the screen to access Control Center, then tap the Focus control to open any profile you’ve created.

3. Set up iPhoto to delete duplicate photos and videos to free up storage space

If you need to quickly clear some space on your iPhone, Photos now has a built-in feature that searches your camera roll for any duplicate photos and videos. This is a great way to not only do some cleaning, but also delete files that are taking up storage space on your iPhone.

In Photos, go to the Albums tab, swipe all the way down and tap Repeat. You can now browse through all your photos and videos and click Merge for each set of duplicates, or click Select > Select All > Merge to remove all duplicates at once. At the bottom of each photo or video, you’ll see the size of the file, so you’ll want to prioritize larger files.

>>>>>>>>>>>>>iPhone battery
Angry about the iPhone’s new search button in iOS 16? Here’s how to get rid of it

 You can download iOS 16 now, and like every new major software update for the iPhone, there are some features and settings you’ll absolutely love and some you might not. If you got a new iPhone 14, this will also apply to you.

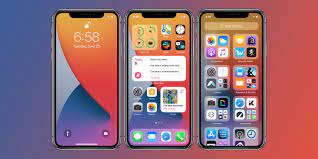
In iOS 16, the addition of a Search button at the bottom of the home screen, just above the dock, caused a stir. Many people are not happy with the new home screen setup.

While the search feature on iOS is useful for quickly finding text messages, files, settings, websites, and photos, the new button is placed in a place where it’s easy to accidentally tap, especially when you’re scrolling through the various Home screen pages. When you inadvertently click the new search button, the search function will appear full screen. Then you have to swipe it out to get back to your home screen – which is annoying.

Fortunately, there is an easy workaround to get rid of the new search button on the home screen, check it out below!

How to get rid of the new search button on iOS 16

On an iPhone running iOS 16, launch the Settings app, go to the Home screen and turn off the “Show on Home Screen” button under Search. Instead of the Search button on your home screen, you’ll now see dots that represent your various home screen pages. If you press it, nothing happens.

If you want to access the search function after removing the home button, you can access it the traditional way: swipe down from anywhere on the screen.

>>>>>>>>>>>>>>iPhone battery