How to AirPlay to Apple TV

 If you know how to AirPlay to Apple TV, you can enjoy content from your iPhone on a bigger screen.

When you know how to use AirPlay to play Apple TV, you can start thinking about how to take advantage of this powerful feature. For starters, you can use it to display what’s on your iPhone or iPad screen without passing it. You can also switch from watching videos on your iPhone to watching on a larger screen.

Here, we’ll show you how to do both while exploring how to stream AirPlay audio to Apple TV as well. It’s really easy to do and requires almost no setup other than making sure your iPhone and Apple TV are on the same network. All that’s left is a case of pressing a few buttons to start and stop.
How to connect to Apple TV via AirPlay: Connect to Wi-Fi

First, make sure your iPhone and Apple TV are connected to the same Wi-Fi network.

1. On your iPhone, launch the Settings app and tap Wi-Fi, then turn on the Wi-Fi button and select a network.

2. On Apple TV, launch the Settings app, scroll down and click Network, then select Wi-Fi and select Network.

How to AirPlay Apple TV: Screen Mirroring

Here we will mirror your iPhone screen on Apple TV using AirPlay. But be warned: anything you do on your iPhone screen will show up on the TV connected to your Apple TV device, so be careful opening any private apps like banking or social media while mirroring is active.

1. Swipe down from the top right corner of the screen to open Control Center (unless you have a TouchID iPhone, in which case swipe up from the bottom edge).

2. Now tap the Screen Mirroring icon.

3. Select your Apple TV from the menu.

4. Tap anywhere outside the menu box to return to Control Center and use your iPhone normally. All your actions will be reflected on Apple TV.

5. To end the session, launch Control Center again and tap the Screen Mirroring icon.

6. Click Stop Mirroring.

How to Play Apple TV via AirPlay: Streaming Video

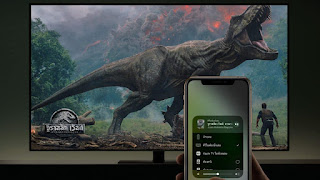
If you want to watch a video on your iPhone on a bigger screen, you can use AirPlay to stream it to your Apple TV.

1. Find a video (perhaps on YouTube) and play it. Now click on the video and select the Stream icon.

2. You will see a list of devices. For Apple TV, select AirPlay and Bluetooth devices.

3. Tap the name of your Apple TV device (we call our TV 4K but you may have a different name).

4. The video will automatically start playing on your Apple TV. You’ll be able to use the on-screen controls to manage how the video plays. (You can use the Apple TV remote to pause and play video, go forward or backward, select subtitles, change audio, or change screen size.)

5. You can end AirPlay streaming at any time. Just pick up your iPhone and tap iPhone on the menu. The video will continue to play on your iPhone.

How to Play Apple TV via AirPlay: Streaming Audio

If you’re playing music on your iPhone and want to listen to it on your TV, you can also AirPlay the song to your Apple TV. If your TV has good speakers, this may be better than using headphones or your iPhone’s speakers.

1. You have two options. You can play songs in the Music app on iPhone or from other places. In the latter case, swipe down from the top right corner of the screen to open Control Center (unless you have a TouchID iPhone, in which case swipe up from the bottom edge).

2. Now tap the AirPlay icon.

3. Now select Apple TV from the device list and the song will start playing on your TV.

4. To stop playing on Apple TV, just select your iPhone again.

Go ahead. You now know how to stream Apple TV via AirPlay.

>>>>>>>>>>>>>Apple battery

The fastest way to force restart your Mac if it freezes

 If your MacBook, MacBook Air, or MacBook Pro freezes completely and you don’t know what to do next, you might consider force restarting your Apple laptop. Often used as a last resort, a force restart is probably the fastest (and only) option to get your Mac up and running again. Let’s take a look below!

How to quickly force restart your Mac

Before taking this extreme, try restarting your Mac the classic way: click the Apple symbol in the upper-left corner of the screen and select Restart. If necessary, you can also force shut down your Mac by holding down the power button until your Mac shuts down.

If these methods don’t work for you, or your screen and cursor are stuck and you can’t select anything, try the force restart options below.

1. Press and hold the Command and Control keys with the power button.

The power button is also a Touch ID‌ / eject button, depending on the Mac model.

2. Your Mac screen should dim and your Mac should restart.

3. Log in to your computer and continue using it normally.

Note: On the 2018 MacBook Air and the new 14-inch and 16-inch MacBook Pros, the power button doubles as the Touch ID button in the upper right corner of the keyboard. On any MacBook Pro with a Touch Bar, it’s the “Touch ID” surface to the right of the Touch Bar.

What happens when you force restart?

Force restart is a quick solution to get your computer back to normal. Before you force restart your MacBook, rest assured that this process won’t wipe your computer’s data. It just restarts your device. However, when you force restart, you may lose unsaved changes in open documents, as your Mac will shut down completely. The screen will go black and when the machine restarts you will have to log back into your account.

How to Force Quit Apps on Mac

If an application you’re using freezes and your Mac is otherwise fine, try force-quitting the application instead of your laptop. You can hold down the Option (⌥) key, then right-click the problematic application icon in the Dock and select Force Quit. Or you can press all three keys at the same time: Option, Command, and Escape. The Force Quit window will open. Select the app you want to quit, then click Force Quit. You can also access the Force Quit panel from the Apple menu in the corner of the screen.

>>>>>>>>>>>Mac battery

Hope it helps you!

Friendly reminder: If you need to replace the battery of your device, this battery store will be a good choice: www.batteryforpc.co.uk

OLED iPad: Here’s everything we know

 After launching iPads with LCD and miniLED display technology over the past decade, Apple is said to be preparing to launch an OLED iPad. While other competitors already offer tablets with OLED displays, why is Apple taking so long, why it plans to do it now, and which models will get the perfect blacks that this technology features.

Why is Apple now preparing to launch an OLED iPad?

Apple analyst Ming-Chi Kuo suggested the first OLED iPad would be launched in 2022, but then said that plan had been abandoned. In a later report, the analyst said that Apple still expects to launch an OLED iPad sometime in the near future.

DSCC’s Ross Young recently talked about why, after so many years, Apple decided to make an OLED iPad – the answer is simple. Costs are falling. Young believes that not only will the performance of OLED panels improve in the next few years, but the cost of large factories will also come down, thanks to tandem stacking and blue phosphorescent emitters.

When should we expect the OLED iPad to be released?

According to DSCC Ross Young, Apple will focus on this iPad starting in 2024. The Elec said in a report last year that Apple is slowly transitioning to four display technologies for its products.

It started with IPS LCD with traditional backlight, IPS LCD with miniLED backlight, now used in 12.9-inch iPad Pro and 14-inch and 16-inch MacBook Pro, and in the near future, OLED.

The report believes that the first OLED iPads—and even OLED MacBooks—are expected to appear around 2023-2026. Today, 2024 seems like the perfect time for an iPad, and 2026 is the perfect time for a Mac.

After this transition, Apple will eventually move to microLED: despite the similar name to miniLED, it’s a completely different technology. It’s actually a more complex version of OLED. It’s brighter, uses less power, and doesn’t suffer from burn-in. Apple’s interest in microLEDs dates back to at least 2014, and while there are some signs of progress, the technology is still in very early stages of development. Like OLED, it’s likely to appear on the Apple Watch first, followed by iPhones, iPads, and Macs.

Which iPads will have OLED displays?

When analyst Ming-Chi Kuo first said Apple was preparing an OLED iPad, he expected the company to apply the technology to the iPad Air and then to the base model iPad and iPad mini, as it would focus miniLED technology on the iPad on the Pro.

But with DSCC Ross Young pointing out that the technology will improve a lot over the next few years and become cheaper, Apple may be readying a new generation of iPad Pros with OLED displays, followed by other iPads.

Taking the iPhone as an example, Apple is said to provide different kinds of OLED panels for the 14 series. Elec Report: TheElec has learned that Samsung Display will apply different grades of material on the OLED panels it manufactures for the upcoming iPhone 14 series, depending on the model grade.

It will use its latest and most advanced material set for higher-tier iPhone 14 models, and the previous-generation material set for lower-end models, the sources said. They said the move was to save costs.

With that in mind, it would make sense if the company followed the same trend across its entire iPad lineup.

We’re at least a few years away from seeing Apple launch an OLED iPad. While the time has not come, the company is expected to launch another iPad Pro with miniLED technology.

>>>>>>>>>>>iPad battery

How to use Stage Manager on iPad

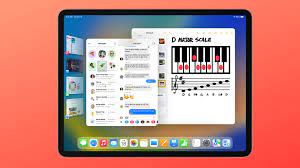
 With the release of iPadOS 16 comes Stage Manager, one of the biggest new features in Apple’s latest tablet-centric operating system update — but not all iPad owners.

For those lucky enough to own a supported iPad, Stage Manager wants to reinvent iPad multitasking, bringing it closer to a traditional desktop experience, with resizable windows and multiple apps running side by side. Here’s how to use Stage Manager on iPad with iPadOS 16.1 and later.

How to activate stage management on iPad

While you might think that Stage Manager will be activated once you upgrade a supported iPad to iPadOS 16.1, that’s not actually the case. Instead, the feature is disabled by default, but can be easily enabled through the Settings app and Control Center.

Via the Settings app

1. Open the Settings app on your iPad.

2. Tap Home screen and Multitasking.

3. Click on Stage Manager (the option at the bottom of the list).

4. Open Use Stage Manager on the iPad.

If this is the first time you’ve enabled the Stage Manager feature, you’ll see a popup explaining briefly how it works.

From this section of the Settings menu, you can also hide Recent Apps and the iPad Dock, providing additional screen real estate for various app windows. To do this, simply uncheck “Recent Apps” or “Dock” from the “Stage Manager” layout section.

Via control center

If you prefer not to navigate the Settings app, you also have the option to activate Stage Manager on supported iPads through the Control Center:

1. Swipe down from the upper right corner of your iPad to access Control Center.

2. Click on the Stage Manager icon (the square with three small squares on the left) to activate.

As with the Settings app, you can also hide the Dock or recent apps from Control Center – just long-press the Stage Manager icon to access the options.

Resizing applications and moving windows in Stage Manager

A great feature of Stage Manager is the ability to resize and move your application windows on the fly, allowing you to create the perfect multi-application workspace.

To resize an application:

First press and hold the indicator displayed in the lower right corner of the application, then move your finger/cursor to resize the window.

The app’s layout should change according to the size and orientation you choose, so try out the various layouts available for your favorite apps.

Moving windows is easier: just tap and hold the top of an app window, then drag the app around on the screen.

Open multiple applications in the stage manager

Of course, the big draw of Stage Manager is the ability to use applications side-by-side, and it’s easy to do:

1. Open the first app you want to use.

2. Drag the second app you want to use from the Dock or from the Recent Apps section. You can do this a third time, but depending on the size of the iPad display you’re using, it might start to get a little cramped.

It’s worth noting that this method also works with multiple windows running the same application.

When multiple applications are open at the same time, they are automatically grouped. This means tapping the group from Recent Apps or the multitasking window will open all selected apps in the layout you were originally using.

How to Disable Stage Management on iPad

If you’ve decided you’ve had enough of Stage Manager and you just want to use Apple’s standard, perfectly functional split-screen multitasking, the quickest way to disable Stage Manager is via Control Center: swipe down from the top-right corner of the iPad display Swipe to access Control Center. Click on the Stage Manager icon so it is no longer highlighted/enabled. The stage manager technology should then be disabled, although it can easily be re-enabled at any point in the future via the same icon.

What about external monitor support?

In addition to being able to run applications in Windows like macOS, another great feature of Stage Manager is the ability to connect the iPad to an external display and use it independently of the iPad, just like a laptop or desktop. That’s a huge change, because until now, connecting an external display would only mirror what’s on the iPad.

Sadly, this feature is limited to the latest iPad Pro and iPad Air models with Apple’s M1 or M2 chipsets, and the experience isn’t available on older A-series iPad Pro models.

>>>>>>>>>>>>iPad battery

Here’s how to use gestures to take screenshots on iPad on iPadOS 16

 For years, users have been able to take screenshots of their iPhones and iPads by using a combination of physical buttons. But in the latest versions of iPadOS, such as iPadOS 16, there is another way to quickly take a screenshot of your iPad without pressing any buttons. Read on as we detail how to take screenshots on iPad using only gestures.

Different ways to take screenshots on iPad with iPadOS 16

The most common way to take a screenshot on an iPad is by pressing a hardware button. If your iPad has a Home button, just press and release the Power button and the Home button at the same time. On newer iPad models, press and release the side button and either volume button at the same time to take a screenshot.

But what some people don’t know is that there are also two ways to take screenshots on iPad without pressing any buttons. For example, you can use your Apple Pencil to swipe from the bottom left corner of the screen to take a screenshot on your iPad. But you can use this gesture even if you don’t have an Apple Pencil. That’s it:

1. Open the “Settings” app on your iPad

2. Go to the “General” menu and select the “Gestures” option

3. Make sure “Allow finger swipes from corners” is enabled

4. Select the action you want when swiping from the left and right corners

Other gestures you can enable on iPad

The cool thing about this setup is that it allows you to set up gestures to trigger other actions on your iPad in addition to taking screenshots. For example, you can also swipe your finger or Apple Pencil from a corner of the screen to create a quick note.

At the same time, iPadOS 16 still provides the classic iPad multitasking gestures. These gestures let you use four or five fingers to swipe between open apps or return to the home screen. All of these gestures can also be enabled or disabled at any time by going to the Gestures menu in the Settings app.

>>>>>>>>>>>>>>iPad battery

iOS 16.2 beta just fixed one of the iPhone 14 Pro’s biggest problems

 Apple had a great time adding always-on display to its phones and brought it to the iPhone 14 models with this year’s iOS 16 update. However, not everyone is a fan of Apple’s approach to always-on displays, which have been a mainstay of Android phones for some time.

If you thought the always-on display on the iPhone 14 Pro was too busy, you’ll want to grab iOS 16.2 when the software update becomes available this month. A new version of iOS 16.2 beta has just landed on developers, and it gives users the option to turn off some features that are displayed on the screen when always-on mode is enabled.

Currently, the always-on feature on the iPhone 14 and iPhone 14 Pro Max dims the phone’s lock screen. The clock and lock screen widgets you added to your lock screen will still appear, but so will your wallpaper, and any notifications that were displayed. This is in stark contrast to the way most Android phones present their always-on displays, which feature a clock and possibly some other notifications or widgets.

The iOS 16.2 beta 3 update introduces a way to take Android’s more minimalist approach to your iPhone. You can now turn off the always-on wallpaper and notifications, leaving only the time, data and widgets on a black screen.

You can access this feature by going into the Display & Brightness section of the Settings app. Select the always-on display, and you’ll now see separate toggles that allow wallpapers and notifications to appear on the screen. They join existing switches that allow you to completely turn off the iPhone 14 Pro’s always-on display.

Personally, I like Apple’s different approach to always-on displays, which I think helps them stand out from the way Android phones do it. I also appreciate how the always-on feature takes advantage of the iPhone 14 Pro’s ProMotion display to shrink the refresh rate all the way down to 1Hz so that the always-on feature doesn’t come at the expense of battery life. But I can understand why some people think Apple is going too far.

In addition to the changes to the always-on display, iOS 16.2 also introduces a new Freeform app for real-time collaboration between different Apple devices, as well as a dynamic island upgrade that makes Wi-Fi icons and signal The bar stays visible on your iPhone 14 Pro screen while playing music. Other changes include expanded ProMotion support, tweaks to live events and the ability to bring weather-related news stories into the Weather app.

>>>>>>>>>>iPhone battery

Dell XPS 13 Plus vs Apple MacBook Air M1

 The Dell XPS 13 Plus represents half of the new 13-inch XPS lineup, offering higher performance and a more innovative machine than the more affordable XPS 13. Both are among the best laptops on the market. Apple’s MacBook Air M1 is an old-school option with an affordable design that’s been refined over the years to become one of the best MacBooks you can buy.

While the XPS 13 Plus is more expensive than the MacBook Air M1, the difference isn’t huge. So if you’re looking for portable power supplies, you might have them both on your shortlist. But which is better?

Price and configuration

The MacBook Air M1 is the lowest-priced MacBook you can buy, starting at $1,000 for an 8-core CPU/7-core GPU M1 processor, 8GB of RAM, and a 256GB SSD. You can spend up to $2,000 for the same CPU with 16GB of RAM and a 2TB SSD.

The XPS 13 Plus is a more expensive machine, starting at $1,300 in an entry-level configuration with a Core i5-1240P, 8GB of RAM, a 512GB SSD, and a Full HD+ non-touch IPS display. The most expensive model with a Core i7-1280P, 32GB RAM, 2TB SSD, and a 3.5K OLED or UHD+ IPS panel is $2,400.

While the MacBook Air M1 is still a high-end laptop, it’s less expensive overall.

Design

The design of the MacBook Air M1 is impeccable, as its tapered chassis started the trend for thin and light laptops. The new MacBook Air M2 takes the blocky look of the latest MacBook Pro, but without any issues with the original aluminum machine. And the build quality is second to none. The XPS 13 Plus looks a lot like previous XPS 13 models, with a streamlined aluminum chassis and dual-anodized chrome edges. Open it up, though, and Dell‘s latest looks futuristic with a bezel-less keyboard, LED function keys, and a glossy glass palm rest with a hidden touchpad. It’s also very well-made, and choosing between the designs of these two laptops comes down to very personal taste.

Speaking of the keyboard, the XPS 13 Plus has large keycaps and a comfortable layout with switches that aren’t very deep, but offer quick, precise responses. However, the MacBook Air M1 features Apple’s Magic Keyboard, and it’s the best. The switches are also shallow, but offer a more precise feel and excellent feedback. You can type quickly and accurately on both keyboards, but the MacBook is better. Both laptops also have tactile touchpads, with Dell’s version responsive across the entire surface and mimicking physical buttons. Thanks to Apple’s years of technical experience, the Force Touchpad for the MacBook Air is even better. The XPS 13 Plus has LED function keys that don’t offer any advantage to the user, but are there to keep the chassis slim.

Both laptops are limited to two USB-C ports with Thunderbolt 4, but the MacBook Air M1 retains the 3.5mm audio jack that the XPS 13 Plus ditched. Meanwhile, the Dell has more advanced wireless connectivity. One advantage of the XPS 13 Plus is its ability to natively drive two external displays, while the MacBook Air M1 is limited to just one.

Finally, both machines feature 720p webcams, while the XPS 13 Plus has an IR camera that enables passwordless Windows 11 Hello logins via facial recognition. The MacBook Air M1 uses the Touch ID fingerprint reader on the power button. Both methods are fast and reliable for logging in.

Display and Audio

The MacBook Air M1 features a 13.3-inch 16:10 Liquid Retina IPS display with a resolution of 2,560 x 1600. It’s great for productivity work, with adequate brightness and contrast, and decent colors. However, the XPS 13 Plus’ 13.4-inch 3456 x 2160 OLED touch panel is spectacular. It’s just as bright, but with incredibly broad and accurate colors and strong contrast with jet blacks.

The XPS 13 Plus also has a choice of Full HD+ non-touch and touch IPS displays and UHD+ touch IPS displays. However, there is no doubt that OLED displays have advantages in terms of productivity, creativity and media streaming needs. Both laptops have dual speakers that deliver clean sound with adequate volume.

Portability

The XPS 13 Plus is smaller in all dimensions than the MacBook Air M1, and a little lighter. Where the MacBook wins out is the efficiency of Apple’s M1 processor. In our web browsing and local video battery tests, the MacBook Air M1 lasted nearly twice as long as the XPS 13 Plus and lasted more than a day of work, while the Dell didn’t.

The MacBook Air M1 is simpler but cheaper

You can get several of the XPS 13 Plus’ innovations for a higher price, especially its beautiful OLED display, and its better productivity performance. However, you’re paying more, and the MacBook Air M1 has better battery life and just as good build quality.

If you’re choosing between these two laptops and just want a solid productivity machine for the least amount of money, the MacBook Air M1 is the better choice.

>>>>>>>>>>>Laptop battery

iPhone 15 Ultra vs iPhone 14 Pro Max – the biggest upgrade like to see

 Apple may want to try something different with next year’s iPhone 15 release. Rumor has it that the company could launch what some are calling the iPhone 15 Ultra — a super-sized iPhone that packs the best features available on an Apple phone and comes at a premium price.

For next year’s models, Apple may seek to further differentiate its Pro versions, just as the differences between its recently released iPhone 14 and the iPhone 14 Pro were more pronounced. So, move to the iPhone 15 Ultra, which will make it clear that this is not just an iPhone Pro Max that has been rebranded by packing more substantial features.

Faster processor

It used to be safe to assume that new Apple phones would feature the company’s latest mobile chips, but then the iPhone 14 came with a variant of the A15 chipset that powered the previous year’s phones. Nonetheless, we expect the iPhone 15 Ultra to run on the new SoC.

In this case, let’s say it’s the A17 Bionic, which should offer a sizable boost over the already impressive A16 Bionic that powers the iPhone 14 Pro Max. That’s because the A17 Bionic is expected to be built on a 3nm process, not the 4nm A16 Bionic. 3nm chipsets can accommodate more transistors than 4nm silicon, resulting in improved performance and power efficiency.

Different ports – or none at all

The European Union has passed a law requiring standard charging technology on mobile devices. While the law won’t take effect until 2024, Apple is expected to get a head start by replacing its proprietary Lightning port with USB-C on the iPhone 15 series.

But the change will affect all iPhone 15 models, not just the iPhone 15 Ultra. Rumor has it that Apple might go a step further and remove ports from its Ultra phones entirely, meaning you’ll be relying entirely on wireless charging to keep the Ultra alive.

More durable body

The iPhone‘s design has remained the same since the iPhone 12 — flat edges, metal frames, and occasional tweaks to the rear camera array to accommodate larger sensors. As long as Apple likes to adopt iPhone design before changing it, we expect some new approaches to be adopted across the iPhone 15 lineup.

There are rumors that the high-end iPhone 15 may use titanium alloy as a new material. Titanium is more durable than the stainless steel used on the iPhone 14 Pro Max. The new alloy could also make the iPhone 15 Ultra lighter than its predecessor, which would be ideal given the lighter weight of the iPhone 14 Pro Max.

Improved camera

The camera is critical to the iPhones success, so it’s only natural that the iPhone 15 lineup will get a tweak or two — especially for the most expensive models in the lineup.

To that end, the iPhone 15 Ultra may get a periscope-style lens with zoom capabilities that exceed the 3x optical zoom supported by the iPhone 14 Pro Max. It’s unclear if the feature will also be available on the iPhone 15 Pro, or if Apple will consider it an Ultra exclusive.

More storage

Buy any iPhone 14 model and the entry-level version will have 128GB of storage, which is pretty standard in today’s smartphones. But if you’re going to put the Ultra label on a device, its specs should be above and beyond the standards of other phones. That means we think there is at least 256GB.

Apple Pencil Support

Speaking of the Galaxy S23 Ultra, it will almost certainly feature a built-in S Pen, a feature Samsung will offer for the second year in a row. By contrast, Apple’s phones continue to ship without a stylus, even with one off the shelf.

That’s the Apple Pencil, which Apple has restricted from use with the iPad Pro, iPad mini, iPad Air, and the 10th-generation iPad. There’s absolutely no reason why this stylus shouldn’t work with a 6.7-inch phone — especially if you’re going to tout that phone as the ultimate productivity device.

Whether Apple agrees with this statement remains to be seen. However, adding Apple Pencil support to the iPhone 15 Ultra would certainly make the rumored phone a noticeable improvement over the iPhone 14 Pro Max.

iPhone 15 Ultra appearance

With the next round of iPhones not expected to launch until September 2023, it’s going to be a while before we know if any of these rumored features will pan out — or if the iPhone 15 Ultra even exists. But the fact that there are six ways this device can differentiate itself from the iPhone 14 Pro Max suggests that the iPhone 15 Ultra represents more than just a name change.

>>>>>>>>>>>>iPhone battery

Split Screen on Mac: The Easiest Way to Multitask

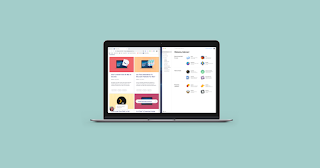
 Sometimes you need multiple windows. But switching between multiple fullscreen windows is not very efficient. Instead, it’s easier to split the screen so you can have two windows open at the same time. Split-screen mode is great when you need to view report data, keep chat windows open while doing other things, or just play video on one side of the screen when multitasking.

Fortunately, Macs offer a split-screen mode that allows you to stick two apps on different sides of the display. This way, you can navigate between windows without navigating with the mouse or pressing Command + Tab. Let’s take a look below!

How to Enter Split View on Mac

1. Make sure both windows you want to use are not in fullscreen mode.

2. In one of the windows you want to use, place the cursor on the green button in the upper left corner. Instead of clicking to maximize the window, hover over until you see the drop-down menu.

3. Select the tile on the left side of the screen or the tile on the right side of the screen. Your Mac will automatically enter split screen mode.

4. From there, other open windows will appear on the other side of the screen. Click on the desired window on the rest of the screen and it will fill the remaining half.

5. If you want to resize the window, use the slider in the center of the screen.

In split view, you will be able to view two windows at the same time. Multitask away!

How to Exit Split Screen on Mac

If you’re done with the split screen layout, here’s how to get rid of it:

1. Move the cursor to the top of the screen until you see the resize buttons at the top left of each window.

2. Click the red button to close the window or the green button to exit split screen.

3. Don’t panic! Your other window is still open, it’s just hidden in fullscreen mode. To access it again, press the Mission Control button ( F3 ) on the top row of the keyboard.

4. You should see two options at the top of the screen: the desktop and any windows you have in split screen mode. Click on another window, and if you want to exit full screen mode, use the green resize button in the upper left corner.

If you’re the type of person who might need to have more than two windows open, you can always manually resize the windows to fit three or four on the screen at a time. The experience won’t be as visually clean as using tiled windows.

What are the shortcut keys for split screen on Mac?

There are many handy Mac keyboard shortcuts, including one for split screen. First use control + command + F to enter full screen mode. From there you can press F3 to pull up Mission Control and drag another app onto your currently full screen app. Click to go back to the newly tiled app and you’ll be in split view.

If the steps are still too many, you can create your own keyboard shortcuts. Go to System Preferences > Keyboard > Shortcuts > Application Shortcuts. You can click the + button to add a command called “Tile window to left side of screen” with the desired shortcut. After activating the shortcut, your active window will be tiled on the left side of the screen, and you can simply select a second window to add to the split screen.

Why can’t my Mac split screen?

First, make sure you’re not currently in fullscreen mode. Split screen only works with normal windowed views. If that’s not the problem, go to System Preferences > Mission Control and check if the monitor has separate spaces enabled. If not, enable it.

If you don’t see this option in the Mission Control menu, make sure you’ve updated to MacOS 10.11 or later. You can check your current OS version by clicking the Apple icon in the upper left menu and selecting About this Mac. If you are using an earlier version, you must update by clicking the “Software Update” button on this screen.

Keep in mind that not all apps support split screen. If you’ve tried everything else and the app still doesn’t tile in split-screen mode, the app probably doesn’t offer split-screen mode.

How to split screen on Mac without full screen?

The official split screen feature on the Mac (called “Split View”) automatically splits two windows in full screen. If you don’t want a full screen view (perhaps because you want to be able to quickly navigate between browser tabs), you can manually drag the window to fit the required space. This option gives you more customization than Split View.

>>>>>>>>>>>>>Mac battery

Use your iPad as a second monitor for your Mac. Here is how to set it up

 No matter how big your computer display is, sometimes a single screen isn’t enough. That’s why so many people need a second monitor, as another screen helps with gaming, streaming, multitasking, communication, organization, and overall efficiency. Having dual monitors is important for productivity — but that doesn’t necessarily mean you need to spend more to get it.

As long as you have a compatible Mac and iPad, you can quickly and easily connect two Apple devices and use your iPad as an additional display for your Mac computer. Using Sidecar built into supported devices, you can extend your MacOS desktop or mirror it to an iPad with touchscreen controls, seamlessly using both devices at the same time. Here’s what you need to know.

Requirements for using an iPad as a second monitor

As mentioned above, both of your devices need to support Sidecar, a feature that lets you use your iPad as a second display for your Mac. For your Mac, you must be running MacOS Catalina or later, and it must be one of the following models:

MacBook Pro (2016 or later), MacBook (2016 or later), MacBook Air (2018 or later), Mac (2017 or later and Retina 5K, 27-inch, Late 2015) , Mac Pro, Mac Mini (2018 or later), Mac Pro (2019 or later)

For your iPad, it must be running iPadOS 13 or later and be one of the following models: iPad Pro, iPad (6th generation or later), iPad Mini (5th generation or later), iPad Air ( 3rd generation or newer models) it is best to update your device to the latest software available to avoid any issues. Additionally, both devices must be signed into the same Apple ID account using two-factor authentication.

If you plan to use wireless, the two devices must be within 30 feet of each other. You can also connect two devices using USB, which has the advantage of charging the iPad while it’s being used as a second monitor.

Share your entire Mac desktop to iPad

Sharing your computer desktop to your tablet may vary depending on the software update on your computer. If you’re running MacOS Big Sur or later, click the Display icon in the upper-right menu bar. In the menu that appears, select your iPad.

If you’re using MacOS Catalina, you’ll instead click the AirPlay icon in the menu bar and select your iPad. If for some reason you don’t see the AirPlay icon, click the Apple menu in the upper right corner, then go to System Preferences > Displays, and check the Display Mirroring option in the menu bar.

Once your Mac and iPad are connected, you can choose from several options in the Display/AirPlay menu:

Mirror built-in Retina display: Mirror your exact desktop to your iPad. This will make your computer desktop look more like your iPad.

Use as a separate display: Use your iPad as an extension of your desktop. To use the iPad display, drag any window or file from your Mac computer to the right side of the screen, which takes you to the tablet. To get back to your computer, just drag the cursor back to where you were.

Share only one Mac window with the iPad

Or, you can quickly share a window instead of dragging it onto your iPad. To do this, just hover your mouse cursor over the green fullscreen button in the upper left corner of most windows. After hovering for a second, you should see an option that says “Move to iPad” and it will share the window to your tablet. You can share multiple windows to your iPad in succession.

Use sidebar controls, gestures, and the Touch Bar on iPad

After you share your screen to your iPad, a set of controls will appear on the left side of your iPad, these are the sidebar controls you’d typically see on a Mac. This includes, from top to bottom:

Menu Bar: Show or hide the menu bar when full screen

Dock : Show or hide the Dock

Command: Double-click the lock key

Option: Double tap lock key

Control: Double tap to lock key

Shift : double-click the lock key

Undo: Undo the last action

Keyboard: Show or hide the keyboard

Disconnect: Disconnect iPad from Mac

In addition to these Mac controls, you can also use some swipe gestures to control certain things on the second monitor. This includes two-finger swipe to scroll, three-finger pinch to copy, three-finger swipe left to undo, and more.

Finally, if the app on your iPad is compatible, you can also use the Touch Bar. You can also get rid of the Sidebar or Touch Bar controls if you don’t want to use them. On a Mac, click the Display icon in the menu bar, and under the connected iPad, you should see the Hide SideBar and Hide Touch Bar. Click one or both of the options to hide the controls in the iPad.

Use iPad when connected to Mac

Even if you’re using your iPad as a second display, you can still swipe up to exit the Sidecar app and use your iPad as usual. In your dock, you’ll see a blue icon with two monitors – this is the Sidecar. To return to using the iPad as a second display, tap the Sidecar app icon in the Dock.

>>>>>>>>>iPad battery