Cast your Android phone screen to your TV. this is the method

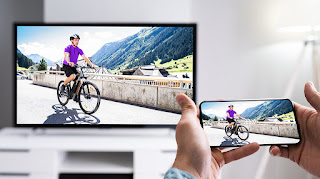
 The small screen of your Android phone lets you magically cast or mirror your phone’s screen to a nearby TV with just a few taps, giving you a better view of everything you want. Aside from a comfortable viewing experience, the cast screen comes in handy if you want to play a few rounds of Among Us or show everyone that you can’t get enough of the latest TikTok trends. Here’s how you can start mirroring or casting your Android phone or tablet’s screen to your TV. Let’s have a look!

Everything you need to mirror your Android phone to your TV

You need an Android phone or tablet running Android 5.0 or higher. This version of Android was released in 2014, so your phone or tablet is most likely running a newer version of Android. You can check by opening the settings app and going to about phone and looking for the Android version.

In addition to an Android phone or tablet, you’ll also need a Google Chromecast streaming device, such as the recently released Chromecast with Google TV, a TV with Chromecast built in, or a smart display like the Google Nest Hub. If you don’t know if your TV supports Chromecast, the best way to check is to see if it shows up as an available casting device when you follow one of the methods below.

Cast your screen to your TV using the Google Home app

The most reliable and consistent way to mirror your Android phone‘s screen is to use the Google Home app. If you’ve set up any of Google’s smart speakers, Nest Wifi, or Chromecast devices, you probably already have it. If not, you can download it from the Play Store.

Open the Home app and select the Chromecast device you want to use. There will be a button at the bottom of the screen labeled Cast my Screen; tap it. You have to accept the prompt reminding you that whatever is on your phone screen will be visible on your TV to anyone in your room. You may also see a second prompt warning you if your device is not optimized for mirroring. To stop casting your screen, tap the button in the Home app labeled Stop Mirroring.

There is an easier way, depending on your phone

There’s an easier way: use the casting shortcut in the quick settings panel. Swipe down from the top of your Android phone or tablet’s display to access the quick settings panel. There should be an option labeled Screen cast, once you find the Screen cast button, select it, and select the device from the list on which to mirror the display. It may take a few seconds for your phone to connect to your Chromecast-enabled device, but once connected, your screen will appear on your TV. Stop casting by repeating the same steps we just outlined.

But here’s the thing: Not every phone includes a cast button option in the quick settings panel. You can still mirror your phone using the Home app.

>>>>>>>>>>Phone battery

Thanks for reading, hope it helps!

Friendly reminder: If you need to replace the battery, this battery store will be a good choice: www.batteryforpc.co.uk

New Android 13 notifications can bring up battery-guzzling apps

 You’d be surprised how much battery life a single app can eat up, even if you’re not actively using the app. According to the Android Developers Blog, the next Android operating system, Android 13, will send you a notification when an app consumes a lot of battery during the day.

Android 13 is going well, with Google releasing the second developer preview of the next Android operating system on Thursday. Between Google’s official word and leaker speculation, we’ve learned a lot about how Android 13 builds on Android 12’s privacy features, user interface enhancements, and Material You design overhaul.

If you’re curious about the release date of Android 13, or if you’re wondering what new features are coming to your phone in the coming months (here are some of the best hidden features of Android 12). Let’s have a look!

Release date

While Google hasn’t publicly revealed a specific release date for Android 13, the Android Developers Blog provides a rough timeline for the release, with a beta release each month as of July. The July beta is listed as “near-final for final testing.”

Judging by precedent, Android 13 could debut a month after the final beta release. The fifth and final beta of Android 12 was released in September 2021, and Google officially released the app in October. In Android 11 (2020) and Android 10 (2019), the final beta dropped in August, and the OS landed on phones in September. So we can reasonably assume that Android 13 will arrive this August. If not, September is a safe bet.

Keep in mind that Google will be sending an Android update to its Pixel phones first (and possibly the rumored Pixel 7 along with Android 13).

New photo privacy features

Android 12 introduces a kill switch that lets you prevent apps from accessing your camera and microphone, and also adds the option to show apps your approximate location instead of your exact location.

It appears that Android 13 will support these privacy settings. According to Google’s Android developer blog, Android 13 will include a photo picker. This means that when apps want to access your images and videos, you can choose specific media files to share instead of granting access to all of them.

App needs your permission to notify you

The second developer preview of Android 13 introduces a new feature called Notification Permissions. In order to send you notifications, apps need you to give them your permission – you can say “no”.

Upgraded design with more color options

Your redesigned Material is the star of the Android 12 show, with a UI color scheme that automatically adjusts to the wallpaper you choose. Android 13 will add more color customizations to Material You. In Android 12, the adjustable color palette feature is only available for Google apps. But Android 13 will extend this feature to all apps, as long as the app’s developer agrees to design a monochrome alternate icon.

Citing a “trusted source” rumor, AndroidPolice says that Android 13 will allow you to choose more color customization options. These include “spritz,” a desaturated color scheme, and “expressive,” which combines hues that differ from the default hue your wallpaper chooses.

Adjust iOS Privileges

Flashlights on Apple’s iPhones have offered adjustable brightness for years, but rumors from Android analyst Mishaal Rahman suggest that Google will eventually integrate the feature into Android 13, allowing for some customization when you use your phone as a light source.

But Rahman said that many Androids currently don’t have the hardware needed to use this feature. Maybe the rumored Pixel 7 will. If you have a Samsung phone, though, Samsung’s software Overlay One UI already lets you adjust the flashlight brightness.

>>>>>>>>>>Phone battery

7 Ways to Android-ify Your iPhone

 When you’re a first-time iPhone buyer, you’re used to using an Android phone, which can lead you to start not using an iPhone. But everyone knows the power of the iPhone. There are a few ways to make your iPhone feel more like your old Android phone, whether you’re using the iPhone SE, iPhone 13, or any other Apple phone, to Androidize your iPhone. Here’s how to make it feel more like an Android device, check it out!

Create custom home screens with widgets and smart stacks

Widgets, customizing your home screen, are a convenient way to keep information at your fingertips, but perhaps more importantly, you can create a completely personalized experience.

You can add individual widgets, or create so-called smart stacks, which will rotate in a series of widgets based on the widget you interact with and the time of day. Place widgets on the iPhone screen by long-pressing on empty spaces. I usually do this above the app in the dock. Tap the plus sign in the upper left corner and drag and drop the widget onto your screen.

You can’t install themes or launchers, but you can still customize the look of your iPhone

If you’re used to creating custom app icons, you’ll be happy to know that your iPhone can also support custom icons. You’ll need to use the Shortcuts app to achieve your custom look, and be prepared to invest some time in each new creation. So instead of using the existing Mail, Safari or Messages app icons, you can replace the default icon with the AOL Mail icon or any photo you want.

Chat with your Android friends using FaceTime

In iOS 15, you can FaceTime with friends and family who don’t have an Apple device. Like the other tips on this list, it probably won’t make your iPhone feel more like your old Android phone. But it can help with the transition, as it provides an easy way to video chat with Android friends without having to install a new app.

FaceTime calls work a little differently when you’re communicating with users of non-Apple devices. You need to generate a link that they can click or tap to join the call from a web browser. Just open the FaceTime app and tap the Create Link button to get started.

Miss Google’s keyboard? You can download your favorite or learn some iPhone keyboard tips

Google’s keyboard, Gboard, is loved by many Android users. You can also install third-party keyboards on your iPhone, although you may find them less powerful than their Android counterparts. If you want to give it a try, you can use Gboard for Android on your iPhone. However, if you find that a third-party keyboard doesn’t solve the problem, you can make the most of your iPhone’s keyboard.

Move the cursor by pressing and holding the space bar until the key disappears, turning it into a trackpad of sorts. Here’s a post with beautifully animated images showing you how it works.

Create custom text replacement shortcuts by going to Settings > General > Keyboard > Text Replacement. This makes it easier to type swear words, or quickly enter information like your email address.

You can swipe to type on your iPhone’s keyboard, just like you can on almost any Android keyboard. If it doesn’t work, make sure it’s turned on by going to Settings > General > Keyboard > Swipe typing and making sure the switch is on.

You’re not locked into Apple‘s default apps. Switch to Google’s apps

You are lucky.

Google does a great job of keeping the same apps you know and love on Android updated on iPhone. Instead of linking you to every Google app, I’ll point you to the Google Developers page in the App Store, where you can find all the apps for the iPhone (or iPad).

If you don’t like Siri, use the Google Assistant

One app that Google offers on the iPhone worth mentioning is Google Assistant. For those who wish to use Google’s virtual assistant instead of Apple, you can download and install a dedicated app. You need to create a shortcut in the Shortcuts app that will launch Google Assistant using Siri.

With Google Assistant installed on your phone, open the Shortcuts app and tap the plus sign to create a new shortcut. Click Add Action > Apps > Assistant > Ask Google and turn off Show When Run. Name the shortcut “Hey, Google” or “OK, Google”.

Face ID isn’t perfect. Here’s how to make it even better

If you’re switching from an Android phone with fingerprint unlocking, you might get frustrated if Face ID doesn’t always recognize your face and unlock your iPhone in the right amount of time. My suggestion: add an alternate look like Scanning your face a second time does the same; it’s the equivalent of scanning four fingerprints in an old Android phone, not just one. To scan your face again, open Settings > Face ID & Passcode and tap Set Alternate Appearance.

>>>>>>>>>iPhone battery

Thanks for reading, hope it helps!

Friendly reminder: If you need to replace your phone battery, this battery store will be a good choice: www.batteryforpc.co.uk

Google: Want to try Android 13? How to Get the Developer Preview Now

 Google has announced the limited release of Android 13 Developer Preview 1, codenamed Tiramisu with a focus on dessert. This latest version of the Android operating system will introduce several new color themes, enhanced privacy and security features, lock and home screen updates, and more.

As long as you have a compatible phone, you can connect your device to your computer and use Google’s Android Flash tool to easily download and install Android 13 Developer Preview 1. Note: The Android 13 Developer Preview can sometimes be unstable! Here’s how to download and install the Android 13 Developer Preview on your phone, let’s take a look!

Which phones is the Android 13 Developer Preview available for?

Google is expected to release Android 13 this fall. It will then be available on a variety of Android phones, but currently you can only install the Android 13 Developer Preview on many compatible Pixel devices: Pixel 4, Pixel 4 XL, Pixel 4A, Pixel 4A 5G, Pixel 5, Pixel 5A and 5G , Pixel 6, Pixel 6 Pro, if your device isn’t on this list, you’ll have to wait for a later version of Android 13, be it public beta or public release.

Backup your Android device first

By default, your Pixel backs up automatically whenever you’re connected to Wi-Fi and your phone has been idle and charged for 2 hours, but you can also back up manually at any time. To back up your Pixel, go to Settings > Google > Backup and tap Back Up Now .

Now you need to enable USB debugging and OEM unlock

To install Android 13 on your Pixel, you’ll need to connect your phone to your computer via USB, which requires your Pixel to be unlocked and USB debugging enabled. While it’s easy to unlock your phone, to enable USB debugging, you’ll need to unlock the developer options first.

1. To unlock the developer options, go to Settings > About phone and tap Build number seven times. Enter your password when prompted and a new developer options menu will appear in system settings.

2. Now, enable USB debugging. Go to Settings > System > Developer options and turn on USB debugging. In the notification that appears, briefly describe what USB debugging means, click OK.

3. While you are still in developer options, turn on OEM unlocking. This will unlock your device’s bootloader, which is what loads the operating system. Once unlocked, you will be able to choose a different operating system to boot from.

Refresh your device with the Android Flash Tool in Chrome

There are two ways to flash the Android 13 Developer Preview system image on the Pixel using a computer, but for simplicity, we’ll use the Android Flash tool, which only works with some web browsers. Additionally, your computer must have 10GB of free storage to function properly.

If all is well, connect your Pixel to your computer via USB, unlock the device and visit the Android Flash Tool website in Chrome and do the following:

1. First, click Get started at the bottom of the website.

2. Next, click Allow ADB Access in the popup that appears (if any ad blockers are present, turn them off).

3. Now click Add New Device, select your device from the list and click Connect.

4. On your Pixel, check the box next to Always allow from this computer and tap Allow to give the Android Flash Tool access to your phone.

5. Back on your computer, click “Developer Preview 1” under “Popular Versions”.

6. Click Install to build, and then click OK.

The pop-up that appears will warn you that installing Android 13 will factory reset your phone, but that’s not a problem if you have a Pixel backed up. Make sure you don’t touch your phone or disconnect it from your computer during this process, or you could brick your phone. If you get another popup on your computer that mentions accepting the Android 13 version, do the following:

1. Click Start in the pop-up window that appears on your computer.

2. Go back to your Pixel, use the volume keys to select Unlock Bootloader, then tap the side key, which will cause your phone to reboot.

3. The software will start downloading, which may take a few minutes depending on your internet connection.

4. After the installation process is complete, click Start in the pop-up window that appears on your computer.

5. Again, back on your Pixel, use the volume keys to toggle to Lock Bootloader, then tap the side button.

6. Finally, on your computer, click Done and your phone will restart as usual.

If all went well, “Installation Complete” should appear in the Android Flash Tool. This means that the Android 13 Developer Preview is installed and you can safely disconnect your Pixel from your computer. After your Pixel reboots, you’ll see a notification that you’re now running the Android 13 Developer Preview. Click OK and set up your phone like a brand new phone.

>>>>>>>>Google battery

Thanks for reading, hope it helps!

Friendly reminder: If you need to replace the battery, this battery store will be a good choice: www.batteryforpc.co.uk

Apple: Do AirPods work with Android?

 Apple’s AirPods line of true wireless earbuds and headphones is one of the most popular. This means that using AirPods with your iPhone, iPad or Mac is easy; but what if you want to use Apple headphones or earphones with your Android phone? Well, you’ll be happy to know it’s possible — but be warned, you might miss out on some AirPods features, like support for spatial audio and super-fast pairing.

Fortunately, there are some workarounds you can take advantage of, including apps that restore some AirPods features that Android users typically don’t have access to. Here’s everything you need to know about using AirPods with Android.

How to connect AirPods to an Android phone

If you’re using AirPods with your Android phone for the first time, you might be wondering how to pair earbuds or headphones with your device.

AirPods 2019, AirPods 3 and AirPods Pro

First, open your AirPods’ charging case, then open the Bluetooth settings on your Android phone by going to Settings > Connected Devices > Bluetooth. Make sure Bluetooth is turned on. Now press and hold the pairing button on the back of the AirPods case – the LED on the front of the case should flash white. Find your AirPods in the list of Bluetooth accessories and tap Pair. Your AirPods should now be connected to your Android phone.

AirPods Max

The pairing process for AirPods Max is exactly the same as for true wireless AirPods, except you need to press and hold the noise control button on the earphones instead of the pairing button on other AirPods charging cases. This button is on the top of the right earcup, on the side of the headband opposite the Digital Crown. The status light on the bottom of the earcups should flash white, and once the AirPods Max appears in the Bluetooth device list on your Android device, press Pair.

Which AirPods features don’t work with Android?

simple setup

Pairing AirPods with your Mac requires you to go into system settings and manually select AirPods. There’s no workaround to make pairing faster on Android devices – but luckily the process is pretty quick anyway.

Siri

Android devices don’t come with Apple’s voice assistant, so don’t expect to be able to summon Siri with your voice while wearing AirPods. However, you can download an app for free called Assistant Trigger, which lets you squeeze the lever on your AirPods to summon Google Assistant.

Check the battery

When you pair your AirPods with your iPhone, you’ll see an animation showing the battery status of the earbuds or headphones. While this won’t happen on Android, the aforementioned Assistant Trigger app can also display remaining playback time.

auto switch

You can automatically switch your AirPods between different iOS devices – so if you’re listening on your iPhone, all you have to do is start playing music on your iPad to switch to your tablet.

custom control

On iOS devices, you can change the function of double-tapping the AirPods’ touch case—for example, you can set it to skip music to the next track. This is not possible on Android devices.

dialogue enhancement

AirPods Pro can help you hear face-to-face conversations by boosting volume using computational audio and beamforming microphones. Android users won’t be able to use this feature because you need the latest version of iOS or iPadOS to use it.

>>>>>>>>>Apple battery

Changing these 5 settings on your Android phone will be good for your Android phone

 Everyone who buys a mobile phone will find that the mobile phone has its own default settings, and the default settings are not the best. These settings include brightness, organization, light mode, and so on. But changing these 5 settings on your Android phone will help you extend battery life, clean up clutter on the home screen, find stolen or lost devices, and improve the performance of your Android smartphone. Let’s take a look!

Settings to improve battery life

Using a phone with a short battery life can be annoying, but there are some steps you can take to maximize every charge from the start:

1. Turn off automatic screen brightness/adaptive brightness and set the brightness level slider below 50%.

The brighter your screen, the more battery power it uses. Operation: To enter the settings, please pull down the shortcut menu from the top of the screen and adjust the slider. Some phones may have automatic brightness switching in the shortcut panel; otherwise, you need to open the settings app and search for “brightness” to find the setting and turn it off.

2. Use adaptive battery and battery optimization.

They focus on understanding how you use your phone, understanding which applications you use and when, and then optimizing the applications and the battery power they use. Some Android phones will have a dedicated battery section in the Settings app, while other phones hide these settings. Each phone is slightly different. I suggest to open your settings and search for battery. The result should get you to the correct screen. Your phone may also have adaptive charging settings, which can monitor the speed at which your phone’s battery is charged overnight to maintain its health.

Dark mode is your friend

Another way to extend battery life while helping to protect your eyes is to use Android’s dedicated dark mode. According to Google, dark mode not only reduces the strain on our eyes caused by the smartphone display, but also extends battery life. Depending on the version of Android your phone is running and the manufacturer of your phone, you may need to look for dark mode in the settings app.

To turn it on, open the “Settings” app and search for “Dark Mode”, “Dark Theme” or even “Night Mode”.

Keep the home screen tidy

Be prepared for the large number of icons on the home screen, this is where the shortcuts are every time you install something. There is a simple way to solve this problem: Long press on a blank area of ​​the home screen and click Settings. Find the option labeled Add icon to home screen or Add new app to home screen and close it.

When installing a new application, there is no longer an icon on the home screen. You can still add shortcuts by dragging the app’s icon out of the app drawer.

Set do not disturb

Android provides a “do not disturb” mode, which can keep the phone more or less silent for a specified period of time. On some phones, this is called downtime setting or even quiet time.

Action: Go to “Settings”> “Sounds” (or “Notifications”) and look for “Do Not Disturb” or something similar. If you can’t find it, please use the built-in search function in the settings to search.

Using this function, you can set the time range you want to turn off the digital noise. But rest assured, any notifications you receive when “Do Not Disturb” is turned on will still be waiting for you when you wake up. In addition, you can usually create an exception to allow calls from repeat callers and favorite contacts to pass through. Open it. If someone calls you in an emergency, they will most likely continue to try.

If you lose your phone, be prepared

Is there anything worse than a lost or stolen phone? Only know that if you turn on Google’s “Find My Device” feature, you can find it.

To prepare for a successful recovery, you need to do the following: Open the Settings app and search for “Find my device.” It is usually located in the “Security” section of the “Settings” app. Or, if you have a Samsung device, you can use Samsung’s “Find My Phone” service, which is located in “Settings”> “Biometrics and Security”> “Find My Phone”. Once enabled, you can go to android.com/find and log in to your account from any PC or mobile device. Samsung users can visit findmymobile.samsung.com to find the lost phone.

Assuming your phone is turned on and online, you should be able to see its location on the map. From there you can make it ring, lock it, set up a lock screen note to tell anyone who has it how to return it to you, or, in the worst case, remotely wipe the whole thing.

>>>>>>>>>>>>>Google battery

Thank you for reading, and hope to help you!

Friendly reminder: If you need to replace the battery, this battery shop will be a good choice: www.batteryforpc.co.uk

Seven tips and tricks for changing weak phone signals

 Have you ever encountered a sudden weak signal from your mobile phone? This makes you very annoyed when you need a signal. Although poor service is usually not your fault, bad weather, interference, or the absence of cell towers nearby can all be the culprits, but you can follow some tips and tricks to help improve the signal. Below are the best troubleshooting steps you can take to keep your phone running at its best performance. Let’s take a look!

Turn airplane mode on and off

Switching the phone connection is the quickest and easiest way to try to solve the signal problem.

Android: Swipe down from the top of the screen-access the quick settings panel-and tap the airplane mode icon. Wait for your phone to completely disconnect its Wi-Fi and cellular network connections. It will not happen immediately, so give it a good 30 seconds before clicking the airplane mode icon again.

iPhone: On iPhone, you can access airplane mode from the control center, but it depends on the iPhone model you have. On iPhone X and later, swipe down from the upper right corner to access the control center. On older iPhone models, swipe up from the bottom of the screen. Then click on the airplane mode icon, it will turn orange when it is enabled. Wait another minute, and then turn it off again.

restart cellphone.

Sometimes you can solve the problem by restarting.

Android: Press and hold the power button or the power button and the volume down key until the on-screen menu appears, then click Restart. If your phone does not provide a restart option, you can just click Shut down to shut down your device, and then use the power button to restart it.

iPhone: If your iPhone has a home button, press and hold the sleep/wake button until the power slider is displayed, and then drag the slider to the right. After the device is turned off, press and hold the sleep/wake button until you see the Apple logo.

On iPhone X and older models, press and hold the sleep/wake button and any volume button, and then slide the power slider to the right to turn off the device. Wait until it is completely turned off, then press the sleep/wake button to turn it back on. Alternatively, you can force a reset: press the volume up button, then press the volume down button, then press and hold the side button. Even if your phone’s screen turns black, keep holding it until you see the Apple logo again.

Take out the SIM card for one minute

Another troubleshooting step to try is to remove the SIM card with the phone turned on, and then put it back in the phone.

All phones: Take out the SIM card, check for damage and put it in the SIM card tray correctly, then put it back in the phone.

eSIM: For phones with eSIM, you don’t need to remove anything. The best thing you can do is restart your phone.

Check carrier settings (applicable to Apple only)

If you have been using iPhone for a while, you may have seen a warning, even if only briefly, your carrier settings are up to date. These updates help iPhone to improve its cellular network connection. To force your iPhone to check for carrier settings updates, open “Settings”> “General”> “About” on your phone. If an update is available, you will be prompted to install it.

Reset network settings

Refreshing the phone’s network settings is one way. Note, however, that resetting your network settings will also reset all saved Wi-Fi passwords, VPN connections, and any carrier’s custom APN settings that require additional settings.

Android: Go to “Settings”> “General”> “Reset”> “Reset Network Settings”. Confirm your choice and your phone will restart.

iPhone: Go to “Settings”> “General Management”> “Reset”> “Reset Network Settings”. The next page will warn you that resetting your network settings will reset your Wi-Fi, mobile data, and Bluetooth settings. Click Reset Settings, and your phone will restart.

Contact your carrier

Sometimes, unexpected signal problems can be traced back to wireless carrier problems. The signal tower may be closed, or the fiber optic cable of the signal tower may have been cut, causing an interruption. Some operators provide network extenders, which are devices that act as small wireless towers and rely on your Internet connection.

Other times, newly discovered signal problems may be caused by a malfunction of your phone or SIM card. After trying these fixes, contacting your carrier to start troubleshooting is the next best step to resolve signal instability.

If all else fails, try this

If after completing all of our troubleshooting steps, including discussing your options with your carrier, you are still struggling to maintain a good signal-try a booster. The signal booster receives the same cellular signal used by your carrier and then amplifies it enough to cover an entire room or entire house.

>>>>>>>>>>>>>phone battery

Thank you for reading, and hope to help you!

Friendly reminder: If you need to replace your mobile phone battery or laptop battery, this battery shop will be a good choice: www.batteryforpc.co.uk

Android users: If you don’t want AirTags to track you, it will help you

 On Monday, Apple released Tracker Detect for Android, an application that allows people without any Apple devices to scan nearby AirTags to prevent someone from misusing the tracking device to track them. Although AirTags are mainly used for harmless purposes, if you suspect that you are being tracked, the Tracker Detect app may be helpful. Let’s take a look!

Scan AirTags with Tracker Detect on Android

After downloading Tracker Detect, turn on Bluetooth, open the app, agree to the terms and conditions, and then click the blue scan button to search for nearby items. If this is your first time using Tracker Detect, you will be prompted to grant the app permission to access Bluetooth. It needs to use Bluetooth to find any AirTags.

Your Android will scan for up to one minute, and if it finds an AirTag near you, it will show as “Unknown Airtag”. If you don’t find anything, you can try to scan again, especially since the tracker must be separated from its owner for at least 15 minutes before it can appear.

What to do if you find that AirTag is tracking you

If Tracker Detect finds that AirTag has been tracking you for at least 10 minutes, the app will allow you to play sounds from AirTag so that you can find the physical tracker more easily.

If you do find AirTag, it’s up to you to decide how to proceed. If AirTag accidentally appears next to you, it means that it is not being used to track you and “Lost Mode” is enabled.

However, if AirTag is being used to track you, you can also view the serial number by tapping the serial number on your phone, which may be useful if you are considering contacting law enforcement and requesting proof of the identity of the person who may be tracking you. You can also open the back cover and look inside the AirTag to find the serial number.

How to disable AirTag

If you want to turn off AirTag and stop tracking you, Tracker Detect will provide a short summary on how to disable it:

Press the stainless steel back cover of the AirTag.

Rotate the cap counterclockwise until it stops.

Release your finger and the lid will fall off.

Remove the coin cell battery.

Removing the battery will notify the owner that the AirTag has been disabled, so please pay attention.

Unfortunately, Tracker Detect lacks some of the features that iPhone comes with-most importantly, automatic background scanning. On Tracker Detect, you must manually scan the AirTag every time. If you have been worried about being tracked, this may be troublesome. Perhaps in a future update, Apple will consider adding more features to the Android app, but until then, if you are tracked by AirTag, Tracker Detect can help provide some relief.

>>>>>>>>>>>>Apple battery

Thank you for reading, and hope to help you!

Friendly reminder: If you need to replace your mobile phone computer battery, this battery shop will be your good choice: www.batteryforpc.co.uk

Clear the cache and cookies on the Android phone web browser-make it the best

Your Android phone’s web browser may collect a lot of data while browsing the Internet. This data usually fills your web browser’s cache and cookies, and can help improve the browser’s loading speed by saving assets of websites you visit frequently and saving preferences. However, websites can also use cookies to track your browsing history, usually for the purpose of providing personalized advertisements where you are almost everywhere. In addition, the larger the browser cache, the more bloated the browser application will be due to data from websites you may no longer visit-but some of their assets and possibly some tracking cookies may remain there.

Therefore, there is no harm in erasing this data occasionally to keep your web browser streamlined, efficient and ideal, and to store as few tracking cookies as possible.

On Android, the steps are slightly different depending on the type of phone and web browser application you are using, so below we will introduce how to clear this data on Google’s Chrome, Samsung’s Internet browser and Mozilla’s Firefox browser .Let’s take a look at the specific operation!

Google Chrome

You can first click the “More” button (indicated by three vertical dots) in the upper right corner of your browser, then click “History” and “Clear browsing data” to delete your cookies and cache from Google Chrome for Android. You can also access this feature from the Chrome Settings menu, click Privacy and Security, and then click Clear browsing data.

Chrome then provides basic and advanced settings for clearing browsing history, cookies and site data, and cached images and files. You can also use the “Time Range” drop-down menu to choose whether you want to delete the entire history, or any time from the past 24 hours to the past 4 weeks. If you want, clicking “Advanced” will also give you access to delete saved passwords, auto-fill form data, and site settings. After selecting the content you want to delete, click the blue clear data button, and then it will be deleted without any other prompts, so make sure you are switching exactly what you want.

Samsung Internet

Unlike Google Chrome, Samsung’s process of deleting cache and cookie data involves accessing the phone’s settings application instead of opening Samsung’s Internet browser application. Operation: After opening the settings, click on the application, then scroll down and click on Samsung Internet. Then click Save. At the bottom of Storage, you can get separate options for Clear cache and Clear data. Clicking Clear Cache will delete the cache immediately, but clearing the data will bring you a reminder that all data of the application will be permanently deleted, including files, settings, accounts, databases, etc.

Firefox browser

You can clear cookies and cache from the Mozilla Firefox Android application. To access, click the More button on the right side of the address bar, again represented by three vertical dots. Then click Settings and scroll down to delete browsing data. Firefox provides you with the most options under the delete browsing data menu, allowing you to also delete any existing open tabs, your browsing history and site data, site permissions, and even your download folders, cookies and cached images and document.

For those users who do not want to keep browsing data after using the application, Firefox also provides an additional option. There is an option to delete browsing data on exit in the settings, which instructs Firefox to erase any combination of these same settings every time you exit the application.

>>>>>>>>>>>Google battery

Thank you for reading, and hope to help you!

Friendly reminder: If you need to replace the battery, this battery shop will be a good choice for you: www.batteryforpc.co.uk

Show you the hidden features of Android 12 on Pixel 6

 Google’s latest mobile operating system, Android 12, began to roll out immediately after the arrival of the Pixel 6 and Pixel 6 Pro this fall. Android 12 has many new features that are different from Android 11, including new privacy tools, a redesign called Material You, and more. These features have not yet been announced, but you must dig into the operating system to find them. Here are four hidden features of Android 12, let’s take a look!

Android 12 puts your notification history at your fingertips

Android has provided device notification history for some time, but you must either know where to view it or you must install a third-party app to see it.

In Android 12, all you have to do is scroll to the bottom of the notification bar, where you will see a new “History” button. Click on it and you will see the most recently cleared notifications and alerts from the past 24 hours. If you see Manage instead of History, it is because the notification history is not turned on. Enable it by clicking Manage, then select Notification History and slide the switch to the on position.

Android 12 makes big phones feel smaller

The new one-handed mode in Android 12 may not be an important feature, but it may have a major impact on the way you use your phone. The new one-handed mode moves the upper half of any content on the screen to the lower half, making it easier to click on the quick setting tiles or notifications.

To use it, place your finger on the small strip at the bottom of the phone screen and swipe down. However, before you do this, you need to turn it on by going to “Settings”> “System”> “Gestures”> “One-handed Mode” and sliding the switch to the “On” position. Below the switch that enables this feature, you have two options: zoom the screen closer or show notifications. Select the first option and close the “Settings” application.

There is a dedicated game mode in Android 12

When it is turned on, your phone will do some things, such as automatically turning on Do not disturb when you turn it on. Action: Go to “Settings”> “Notifications”> “Do Not Disturb”> “Schedule”. There, check the box next to Game Mode to turn it on. Next, click the settings gear icon and switch between these two items.

Android 12 has a new app layout option, but it may only be available for Pixel

The application grid on the phone’s home screen is usually a 4×4, 5×5, or 6×6 grid. However, in Android 12 on Pixel 5, there is a new app grid option that is very interesting at first glance-2×2. I think this is limited to Pixel phones, but hope that other phone manufacturers adopt it, because it is a huge accessibility feature for those who need larger app icons. Operation: Long press on the home screen to switch to the new 2×2 layout, then select Style and Wallpaper>Grid>2×2.

 >>>>>>>>>>>>Google battery

Thank you for reading, and hope to help you!

Friendly reminder: If you need to buy or replace batteries, this battery store will be your good choice: www.batteryforpc.co.uk