AirPods Pro features that more people should know how to use

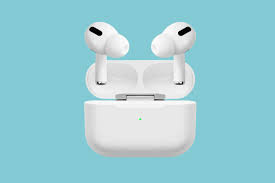
 Apple launched a new version of its wireless earbuds called the AirPods Pro 2 in September. They feature longer battery life, a new charging case that supports Find My, updated microphones, new volume controls, and a new H2 chip.

The second-generation AirPods Pro are the follow-up to the first-generation AirPods Pro launched in 2019, including the same features such as active noise cancellation for improved listening experience and replaceable silicone ear tips for a more comfortable fit.

Whether you own the original AirPods Pro or the new AirPods Pro, there’s a lot you need to know about your in-ear headphones to unlock their full potential. In this guide, we’ll show you everything you need to know about AirPods Pro.

Pair AirPods Pro in seconds

After unboxing your AirPods Pro, unlock your iPhone or iPad and open the earphones’ charging case. After a second or two, a prompt will appear asking if you want to pair the earbuds. Click connect to initiate pairing and you’re done. AirPods Pro not only work with your iPhone, but also pair with all of your Apple devices signed in with your iCloud account.

Press, don’t touch on AirPods Pro

Instead of tapping one of the AirPods, use the stem of the AirPods Pro as a button. There are actually no buttons there. Instead, it’s a pressure-sensitive section that replicates the way you use the buttons. This is similar to the trackpad on MacBook, MacBook Air, and MacBook Pro not physically moving to click.

Squeeze the flat grooves on each AirPod with two fingers. You’ll hear a click in your ear every time you press it. Here’s what each button press does:

Click: Pause/Play

Double click: fast forward

Triple press: jump back

Long press: Switch between noise reduction and transparency mode.

Swipe to change AirPods Pro volume

A nice addition to the AirPods Pro 2 is the ability to use the lever to change the volume. Swipe up to increase the volume, swipe down to decrease the volume. Yes. It’s that easy.

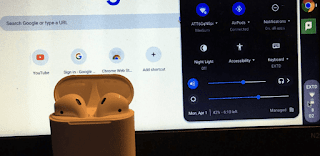
How to Monitor Battery Life

One of the best features of the AirPods Pro is battery life. Between the battery in the case and the battery in each earbud, you can get hours of use without recharging. Apple has a few different ways to monitor the battery life of each AirPod Pro as well as the case.

Whenever you want to check the power of your AirPods Pro and the charging case, unlock your iPhone or iPad and open the charging case next to the device with your AirPods. An animation will appear showing the charge level of each AirPod and charging case.

You can also add a battery widget to your iPhone’s home screen. When the AirPods are actively paired with your phone, the remaining battery life and case of each earbud will be displayed in the widget.

How to use Active Noise Cancellation

The main feature of the AirPods Pro is its Active Noise Cancellation, or ANC. When it’s on, noise cancellation blocks out nearly all the background noise you’d normally hear with regular earbuds or standard AirPods.

Long press one of the AirPods buttons to turn off noise cancellation, or use Control Center on your iPhone or iPad. Swipe down from the top-right corner of your device’s screen; then, when Control Center appears, long-press the volume slider. At the bottom of the screen you will have three options: Noise Reduction, Off and Transparency. Click the setting you want to use.

When you switch to Transparency mode, you will be able to hear some sounds in the environment, but still hear the audio playing in the AirPods Pro, which is what you use when walking down a busy street, so you can hear To for example, when you need to listen for gate changes, in traffic or at the airport.

You can switch to transparency mode by long-pressing the AirPods’ button or using the toggle switch in Control Center.

Find My AirPods Pro 2 Case

One of the most popular features of the second-generation AirPods Pro is the ability to use Find My and pinpoint a lost AirPods Pro case. Open the Find My app on your iPhone and tap the Devices tab. Tap AirPods Pro in the list to see its location on the map. If you’re within 30 feet or so, press the Find Nearby button. Then follow the on-screen prompts to guide.

Check the charging status while wirelessly charging the case

The case that comes with the AirPods Pro will charge wirelessly on the same wireless charging pad as the iPhone. It also works with MagSafe chargers, just doesn’t stick to the charger magnetically like the iPhone 12 or 13. Place the charging case on the charging pad with the small light facing up and start charging. When it’s first placed on the mat, the case’s light will turn on to let you know it’s charging. However, it eventually times out and shuts down. Tap on the charging case to check the charging status of the charging case (green means fully charged).

>>>>>>>>>>>AirPods battery

How to connect AirPods to iPhone, iPad, Mac, PC, and more

 Many people around the world love AirPods for their light weight, ease of use, amazing noise cancellation and sound quality.

So, we’ll show you how to automatically connect to your iPhone, iPad, or Mac device. Whether you have an iPhone SE or iPhone 14 Pro or an iPad Air or iPad Pro, you can connect your AirPods to them. We’ll also see how to manually connect them with an Android device via Bluetooth settings. Let’s take a look below!

How to connect AirPods to iPhone

The first and main thing to look out for when trying to connect your AirPods to your iPhone is to make sure your iPhone is updated to the latest version of iOS. Plus, the AirPods automatically connect with the iPhone, so the process is simple.

Just follow the step-by-step guide below to prompt this connection:

1. Unlock your device and leave it on your iPhone’s home screen.

2. Hold your iPhone close to the AirPods in the charging case and open the lid.

3. If you plan to reconnect your AirPods with your iPhone, press and hold the button on the back of the case to reset them.

4. A prompt will appear on the iPhone screen. Click Connect. When they’re connected, the status lights on the case flash and then stay the same. After following the on-screen instructions, tap Done.

How to connect AirPods to iPad

Connecting AirPods to an iPad is similar to connecting them to an iPhone. As long as you are also signed in with your Apple ID. The setup process should display a message on your device that the AirPods have automatically connected.

To confirm this, you can follow the guide above for connecting your AirPods to your iPhone. If it doesn’t work, try this:

1. Make sure bluetooth is turned on from the bluetooth menu in settings

2. Swipe down from the top right corner to navigate to Control Center. The audio controls should show an image of the connected AirPod.

3. If your AirPods are still not connected, press and hold the music control icon.

4. Tap the music source icon, then tap your AirPods.

This should do the trick.

How to connect AirPods to an Android phone

To manually connect your AirPods to your Android device, you must go to the Settings app on your device and follow these steps:

1. Navigate to your phone settings and select Bluetooth settings.

2. Put the AirPods in the charging case close to the phone and open the case cover.

3. Press and hold the button on the back of the case until you see a flashing white light.

4. Select AirPods from the list of Bluetooth devices on your phone’s screen and follow the on-screen instructions to pair them with the device.

While you can pair AirPods with non-Apple devices, you should be aware that these devices may reduce the quality of audio streaming to your AirPods. Significant sound enhancement and noise reduction may also not be available on some Android devices, mainly due to Apple’s proprietary version.

How to connect AirPods to MacBook

If you have a registered Apple ID, your AirPod is likely already listed on the Bluetooth menu bar or on the volume control buttons on your Mac. If not, follow the guide below:

To pair your Airpods with your Mac, disconnect them from your iPhone, then follow these steps:

1. Put the AirPods in the charging case and open the lid.

2. Press and hold the settings button or noise control button on the back of the charging case. Do this until you see the white status light blinking.

3. Go to the Apple menu bar on your Mac and select System Preferences.

4. Click on Bluetooth and select your AirPods in the list of devices displayed on your Mac. Then, click Connect.

Note: You can enable a preference to automatically connect the earbuds to your Mac. Additionally, users whose AirPods support Siri voice commands can enable it on their Macs.

How to connect AirPods to PC/Laptop (Windows)

Here’s how to connect your AirPods to a Windows PC:

1. Make sure your bluetooth is turned on by navigating from Settings to Devices

2. Click Add Bluetooth or other device, then click Bluetooth.

3. Open the lid of the AirPods case with your AirPods and press and hold the small button on the back of the case for a few seconds until you see a flashing white light.

4. Your earbuds should appear on your computer screen below the list of devices available for pairing. They may initially show up as Headphones, then switch to AirPods.

5. Click on the AirPod name, the lower right corner of the screen will show that the connection is successful.

>>>>>>>>>>>>>>>>>AirPods battery

Thanks for reading, hope it helps!

Friendly reminder: If you need to replace the battery of your device, this battery store will be a good choice: www.batteryforpc.co.uk

AirPods Pro 2 are harder to lose, last longer, and sound better

 Apple announced the new AirPods Pro 2 wireless earbuds at its Far Out September event, priced at $249/£249/AU$399. Pre-orders begin on September 9, with a shipping date of September 23.

The new AirPods Pro feature the same “protruding stick” design as the previous version, and white remains the only color option. A key upgrade is the capacitive touch controls on the outer surface of the earbuds, which allow you to adjust volume by swiping your finger up or down — something the original feature didn’t have.

According to Apple, the new H2 chip allows for advanced computational audio in the new AirPods Pro, with the benefit of canceling twice the amount of noise even when you turn on transparency mode, such as heavy machinery.

Like the AirPods 3 and AirPods Max, the new AirPods Pro also support spatial audio. A new Personalized Spatial Audio option is also supported in iOS 16, which uses the TrueDepth camera feature on iPhone to create a unique listener profile based on the shape of your head and ears, so sound movement is more persuasive.

Lightning wired charging, Qi, and Apple MagSafe wireless charging are options for the new AirPods Pro, but you can use the charger that came with your Apple Watch for the first time. For the new model, battery life has been upgraded to 6 hours on a single charge and 30 hours of total listening time with the charging case, up from 4.5 hours and 24 hours, respectively, of the original.

There are few new features among the new models listed in the 5 upgrades released for the AirPods Pro 2, but one of them is an improved case with built-in speakers for pairing feedback and bass power and charge status. It’s also used for precise finding, the case’s speaker beeps when using the iOS Find My feature, and there’s support for UWB directional positioning with your iPhone so you can point directly at your lost AirPods.

Lastly, Apple has also added new low-distortion speakers and custom amplifiers, so we think the overall audio quality will be improved over the original.

There’s no mention of lossless audio, but Apple does say the H2 chip supports high-bandwidth connections, so we don’t know what that means yet. We’ve written before about how Apple is adding lossless sound to the AirPods via Bluetooth, so there may be more to come with these buds in the future.

>>>>>>>>>>>>>>Apple battery

AirPods: Try this factory reset for a quick fix

 Apple’s AirPods Pro are one of the best wireless earbuds you can buy. With great sound quality, excellent active noise cancellation, and a compact design, AirPods Pro set the tone for premium wireless earbuds that quickly evolved into the everyday device of many Apple enthusiasts. But even great headphones are prone to issues, and if you’ve been using them for a while, sometimes your AirPods might have some issues.

Knowing how to reset your AirPods is a useful tip, whether you want to restart your AirPods or sell them before a deal. good news? It’s an easy process that you can learn in just a few minutes, and the same steps apply whether you have the original AirPods, AirPods 2, AirPods 3, or noise-cancelling AirPods Pro.

How to factory reset AirPods or AirPods Pro

1. Put your AirPods in the charging case and make sure the lid is closed.

2. After 30 seconds, open the cover to connect your iPhone or iPad. On either device, go to Settings > Bluetooth , then tap the blue i icon next to AirPods. (If you don’t see your AirPods in Settings > Bluetooth, go to the next step.)

3. Tap Forget this device, then tap Confirm again.

4. Now that your AirPods are forgotten, open the lid, press and hold the button on the back of the case for about 15 seconds, or until the status light flashes amber, then turns white.

If you are using an Android phone, the first two steps are the same, then:

3. Go to Settings, then Connected Devices and tap the gear icon next to AirPods or AirPods Pro.

4. Now, tap Forget and then Forget Device to confirm.

After resetting your AirPods, the earbuds will no longer automatically recognize the device associated with your iCloud account. Opening the AirPods case near your iOS device will start the setup process as if you were using it for the first time.

>>>>>>>>>>>>>>>AirPods battery

How to connect AirPods to a Chromebook

 When you stream Netflix on your Chromebook, you can easily listen to music or get better sound through headphones. But if you don’t like being tangled in wires, Bluetooth earbuds like Apple’s AirPods are a great option. Here, we’ll show you the steps you need to follow to connect your AirPods (or other Bluetooth headphones) to your Chromebook.

Can I use any bluetooth headset with my Chromebook?

Yes. If they use Bluetooth to connect to the device, they’ll happily use their Chromebook. However, some features may not work, especially if you have AirPods.

Controlling Siri, for example, is impossible because the Apple digital assistant resides on the iPhone and communicates with the AirPods, rather than “in” the earbuds themselves.

AirPods can be paired with multiple devices — thanks in part to iCloud — but they can only handle one active Bluetooth connection at a time. So make sure they are not connected to your iPhone (or Android phone) when trying to set them up on your Chromebook, as this can cause problems.

The easiest way to test this is to turn off the bluetooth on your phone while connecting them to your Chrome laptop by following the steps below.

How do I connect AirPods and other Bluetooth headphones to my Chromebook?

Connecting wireless earbuds to your Chromebook is easy. Here’s what you need to do:

1. Click the time displayed in the bottom right corner of your Chromebook.

2. In the menu that appears, click the Bluetooth icon to turn it on, then click the down arrow to open the Bluetooth settings.

3. Open the case on the AirPods or press the pairing button.

You should see the headset appear in the list of Bluetooth devices detected by your Chromebook. ChromeOS will then automatically connect the earbuds and you’ll see a message letting you know this has happened.

To disconnect your AirPods from your Chromebook, go back to the Bluetooth settings and click the settings “cog” icon in the upper-right corner of the window.

You’ll be taken to the main settings page and you’ll see the Bluetooth earbuds listed as connected. To the far right of its name, click the three dots and select Disconnect.

>>>>>>>>>>>>AirPods battery

AirPods can’t switch between devices? try these fixes

 Apple’s wireless AirPods and some Beats models automatically switch between devices depending on which device you’re using. If your AirPods won’t switch, here are some things to try.

Do your AirPods support automatic switching?

Not all models of AirPods (or Beats) support automatic device switching. You must be using AirPods Pro, 2nd or 3rd generation AirPods, AirPods Max headphones, Powerbeats or Powerbeats Pro earbuds, or Beats Solo Pro headphones for this to work.

You can find out which version of AirPods you have by connecting them to your iPhone or iPad, then navigating to Settings > Bluetooth and tapping the “i” button next to AirPods. On a Mac, you can do this by connecting them and then visiting System Preferences (or System Settings) > Bluetooth and clicking Options next to AirPods.

It’s worth noting that you’ll also need an Apple device for this to work. It’s not supported on Windows PCs or Android smartphones, but you can pair AirPods with almost any device and enjoy wireless audio.

Make sure “Auto connect” is enabled

To do this, you need to tell AirPods to automatically connect to each device you want to use. This setting is device-specific, so you can tell AirPods to automatically connect to your iPhone instead of your Mac.

To do this, go to Settings > Bluetooth, then tap the “i” next to AirPods on your iPhone or iPad. Under “Connect to this iPhone/iPad”, make sure “Automatic” is enabled. You can do the same on your Mac under System Preferences > Bluetooth by clicking the Options button next to your AirPods.

For any device you want to use this feature on, make sure to select “Automatic” in this box. If you want to exclude the device from automatic connection, select “Last connected to this <device>”. If you want to turn this feature off completely, select “Last connected to this <device>” on all your Apple gadgets.

Turn on automatic ear detection

When your AirPods detect that they’re in your ears, they’ll switch based on which device they think you’re using. This feature may still work if it is not enabled, but you will have a better experience with it enabled. You’ll also save battery life because your AirPods won’t stay on all the time when you open the case.

To do this, go to Settings > Bluetooth and tap the “i” next to AirPods, then turn on Automatic Ear Detection. On a Mac, go to System Preferences > Bluetooth, then click the Options button next to AirPods, then turn on automatic ear detection.

Make sure you’re using the same Apple ID on all devices

One of the best things about AirPods and Beats headphones is how they sync between devices using iCloud. This means you only need to pair your AirPods with a single device and they will work on all of your devices. The only caveat is that you need to share the same Apple ID on all devices.

Reboot the affected device

If you’re sure your AirPods or Beats are compatible, and you’ve checked your AirPods settings under Bluetooth and it’s still not working, try restarting whatever is causing you trouble. The same goes for your iPhone or iPad, but the steps to restart may vary depending on the device you have. Any software issues you may have that are causing the problem should be resolved by a full restart.

Make sure everything is updated

If it still doesn’t work, it’s worth checking that you meet the minimum software version requirements for this feature. If you do not meet these requirements, the feature will not work.

You can check which version of iOS or iPadOS you have under Settings > General > About This Mac on your iPhone or iPad. On a Mac, click the Apple logo and select About This Mac to see the installed version.

If you don’t meet the minimum requirements, try updating your iPhone, iPad or Mac to the latest software from Apple under Settings > General > Software Update or System Preferences > Software Update on your Mac.

Unpair your AirPods and start over

If you’ve tried everything else and met all the minimum requirements, try restoring your AirPods to factory settings by unpairing. You can do this by clicking the “i” button next to your AirPods or using the Options button next to your AirPods under System Preferences > Bluetooth on your Mac under Settings > Bluetooth.

Still not working? manual switch

If you’ve tried everything and it still doesn’t work, you can switch between devices manually. To do this on your iPhone or iPad, swipe down from the top-right corner of the screen, tap the Now Playing box, and select your AirPods from the options below the playback controls. On a Mac, you can click the Control Center icon in the upper-right corner of the screen, then click the AirPlay button next to the volume slider. You can also enable the “Show sound in menu bar” option on the Output tab under System Preferences > Sound for a quick toggle.

>>>>>>>>>>>>Apple battery

Apple: How to give your AirPods a new look

 How long have you worn your AirPods, or put them aside? Is it a long time, have you noticed that your AirPods have become very dirty, your long-term wearing may make your AirPods full of earwax, or you have left them aside for a long time and they are full of dust. Isn’t it scary! To keep your AirPods as new as they were when you first bought them, here’s how to clean them, let’s take a look!

Apple‘s AirPod Cleaning Instructions

Apple instructs you to use a slightly damp cloth and a soft, dry, lint-free cloth, and warns you not to use soap, shampoos, and solvents, or to run your AirPods underwater. To scoop out dirt from the microphone and speaker grids, Apple recommends using a dry cotton swab and a soft-bristle brush.

According to Apple, for the tje AirPods Pro, you can remove the earbuds and rinse them with water, but don’t use soap or other cleaners. Apple then wants you to follow its general rule of wiping the earbuds clean with a soft, dry, lint-free cloth and letting them dry completely before reassembling.

To kill any germs that might be hitchhiking on your AirPods, Apple says you can use 70% isopropyl alcohol wipes or Clorox disinfecting wipes to gently wipe down the outer surface (but not the speaker mesh). It’s best to avoid overly saturated wipes, as you don’t want any openings in your AirPods to get wet. Finally, no matter how dirty and disgusting your AirPods are, don’t dip them in any cleaning product.

Apple‘s method was tested. Tried using a Q-tip, but ended up just smoothing out the wax and dirt further. Then I used an old toothbrush to try to remove the roughness, with no better results.

Fun-Tak and Wooden Toothpicks

I could wipe the outside of the AirPods (and their case) with a dry cloth to remove dirt, but I needed a better way to get the wax and dirt out of the speaker’s mesh and hollows.

To remove wax and grime stuck in the cavity of the AirPod speaker, just grab a small piece of Fun-Tak and stretch and rub it to warm it up. Then press it on the speaker a few times and it will pick up wax and grime.

The stubborn bits that hit the sides of the speaker cavity can then be gently removed using a wooden toothpick. A wooden toothpick is sharp enough to pick out coarse waxy dirt, and it’s far safer than sharp metal objects like unfolded staples, which can scratch plastic or tear wire speaker mesh.

>>>>>>>>>>>>Apple battery

Apple: Do AirPods work with Android?

 Apple’s AirPods line of true wireless earbuds and headphones is one of the most popular. This means that using AirPods with your iPhone, iPad or Mac is easy; but what if you want to use Apple headphones or earphones with your Android phone? Well, you’ll be happy to know it’s possible — but be warned, you might miss out on some AirPods features, like support for spatial audio and super-fast pairing.

Fortunately, there are some workarounds you can take advantage of, including apps that restore some AirPods features that Android users typically don’t have access to. Here’s everything you need to know about using AirPods with Android.

How to connect AirPods to an Android phone

If you’re using AirPods with your Android phone for the first time, you might be wondering how to pair earbuds or headphones with your device.

AirPods 2019, AirPods 3 and AirPods Pro

First, open your AirPods’ charging case, then open the Bluetooth settings on your Android phone by going to Settings > Connected Devices > Bluetooth. Make sure Bluetooth is turned on. Now press and hold the pairing button on the back of the AirPods case – the LED on the front of the case should flash white. Find your AirPods in the list of Bluetooth accessories and tap Pair. Your AirPods should now be connected to your Android phone.

AirPods Max

The pairing process for AirPods Max is exactly the same as for true wireless AirPods, except you need to press and hold the noise control button on the earphones instead of the pairing button on other AirPods charging cases. This button is on the top of the right earcup, on the side of the headband opposite the Digital Crown. The status light on the bottom of the earcups should flash white, and once the AirPods Max appears in the Bluetooth device list on your Android device, press Pair.

Which AirPods features don’t work with Android?

simple setup

Pairing AirPods with your Mac requires you to go into system settings and manually select AirPods. There’s no workaround to make pairing faster on Android devices – but luckily the process is pretty quick anyway.

Siri

Android devices don’t come with Apple’s voice assistant, so don’t expect to be able to summon Siri with your voice while wearing AirPods. However, you can download an app for free called Assistant Trigger, which lets you squeeze the lever on your AirPods to summon Google Assistant.

Check the battery

When you pair your AirPods with your iPhone, you’ll see an animation showing the battery status of the earbuds or headphones. While this won’t happen on Android, the aforementioned Assistant Trigger app can also display remaining playback time.

auto switch

You can automatically switch your AirPods between different iOS devices – so if you’re listening on your iPhone, all you have to do is start playing music on your iPad to switch to your tablet.

custom control

On iOS devices, you can change the function of double-tapping the AirPods’ touch case—for example, you can set it to skip music to the next track. This is not possible on Android devices.

dialogue enhancement

AirPods Pro can help you hear face-to-face conversations by boosting volume using computational audio and beamforming microphones. Android users won’t be able to use this feature because you need the latest version of iOS or iPadOS to use it.

>>>>>>>>>Apple battery

One (or two) AirPods does not work, how can I fix it to make it work?

 Does AirPods make you feel very convenient? But have you ever encountered such a situation where an earplug inexplicably stops working. Does this make you very distressed? If you encounter this kind of problem, tell you a simple repair method that can keep your earplugs working in a short period of time. Whether you have the original AirPods, AirPods 2, new AirPods 3, or noise-canceling AirPods Pro, the steps are the same.

If there is a problem with your AirPods, it is also a good idea to make sure that your iPhone’s Bluetooth is turned on. To do this, swipe down from the upper right corner of the screen to launch the control center. Then, make sure that the circle with the Bluetooth symbol is blue. If it is not, tap it to turn on Bluetooth.

You can also check whether your iPhone’s software is up to date to alleviate any potential problems you may encounter when using AirPods. Software updates usually bring security fixes and sometimes add new features to your AirPods. Start the settings, click General and select Software Update.

The following will solve for you how to repair a non-working AirPod and reset your AirPods!

How to fix a non-working AirPod

1. Put the two AirPods back into the charging case and make sure they are charging. Let them charge for 30 seconds.

2. Open the protective cover near the iPhone or iPad and wait for them to pop up on the screen.

3. Put two AirPods in your ears and try to play music or video to make sure the audio is working properly.

How to reset your AirPods

1. First, please make sure your AirPods are placed in the charging case and the lid is closed.

2. After 30 seconds, open the lid and connect the AirPods to the iPhone or iPad. Launch the settings menu on your mobile device and tap Bluetooth.

3. Find your AirPods in the list of Bluetooth devices, and then tap the i symbol next to.

4. Choose to forget this device. You may need to scroll down to find this option.

5. After forgetting the AirPods, open the charging case cover and press the button on the back for about 15 seconds. The front light should flash white.

6. Now, put the AirPods in the charging case, with the lid open, close to the iPhone or iPad. You should see instructions to pair them again on the screen, just like you set them up for the first time.

Resetting the AirPods can usually solve this problem. However, if you are still experiencing issues with one or two AirPods, please check to make sure that no debris is obstructing the speaker grid.

>>>>>>>>>>>Apple battery

Thank you for reading, and hope the above information will help you to fix the AirPods that are not working!

Friendly reminder: If you need a variety of mobile phone batteries, laptop batteries, I recommend a safe and reliable online store for you to choose: www.batteryforpc.co.uk