Everyone knows the latest Apple Watch is designed for everything related to water sports and fitness, and it’s an ideal smartwatch for those looking to track laps in the pool or see how far they’ve surfed . But water-based tracking for wearables also comes with a handy water feature: water lock.
The Apple Watch may be water resistant up to 50 meters, but that doesn’t mean water won’t get into the wearable when you swim, surf, or even shower. Water Lock keeps your Apple Watch locked while you’re in the water, or even squirts water when you’re done. Here’s how to use the Apple Watch’s Water Lock feature. Let’s have a look!
Anyone with an Apple Watch Series 2 or newer can easily turn on Water Lock. Just like you use your Apple Watch as a flashlight, you can turn it on by visiting Control Center. Turning it on locks the screen so it doesn’t respond to inadvertent input when the user is in water, and turning it off using the Digital Crown makes it easy to squirt water from the Apple Watch’s speakers.
Below you’ll find a quick guide to turning your Apple Watch’s water lock on and off to spray water:
1. On Apple Watch, swipe up from the bottom of the screen to access the Control Panel.
2. Once opened, scroll down and tap the water drop icon.
3. A water drop icon will appear at the top of the watch face.
4. To spray water, turn the Digital Crown until the display reads “Unlocked”.
5. A series of sounds will play to the clear water in the speaker. Once done, the Apple Watch is ready to use.
You can do this multiple times if the water is still there. It’s a handy feature for any swimmer and surfer, and it’s even useful in the shower. Although, Apple doesn’t recommend using its wearable in the shower because soaps, shampoos, conditioners, lotions, and fragrances can affect it.
Apple has revealed a slew of new innovations for its hardware with a strong push for accessibility, features that will be implemented via software updates later in 2022.
New software features developed using machine learning include door detection for users who are blind or low-vision, and a real-time captioning system for those who are deaf or hearing impaired, and Apple Watch Mirroring for those with physical and visual impairments, movement disorders, and smartwatch control via iPhone Ability.
Let’s take a deeper look at these features, starting with door detection, which, as the name suggests, allows iPhone and iPad users to locate doors when they arrive at a new place.
The feature uses lidar, so requires a device with a lidar scanner (iPhone 12 and iPhone 13 – Pro and Pro Max – phones, and various iPad Pro models), built into the Magnifier app. It can determine whether a door is open or closed, if the latter, how it opened, and the user’s distance from the door, plus it can read any signs or characters on the door.
The magnifying glass will gain a new detection mode that will play the role of door detection and will also provide features like person detection and image description.
People who are deaf or hard of hearing can access Live Captions on iPhone, iPad, and Mac computers, allowing captions to be generated on-device for everything from video chats to watching streaming content. In FaceTime, captions are automatically attributed to the person in the call, while on Mac users have the option to type in a reply and have them read it aloud in real time.
Note on device support that only supports Macs with an Apple chip, or you need an iPhone 11 or later, or for an iPad, models with an A12 Bionic chip. Initially, Live Captions will debut in beta form (and thus still in testing — Apple observes that the accuracy of captions “may vary”) only in English.
The last major accessibility revelation Apple made here was the introduction of Apple Watch Mirroring, which allows people to use their iPhone to control their watch. In other words, users can benefit from smartphone accessibility features such as voice control and switch controls when interacting with the Apple Watch, voice commands to turn on the watch, head tracking, and more.
The new Quick Actions for Apple Watch also allow users to control with simple gestures, such as answering (or ending) a call with a double-pinch gesture.
Note that you need an Apple Watch Series 6 or newer to benefit from the mirroring feature.
Turning off your iPhone isn’t always easy, especially if it’s frozen or not working. In the following guide, we’ll show you all the effective ways to turn off your iPhone. These methods are different and once we learn all of them, even if the iPhone is locked or we find something wrong (such as the shutdown button is broken or stuck). Let’s have a look!
The easiest and most direct way to shut down your iPhone X, iPhone XS, iPhone XR, iPhone 11, or iPhone 12 is to press and hold the volume up key and the side button for 5 seconds, then turn it from the left as soon as the shutdown slide appears . Start the classic shutdown procedure on the right (works in any case where the iPhone is working properly).
If we have iPhone versions older than iPhone X (eg iPhone 8, iPhone 8 Plus, iPhone 7, etc.), classic shutdown can be done by holding down the power button for a few seconds until the shutdown slideshow is displayed.
To shut down your iPhone directly from the system, open the Settings app, go to the General menu and scroll through the list of options until you find the Shutdown item. After pressing the item, the classic shutdown slide will appear, which we can drag to the right to complete the process. Even with little use, this process helps to shut down the phone without pressing the power button, and it’s useful if we’re having hardware issues with the physical buttons.
Force restart iPhone
If our iPhone seems to be frozen or unable to turn it on or off, then it is better to learn the key combination that we can force restart any iPhone on the market. To restart a locked iPhone, we can follow these steps:
iPhone X or later: Quickly press and release the Volume Up key, quickly press and release the Volume Down key, and finally press and hold the Side key. We also release the side button once we notice the Apple logo.
iPhone 8 or iPhone SE (2nd generation): Also in this case, we quickly press and release the volume up key, press and quickly release the volume down key and hold the side key. When we see the Apple logo, we can release the key.
iPhone 7: Press and hold the Volume Down key and the Standby/Wake key at the same time. When the Apple logo appears, we release both keys.
iPhone 6s or iPhone SE (1st gen): On these phones, we press and hold the Standby/Wake button and the Home button at the same time. Once we see the Apple logo appear, we release the keys.
The side buttons usually don’t work if our iPhone gets stuck on startup, along with the force unlock procedure seen above. In this case, we recommend that you first charge the phone by connecting it to a PC with iTunes via a cable; after about 2 hours, we can use the program to enter Apple’s DFU mode. The keys to enter this special mode are as follows:
On iPhones prior to iPhone 7 and iPhone 7 Plus Plus (with mechanical Home button): We were afraid to press the power button for about 3 seconds, and immediately after that we also held the Home button (without releasing the button) for about 10 seconds, we Release the button power and press and hold the home button for about 8 seconds.
On iPhone 7 and iPhone 7 Plus Plus (with virtual Home button): The process is the same as seen above, the only difference is that we have to use the Power and Volume Down keys instead of Power and Home .
On iPhone 8, iPhone 8 Plus, iPhone X and later: Press Volume Up once, then immediately press Volume Down once (two touches must be quick) and hold the side button until the iPhone screen goes black. When the screen goes black, release the side button and hold the side button and volume down button at the same time for about 5 seconds; after 5 seconds, we only release the side button and keep pressing the volume down button until a warning message appears on iTunes.
These features can help you save battery and get the most out of Microsoft’s latest updates. Whether you use your computer for work or personal life, now is a great time to master some of Windows’ productivity features. These built-in tricks can help you with everything from setting up taskbar shortcuts to saving battery power. Microsoft isn’t usually as candid about its hidden features as Apple, which can sometimes make it harder to figure out how to take advantage of all that Windows has to offer. But we’re here to give you our list of hidden features you can start using today to get the most out of Windows 11. Let’s have a look!
If your desktop screen is overcrowded with open windows, you can quickly minimize them all except the one you’re currently using. You’ll need to turn this feature on in Windows 11 by going to Settings, System, Multitasking and turning on Window Shaking in Title Bar. Just click on the title bar of the window you want to keep open to select it. Then, hold down the mouse and quickly move the window back and forth — basically shaking it. After a few quick shakes, all other open windows are minimized, leaving only the one you shaken.
2. Open the “Secret” start menu
You know that to get to the Start menu, you need to click the Windows icon at the bottom left of the screen or on the keyboard. But Windows 11 includes a little-known second Start menu, which you can access in two different ways, by pressing Windows key + X or by right-clicking the Windows icon/Start button.
There are at least eight different ways to take screenshots with Windows. If you want to capture and save a picture of the entire screen, the easiest way is to press the Windows key + Print Screen key, and the picture will be saved to the Pictures > Screenshots folder.
To capture only a portion of the screen, press Windows key + Shift + S to open a tool called Snip & Sketch, which allows you to click and drag to create a screenshot and save it to the clipboard.
4. Use keyboard shortcuts to open pinned items from the taskbar
If you’ve pinned programs to the taskbar at the bottom of the screen to create shortcuts, you don’t need to click an icon to open them. Instead, use the keyboard shortcut Windows key + [number keys], which correspond to the location of pinned programs on the taskbar.
5. Know how much space an app takes up
The computer starts to run slower due to lack of space. A quick way to speed them up might be to get rid of apps that take up more space than they should, especially if you don’t use them often. To see how much space apps, temporary files, and documents are taking up, navigate to Settings > System > Storage. Click Show more categories to see the full list. To find out what to throw, click Cleaning suggestions to see Windows 11 suggestions.
6. Close background apps to save battery
To control which apps run in the background and save some battery power and data, go to Settings > System > Power & Battery. Tap Battery Saver, then make adjustments to limit certain notifications and background activities while Battery Saver is on.
The feature should be on by default, but if not, go to Settings > Bluetooth & devices > Mouse and toggle Scroll inactive windows to On when I hover over them. You can then mouse over the window in the background and use the wheel to scroll.
8. Show File Extensions in File Explorer
Microsoft hides file extensions by default, making it difficult for people who need to find certain types of files. To view file extensions in File Explorer:
1. Using Search in the taskbar, type File Explorer Options, and then click it.
2. In the pop-up window, click the View tab.
3. If checked, uncheck the Hide extensions for known file types box. Click Apply, and then click OK.
You can also use the File Explorer options menu to choose to show empty drives, hide files and folders, and more.
9. Use Focus Assist to reduce distractions
It’s frustrating trying to get work done when you’re constantly interrupted by notifications. You can determine how much you get with Focus Assist.
Set it up by going to Settings > System > Focus assistant. Choose from three options: Off, Priority Only (view only selected notifications from your customized priority list, and send the rest to your Action Center), and Alerts Only (hide all notifications except alerts ).
Google’s first smartwatch is out. The company teased the watch, called the Pixel Watch, at its I/O conference on Wednesday, alongside the Pixel 6A, the Pixel 7 with the new Tensor chip, the Pixel Buds Pro, and Android 13.
But Google‘s announcement is just a preview, not the full release. That means many details remain a mystery, such as the watch’s price, battery life and health sensors. Google will likely reveal more details about the Pixel Watch closer to its fall 2022 launch, but here’s what we know so far.
It will launch with the Pixel 7 this fall
In an announcement on Wednesday, Google said the Pixel Watch will be officially released this fall. The exact time hasn’t been set, but Google typically holds a fall product launch in late September or October. For example, the Pixel 6 debuted at an event on October 19, 2021, while Google held a press conference on September 30 to launch the Pixel 5 in 2020.
Pixel Watch features a circular design with customizable straps
As the leak states, Google’s first smartwatch has a round face with a dome design and what looks like glass with curved edges. The watch is made from recycled stainless steel and has a tactile crown similar to the Apple Watch. Customizable shoulder straps will also be available.
Google’s Wear OS software and apps will power watches
Google’s new smartwatches will run on its Wear OS platform. Other than calling it “smooth” and “easy to navigate,” Google hasn’t commented much on the watch’s software features. Rick Osterloh, Google’s senior vice president of devices and services, described the operating system as “clickable, voice-enabled and self-explanatory.” During the presentation, the company briefly showed how apps like Google Maps, Wallet, Home and Google Assistant would appear on the watch.
It will integrate with Fitbit, but not replace it
You can expect to see some familiar Fitbit features on Google’s watch. These include continuous heart rate monitoring, sleep tracking, and active zone minutes, which measure how much time you spend in specific heart rate zones during exercise. Google also showed how to view Fitbit health stats, such as heart rate and steps, directly from the watch face. However, we don’t know which specific health tracking sensors will be used in the Pixel Watch. But it seems clear that the Pixel Watch will inherit more Fitbit features in the future.
It will only be compatible with Android devices
Since the Pixel Watch is designed to complement Google‘s Pixel devices, it won’t be compatible with the iPhone, according to a Google spokesperson. Given that Fitbit’s watches and trackers are compatible with both iOS and Android, that may be part of the reason why the Pixel Watch won’t replace Fitbit’s products.
There will be a cellular option
Google will offer a 4G LTE option for the Pixel Watch, which will allow it to maintain a cellular connection when the phone isn’t nearby. Fitbit’s smartwatches don’t have the option to support cellular, so it’s a way for Google to differentiate the two product lines.
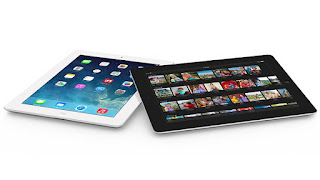
Most users have noticed that after a few months, some budget tablets barely offer the execution speed of high-end tablets, and there is little we can do to improve the situation. For users who do not give up easily, we can also try to speed up the execution of applications or introduce new features by updating the Android operating system, very similar to what is seen on smartphones.
Below we’ll show you how to update your old Android tablet to get a satisfactory level of performance to run all the apps we’re interested in without experiencing excessive slowdowns. Updates can also bring new features not present in the firmware in use at the time. Let’s take a look together!
Official update via OTA
The first kind of update that we can apply is probably from the manufacturer of the Android tablet: by choosing a device from a well-known manufacturer, we will regularly update the product for the first two years after release in order to receive the latest security patches released on the market and new features. If we never initiate a system update on our tablet, we can do it quickly by opening the Settings app, which takes us to the tablet’s information menu, and pressing the Check for Updates item.
We will be notified if there is an update: by pressing the download button or installing, we will be able to update our old Android tablet to the latest firmware version provided by the manufacturer. Since system update files can be large, make sure to connect to Wi-Fi and avoid using cellular data networks so that files can be downloaded quickly at no additional cost. At the end of the download, we restart the tablet and wait for the update to end.
Update via custom ROM
Not all Android tablets on the market receive constant and frequent OTA updates: some Chinese products never even receive an update! In these cases, we can still update our tablet by installing a custom ROM, an unofficial firmware managed by volunteer developers capable of giving any old tablet a new lease of life. The best custom ROM we can install on a tablet is LineageOS, available from the official website.
If we’re geeks and want to update our old tablet at all costs, all we have to do is find the specific LineageOS version for the tablet we’re using, download the latest version made by the developer and follow the installation instructions in Install. In the vast majority of cases, the procedure is the same for all tablets, and is very similar to that for Android smartphones:
1. Unlock the bootloader or Samsung Knox (if present)
2. Install a custom recovery like TWRP
3. Load the custom ROM file into the tablet’s memory
4. Restart the tablet in recovery mode
5. Recover installation from custom ROM
6. Restart the tablet
These are the necessary steps to be able to install a custom ROM like LineageOS on our tablet in order to have the latest version of compatible Android and all the other features present on this unofficial firmware.
Android 13 “Tiramisu” was announced at Google IO 2022, showcasing improvements to its design, improved notifications, and more. Google has been focusing on security during this year’s keynote, and Android 13 has adopted the same focus, lauding improvements to RCS, messaging standards, and wallets.
While the latest Android 13 public beta is available for Pixel 6 phones, you can check to see if your device is eligible by visiting the Android Beta webpage, which will roll out once Google IO is over.
The Pixel 7 and 7 Pro were also announced at the event, and Google confirmed that they’ll both debut with Android 13 once they’re available.
feature
The Android theme Material You in Android 13 has many improvements, music controls on the lock screen adapt to the color you choose, and a greater focus on security. Earthquake alerts are improving, with full-screen alerts that better describe the situation and a helpful way to stay safe.
handover
We hoped that Google would be inspired by Apple’s Handoff feature, and it looks like our wish has been granted. You can hand over images and media to Google products or Android tablets. There’s also Quick Pair, which pairs your devices better together in a faster way.
Google Wallet
Google Wallet is a redesign of Google Pay that stores your payment cards as well as event tickets, parking passes, vaccination cards, health insurance cards, flight passes, and more. It’s a one-stop shop for Android 13 users, designed to replace the wallet you’ve been carrying around for years.
Google also announced that Android 13 is focused on being tailored for tablets and foldables, which could hint at the Pixel Fold.
Devices that support Android 13
Android is known for not being easy to update your phone to the latest version. Part of the reason is how different manufacturers design Android to match brands like Samsung.
But as Google releases a new Pixel phone every year, those phones usually come with the latest version of Android. It wouldn’t be surprising to see the Pixel 7 or Pixel Fold appear again in October with Android 13.
The Google Pixel 6 and 6 Pro support the Android 13 public beta, so they will almost certainly work with the finished software. There are also 20+ Google apps that need to be optimized for tablets, so Android 13 looks to be the first major release available for tablets as well as foldables and phones.
Other manufacturers usually follow up and make their own tweaks on the new Android version after a few months of testing, but usually not until the first half of next year.
release date
During the Google IO keynote, “2022 is over” was a common phrase used when the Pixel Watch, Pixel 7, and 7 Pro were announced. But Google made sure to emphasise that the 7 and 7 Pro will launch with Android 13, so it’s conceivable that they’ll arrive around October 2022.
Your old laptop may be running slowly, but that doesn’t mean you need to replace it. With heavy use, your notebook can collect a lot of excess files and programs, not to mention some literal dust. Parts age and software updates become more demanding. But before you buy a new workstation, you should try some hardware and software fixes. A screwdriver and a few settings tweaks can get your laptop running like new. Here are 12 ways to speed up your system. Let’s have a look!
1. Upgrade your hard drive to SSD
Adding a solid-state drive (SSD) is the biggest hardware change you can make to speed up your laptop. It makes everything faster; starting, closing and launching applications will all happen in the blink of an eye compared to a traditional hard drive. If your old laptop has a traditional hard drive inside, you can hack it for a significant speed boost at a reasonable price.
2. Upgrade your RAM
Your laptop should have at least 8GB of RAM. Your best bet these days is to buy a laptop with so much memory, since more and more manufacturers solder it to the motherboard, there’s no way to add more memory. However, many laptops still let you open them, and RAM is relatively cheap. If you have 4GB, please upgrade to 8GB.
3. Update your launcher
Anything running in the background can slow down your computer‘s startup time and dedicate resources to programs you might not even be using. Fortunately, turning off these features is easy:
In Windows 10, go to Task Manager > Startup to see a list of programs that are running when you turn on your computer.
On a MacBook, go to System Preferences > Users & Groups > Login Items to adjust the programs that start when the computer is turned on.
4. Uninstall unused apps
Unused programs take up storage space on your hard drive and use up CPU resources. Delete junk to free up space and processing power for a faster computer.
5. Run regular malware scans
Something you didn’t install on purpose could be the reason why your laptop is running slowly. Run virus and malware scans regularly to prevent malware from slowing down your laptop, or worse. Being vigilant can help you avoid and eliminate the threat of hoarding resources or filling your laptop with junk files.
6. Kill animation
Animations in your operating system may look cool, but they take up valuable resources that can be moved elsewhere.
3. Select Adjust for Best Performance, which will turn off a bunch of special effects and animations.
In OS X:
1. Go to System Preferences > Dock.
2. Check the box to turn off magnification and stop animations when opening the app.
7. Speed up your shutdown
When you shut down Windows, you often have to wait a long time while the computer tries to close open programs that cannot close properly on its own. If you’re willing to dig into your registry, you can force the shutdown process to kill these rebel apps instantly. Make sure to always save your work when doing this, as it will close open programs without affecting it.
8. Disable Web Results
In Windows 10, Cortana searches the web and your local files when you search. This takes time to download and can be a drag on your system. If you mostly use the Cortana box to find files and apps on your hard drive, Windows 10 can easily turn off web results.
9. Speed up your Downloads folder
File Explorer is one of the most used folders in Windows, and if it’s full of your downloads, it can take a long time to load. If you see the loading bar every time you open a folder, you need to optimize it.
10. Keep it clean
Don’t get your laptop too dirty or you risk letting it overheat. When this happens, the processor and graphics card have to work harder to function properly.
11. Change browser
Microsoft’s Edge isn’t quite as full-featured yet, but it has the benefit of being lighter and faster. On a Mac, you can try Safari.
12. Update your drivers
Some new drivers can breathe new life into your hardware and fix any issues it may have. Be sure to check the manufacturer’s website to make sure your drivers are up to date.
Just because iPhones perform better on MacBooks doesn’t mean they won’t work on Windows 10 laptops. Syncing your data on Windows 10 requires a bit more expertise (as opposed to macOS’s plug-and-play sync, or how you drag and drop files with Android on Windows 10). Let’s take a look below!
Syncing music, photos, movies and TV shows means getting familiar with iTunes. If you’re already using it, you’re ready to go. If not, you can download and import your music by going to File > Add Folder to Library to move your current music into iTunes. Once you’re ready to sync, follow these steps:
1. Connect your iPhone to your laptop with a Lightning cable.
2. Click Continue when asked if the computer can access the phone.
3. Click the phone icon in the top bar.
4. Click Sync. Depending on the amount of data you’re syncing, this may take a while.
5. Check your photos, music, apps, and videos to confirm that they arrived on your phone from Windows 10.
Copy from iPhone
This is where things get tricky. To avoid piracy, it’s not that easy to sync from an iPhone and send data to it. Fortunately, there are some workarounds.
Music and Movies: This puts you in Apple‘s cab. While you can move non-iTunes media files from your PC to your phone, you can’t send them from your phone to your computer. However, if you buy media from iTunes on your iPhone, you can get it on your desktop via the cloud. As long as you have an Apple ID, you can download all your songs and movies again from iTunes on your PC at no extra cost.
Files: The cloud is your friend for syncing files. While I personally use Dropbox, you can also use iCloud.
Here’s our guide to using iCloud on Windows. It’s perfect for those who love Apple software, including Pages, Numbers, and Keynote. If you’re a Dropbox user, you can use the iPhone app and desktop app to view files or photos on any device. If you’re a Google user, you can use Sheets, Slides, and Docs.
When you buy a new Windows laptop, you need to adjust the new laptop to make it easier for you to use in the future. So are you still struggling with how to set up your new Windows laptop? Here are some things to consider when setting up a new laptop. Let’s take a look together!
Your computer may download a series of Windows 10 updates on its own, so why not force them to install manually to get it done? Steps:
1. Enter “update” in the search box.
2. Click Check for Updates.
Windows will begin searching for and downloading updates, but you don’t need to wait for the process to complete before moving on to the next task.
3. If Windows does not automatically search for updates, select the Check for Updates box.
Uninstall bloatware
Most PC vendors pre-install annoying third-party software on your computer. These outdated software are ready to suck up valuable system resources. To uninstall it:
1. Navigate to Settings. You can get there from the start menu.
2. Select System.
3. Select Apps & Features from the left menu. If you don’t see this option, press and enter Apps in the search box, then select Apps & Features.
4. Select the application you want to uninstall.
5. Click Uninstall.
6. Click the second Uninstall button that appears.
Copy or sync your files
There are several possible ways to move your documents, photos, videos, and other critical files from your old computer.
OneDrive sync: If your important files are stored in OneDrive, they will automatically download to the new PC when you sign in with your Microsoft account.
Dropbox or Google Drive: These services work just like OneDrive, but don’t come with Windows preinstalled. If you used them to store files on the old computer, install them on the new computer.
Manually copy files: Select all files under the Documents, Music, Video, and Photos library, copy them to an external drive, and then copy them to the new machine.
Install antivirus software
If you accidentally click on a wrong link, your entire computer can fall victim to a malware infection – a horrific situation that can usually be avoided with some good antivirus software. The point of antivirus software is to prevent such situations from happening before they happen, and if they fail, to fix them right after. It is vital to have some kind of antivirus software to protect your PC from threats.
With Bitdefender, you can prevent problems before they happen; if anything harmful manages to get into your computer, you can also scan for and eliminate threats after the fact. Here’s a quick guide on how to install Bitdefender Free Antivirus:
1. Click the big green “Free Download” button on the Bitdefender website.
2. Go to your downloads folder and find the bitdefender_online.exe file you just downloaded. click it. Then it will install Bitdefender.
3. To avoid annoying pop-up reminders or any potential long-term issues with Bitdefender functionality, please create a Bitdefender account. It’s as easy as providing your name, email and creating a password. From there, Bitdefender will operate autonomously, allowing you to conduct your internet activities with peace of mind, always protecting you.
Set up Windows Hello fingerprint or face login
Many current laptops come with fingerprint readers or infrared cameras for facial recognition. You should set up Windows Hello, a feature that lets you log in with your finger or with a glance, so you can avoid the hassle of using common passwords. This is another great security feature that protects your files.
1. Navigate to Settings.
2. Click Account.
3. Select the login option.
4. Click the Settings button under Fingerprint or Face Recognition.
5. Click Start.
6. Slide your finger or stare at the camera as instructed. If you don’t have a fingerprint reader or infrared camera, Windows 10 won’t let you continue.
7. Click Set PIN. Windows 10 requires you to have a PIN as a backup in case your finger or face fails to register. If you already have a PIN, you won’t be asked to do this.
8. Enter the PIN and click OK.
Install the browser of your choice
Microsoft‘s Edge browser is fast, lightweight and definitely worth considering. But if you’re used to Chrome and Firefox extensions, you’ll want your favorite browser right away. To set a new browser as the default browser, follow the steps below.
1. Download and run the browser installer of your choice. Chrome at https://www.google.com/chrome/browser/desktop/
2. Navigate to Settings. You can get there from the start menu.
3. Click System.
4. Select Default Applications in the left pane.
5. Click the icon under Web Browser. It might say “Choose a default”, or it might have an icon for the current default browser.
6. Select your browser in the pop-up menu that appears.