How to turn an old MacBook into an emergency Wi-Fi hotspot

 The whole point of a Wi-Fi hotspot is to turn on your cellular data connection to other devices. It allows you to control when the connection is active and who can connect, but if you have any online activity, any online activity will count towards your data plan limit.

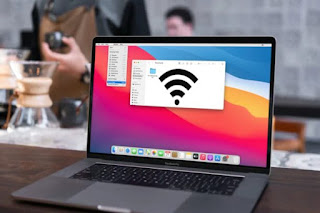
Why you should use your MacBook as a Wi-Fi hotspot

Turning your MacBook into a Wi-Fi hotspot isn’t quite the same as using your phone. Since MacBooks don’t currently offer cellular connectivity, the only way you can connect them to the internet is to already have an internet connection available. But in some cases, setting up a MacBook Wi-Fi hotspot can be useful.

This feature is handy if, for example, you’re in a location that doesn’t typically have Wi-Fi but does offer a physical Ethernet connection. Most pocket devices that can connect to the internet (i.e. smartphones) can’t just plug in an ethernet cable, and if you need to connect multiple ethernet-capable devices, a single connection won’t cut it. By plugging in your old MacBook and setting it up to share Wi-Fi, you’re essentially making it a makeshift wireless router to which your other devices can connect.

What you need to use your MacBook as a Wi-Fi hotspot

Turning a MacBook into a Wi-Fi hotspot isn’t very difficult, but it’s more than just the click of a button. Your MacBook needs to be running at least macOS 10.6 Snow Leopard, because that’s when Apple started including internet sharing options. You’ll also need to make sure your MacBook has access to an available internet connection, whether that means having the necessary ethernet connection or knowing the access password. After all, this feature won’t do you much good if you can’t get online in the first place.

Finally, you may need to take additional steps to secure your connection. If you wish to send or receive sensitive information, consider setting up a VPN to better protect your online privacy. At the very least, it is strongly recommended that you choose a more secure option when setting up a shared Internet connection.

How to Set Up a MacBook Wi-Fi Hotspot

The first step in setting up your MacBook as a Wi-Fi hotspot is to enable Internet Sharing in macOS. The process may vary slightly depending on the version of macOS you’re using, but in most cases it’s like this:

1. Open System Preferences.

2. Select Sharing > Internet Sharing.

3. Select the correct source device under “Share your connection from”.

4. Select how you want to share in the “Computer used” section.

Things get more nuanced when you decide how to share your connection. If you plan to share over Wi-Fi, when you go to step 3, you will need to select Ethernet, then Wi-Fi for step 4. Then open the Wi-Fi options to set your connection details, and select Start to start sharing your connection.

If you are using a Wi-Fi adapter, you need to configure it first, then select the Wi-Fi adapter in step 3. The rest of the process is the same as for regular Wi-Fi setup.

What about Bluetooth?

It’s possible to share a MacBook’s internet connection wirelessly via Bluetooth, but it’s not ideal, mainly because Bluetooth internet connections aren’t as fast as Wi-Fi and have more limited range. However, it will work in a pinch, so if that’s your only option, it will still get the job done. First, make sure that both your MacBook and the device you’re connecting to are available and have Bluetooth enabled.

1. Open System Preferences on your MacBook.

2. Select Sharing > Internet Sharing.

3. Select the correct source device under “Share your connection from”.

4. Select Bluetooth PAN as the sharing method.

5. Select Internet Sharing > Start to start sharing.

Keep in mind that not all MacBooks support Bluetooth PAN, especially newer models, since Wi-Fi has become so common. If your MacBook doesn’t offer a Bluetooth PAN, you’ll have to choose Wi-Fi, and if your device can’t connect to Wi-Fi, you may need to find another way to fully transfer the necessary material to your MacBook.

>>>>>>>>>>Apple battery

Thanks for reading, hope it helps!

Friendly reminder: If you need to replace the battery, this battery store will be a good choice: www.batteryforpc.co.uk

Samsung Galaxy Z Fold 4 is a formidable rival to Xiaomi’s new foldable phone

 We’re in a confusingly busy time for foldable phones, as not long ago, Samsung launched the Galaxy Z Flip 4 and Samsung Galaxy Z Fold 4, the Motorola Razr 2022 followed, and now Xiaomi has joined the ranks. The company just launched the Mi Mix Fold 2, a phone that looks similar to the Galaxy Z Fold 4.

The Xiaomi Mix Fold 2 has an 8.02-inch 1914 x 2160 folding screen inside with a refresh rate of 120Hz and 360 pixels per inch, and a 6.56-inch cover display on the outside with a refresh rate of 120Hz. There should be no shortage of power thanks to the Snapdragon 8 Plus Gen 1 chipset and 12GB of RAM, while storage is available in 256GB, 512GB, or 1TB.

As for the cameras, these are Leica-branded and include a 50MP primary sensor, a 13MP ultra-wide, and an 8MP telephoto camera with 2x optical zoom. There’s a 4,500mAh battery pack on the front of the battery that supports 67W charging.

So far, the Mi Mix Fold 2 has only been released in China, and it’s unclear if or when it will launch more widely, especially since the original is only available in China. But for reference, it starts at 8,999 yuan, which is about $1,335 / £1,090 / AU$1,875, so it’s not cheap.

Analysis: How does the Xiaomi Mix Fold 2 compare to the Samsung Galaxy Z Fold 4?

The Xiaomi Mix Fold 2 and Samsung Galaxy Z Fold 4 are both flagship phones, but there are some notable differences between them.

Xiaomi‘s phone has a slightly bigger screen, a slightly bigger battery, faster charging, but a slightly worse optical zoom. The two phones have similar power and storage, so there’s little difference, and their camera setups sound similar, save for the zoom potential. Price may be a major factor, but we can’t comment on this until it’s determined pricing for the Mix Fold 2 outside of China, other than to say that the Xiaomi Mix Fold 2 will probably have to be a little cheaper than the Z Fold 4 if it’s going to steal a lot of Samsung’s sales . But if the price is right, this is easily one of the best foldable phones around.

>>>>>>>>>>>>>>Phone battery

Switching your iPhone to Android? Here’s an easy way to transfer data

 If you’ve made the leap from an iPhone to an Android phone, you’ll find yourself with a long to-do list. Whether you’re transitioning to Google’s Pixel 6 or a new Samsung phone like the upcoming Galaxy Z Flip 4, switching operating systems can quickly become a hassle if you don’t know the most efficient way to move your data.

The secret to the easy transfer process is the tiny plastic adapters that Google and Samsung include in the box. The adapter has a USB-A connector on one end and a USB-C connector on the other end, allowing you to connect your new phone to your old iPhone. You can also use a USB-C to Lighting cable for newer phones like the iPhone 11. Using the adapter, you can transfer photos, videos, files, music and wallpapers. Let’s take a look at the specific operation together!

Switch from iPhone to Google Pixel phone

If you’re specifically switching from an iPhone to a Google Pixel, the first thing you’ll want to do is charge both phones. Next, you’ll turn off iMessage on all Apple devices—anything that uses your AppleID. Go to Settings, then Messages, then turn off iMessage.

If your new Pixel came with a SIM card, install it, turn on your phone and hit the start button. Next, connect to a Wi-Fi network and select Copy your data. Now unlock your old iPhone and put your lighting power cord in the bottom. Then, plug the other end into what Google calls the Quick Switch Adapter (QSA). Finally, insert the QSA into the Pixel. You can also use a USB-C to Lighting cable.

When prompted, tap Trust on iPhone. Then sign in to your Google Account on the Pixel. Next, select what you want to copy and click Copy. While the transfer occurs, you can continue to set up your phone, such as adding a PIN or setting up the Google Assistant and Google Pay. Once the transfer is complete, you’re done. Check to make sure everything you want to migrate is actually implemented and enjoy your new Google life.

Switch from iPhone to Samsung Galaxy phone

If you have a new Samsung Galaxy phone, it also comes with an adapter, but you can also move data over Wi-Fi. I recommend using an adapter as it is faster. You can also connect the two with a USB-C to Lighting cable. Just like with Pixel transfers, the first thing you need to do is make sure both phones are charged and turn off iMessage on your iPhone.

Unlike the Pixel, however, you can choose to set up your Galaxy phone as a new phone and then transfer the data, which means you can start using the phone right away without waiting. To start the transfer, open the Smart Switch app on your Samsung phone. Your phone may take a minute to download the app.

After turning it on, you may be prompted to send or receive data. Click Receive. Then, choose how you want to transfer: Wi-Fi or cable. Next, connect the two phones with the adapter and the iPhone’s Lightning cable – if you’re streaming over Wi-Fi, you don’t need to connect the phone to the cable.

On an iPhone, tap Trust, and on a Samsung phone, you’ll see a message pop up saying Connecting to your iPhone. If your iPhone was backed up with encryption, you might be prompted for a passcode. It should be your Apple ID password.

Next, your Samsung phone will scan your iPhone for data. This can take a few minutes and then you can choose exactly what type of data to bring in. Then, click the transfer arrow. Once done, browse your new Samsung phone and check your data. If you can’t find your photos and videos in the Gallery app, check out the Google Photos app.

>>>>>>>>>>>>>Phone battery

Thanks for reading, hope it helps!

Friendly reminder: If you need to replace the battery, this battery store will be a good choice: www.batteryforpc.co.uk

Galaxy Watch 5: How does the Pro model differ from the standard model?

 Samsung announced its new Galaxy Watch 5 series at Unpacked. By now, you probably know that the lineup consists of the base Galaxy Watch 5 and Galaxy Watch 5 Pro. The two smartwatches share the same DNA, but are also different enough to give us a deeper understanding of how they work. So, what are the main differences between the Galaxy Watch 5 and the Galaxy Watch 5 Pro? Let’s take a look below!

For starters, the Galaxy Watch 5 is available in two sizes (40mm and 44mm), while the Galaxy Watch 5 Pro is only available in a 45mm configuration. Aside from the obvious size difference, another noticeable difference is the rotating bezel. None of the Galaxy Watch 5 models have a rotating physical bezel; however, the Galaxy Watch 5 Pro does have a thicker concave (fixed) bezel, which is more of a design element than a feature.

Galaxy Watch 5 vs Watch 5 Pro: Design and build quality

Smartwatches with professional labels use higher quality materials in their construction. While both the Watch 5 and Watch 5 Pro use a sapphire crystal display protection (60% better scratch resistance), only the Galaxy Watch 5 Pro has a titanium body and a D-Buckle wristband.

Galaxy Watch 5 vs Watch 5 Pro: Hardware similarities and differences

Aside from the obvious design differences, the Galaxy Watch 5 and Watch 5 Pro share the same 5nm Exynos W920 chipset, 1.5GB of RAM, and 16GB of storage. They are also running One UI Watch 4.5 based on Wear OS 3.5 at launch.

All Watch 5 variants should perform similarly, but one key difference is that the Galaxy Watch 5 Pro has a larger battery. The Pro model is powered by a 590mAh battery, while the standard 40mm and 44mm Galaxy Watch 5 variants have 284mAh and 410mAh batteries respectively.

The Galaxy Watch 5 Pro offers up to 80 hours of use on a single charge. Battery life on Samsung smartwatches has been a concern since the original Galaxy Watch, but both the Watch 5 and Watch 5 Pro set the bar even higher.

Galaxy Watch 5 Pro gets exclusive health features

Samsung‘s new smartwatch comes with a temperature sensor and better health features, including sleep tracking and sleep coaching with sleep analysis reports, scores, and daily tasks. They also feature heart rate, blood pressure and blood oxygen monitoring, electrocardiogram and snoring detection.

However, the Galaxy Watch 5 Pro gets three Samsung-exclusive health features, including route workouts that support GPX file export and import, turn-by-turn routes for hiking and biking activities, and tracking to reversing routes to your starting point.

>>>>>>>>>>>Samsung watch battery

Samsung Galaxy Watch 5 vs Galaxy Watch 4: Should you upgrade?

 Not only did Samsung announce its flagship phones for late 2022, the Galaxy Z Fold 4 and Z Flip 4, but we also introduced a brand new smartwatch.

Last year’s Galaxy Watch 4 and Watch 4 Classic brought a fundamental shift in Samsung’s wearable strategy, as the company ditched Tizen after partnering with Google on the new Wear OS 3. This gives users access to more apps through the Play Store, while also introducing the company’s new Bioelectric Impedance Analysis (BIA) sensor.

Samsung Galaxy Watch 5 vs Galaxy Watch 4: What’s the Same

As soon as you take a look at the Galaxy Watch 5, it’s clear that Samsung has decided to take a “if it ain’t broke, don’t fix it” approach. Compared to the Galaxy Watch 4, you might even have a hard time telling the two apart.

The Galaxy Watch 5 is available in two different case sizes; 40mm and 44mm, while displaying the same size, 1.19 inches for the former and 1.36 inches for the latter. Even the two generations of smartwatches are the same size, which is great if you’re concerned that Samsung is trying to shake things up with the Watch 5.

Under the hood, things are about the same, as Samsung continues to use its Exynos W920 chip paired with 1.5GB of RAM and 16GB of onboard storage. In terms of navigation, you’ll find two buttons on the right side of the case, while Samsung’s unique digital bezel makes a return for the standard Watch 5 once again. This gives you the ability to scroll, essentially acting as a digital crown without the need for a physical crown.

When it comes to health and fitness tracking, both the Galaxy Watch 5 and Galaxy Watch 4 have many of the same sensors. These include Samsung’s Bio-Impedance Analysis (BIA) sensor, which captures over 2,400 data points, providing the ability to check your body composition directly from your wrist. Then, we have other sensors like built-in ECG and optical heart rate, and the ones found in almost all the best fitness smartwatches for activity and step tracking.

Samsung Galaxy Watch 5 vs Galaxy Watch 4: What’s changed

On the surface, you’d be hard-pressed to notice any physical differences between the Galaxy Watch 5 and Galaxy Watch 4. The most obvious difference is definitely the color options, as Samsung is ditching the green and black options for the Watch 5. Instead, those opting for the 40mm version can choose between Boa Purple, Graphite and Pink Gold. If you choose the larger 44mm model, you can choose from sapphire, silver and graphite.

While the Watch 5 may look and physically identical to the Watch 4, Samsung did make a major upgrade to the display glass in use. Last year’s iteration used Corning Gorilla Glass with DX+, which was designed to be as close to sapphire as possible.

With the Watch 5, Samsung went all out to bring sapphire glass to its latest smartwatch. According to Samsung, the upgrade makes the Watch 5s’ glass about 1.6 times stronger than its predecessor.

The next big difference between these two smartwatches is battery life. Somehow, Samsung managed to fit a bigger battery into the Watch 5, using a 284mAh battery on the 40mm model and a 410mAh battery on the 44mm model.

Fast charging has also been improved, as the Watch 5 is able to reach 45 percent battery life in just 30 minutes. To accompany the new advanced sleep tracking feature, Samsung claims the Galaxy Watch 5 offers 8 hours of sleep tracking on just an 8-minute charge.

Arguably the biggest new feature in the Galaxy Watch 5 lineup is an all-new body temperature sensor. This feature has long been rumored to be coming, and now it’s finally here. While this isn’t a new feature in the smartwatch market, this is the first time we’ve seen a Samsung smartwatch include it. But contrary to other options, Samsung is using an infrared temperature sensor designed to provide more accurate results.

Samsung Galaxy Watch 5 vs Galaxy Watch 4: Should you upgrade?

Not only does the Watch 5 offer an extra 10 hours of battery life, it’s incredible to get 8 hours of sleep tracking on a charge of less than 10 minutes. Unlike Bluetooth 5.0 in the Watch 4, it also includes Bluetooth 5.2 for a more reliable and stable connection to your phone. Also, you will enjoy having a more durable smartwatch thanks to the sapphire crystal glass.

But if you care a little bit about fitness tracking, the Watch 5 knocks it out. Samsung continued to use its excellent BIA sensor, but redesigned the bottom of the watch to provide more reliable readings. And the added skin temperature sensor is just the icing on the cake.

>>>>>>>>>>>>Samsung watch battery

Samsung Galaxy Z Flip 4 vs Galaxy Z Flip 3: New Features

 Samsung has officially released the Galaxy Z Flip 4 clamshell foldable phone. The new foldable device brings a lot of improvements, including the latest Snapdragon 8 Plus Gen 1 chipset, 8GB of RAM, up to 512GB of onboard storage, a larger battery, and more. But how does it compare to last year’s Galaxy Z Flip 3? In this article, let’s compare the Samsung Galaxy Z Flip 4 with the Galaxy Z Flip 3 to see if it’s worth updating to the new model.

Design

The new Samsung Galaxy Z Flip 4 looks very similar to the Galaxy Z Flip 3. However, if you look closely, you will be able to spot some differences. The device has been treated with a new design, with straighter edges and a slimmer hinge. While the new hinge helped Samsung reduce the display crease, it resulted in a slightly larger size. Suffice to say, the Z Flip 4 looks almost identical to the previous generation. In short, Samsung appears to be following the “if it ain’t broke, don’t fix it” strategy for the Galaxy Z Flip 4 design.

Exhibit

Moving on to the display, the Galaxy Z Flip 4 features the same 6.7-inch Dynamic AMOLED 2X display we first saw on the Flip 3. Fortunately, the display now supports a 120Hz adaptive refresh rate, which means the software can expand the elements displayed based on content, which should, in theory, improve battery life. Unfortunately, the outer 1.9-inch cover doesn’t show much of a difference. While we’re all expecting a larger display from Samsung on the Flip 4, it remains the same.

Camera

The Galaxy Z Flip 4 features an upgraded dual-camera module on the back that includes a 12MP f/1.8 primary sensor and a 12MP f/2.2 ultra-wide-angle lens. While the megapixel count remains the same as the previous generation, the main sensor is much larger than before. The new sensor lets in 65% more light, resulting in brighter, clearer, more vibrant photos. Samsung also promises better images and video recording in all lighting environments.

Processor

Moving on to the chipset, the Samsung Galaxy Z Flip 4 is powered by Qualcomm’s latest Snapdragon 8 Plus Gen 1 processor. The new chip is a generational improvement over the Snapdragon 888 SoC Samsung used in last year’s Galaxy Z Flip 3. It offers higher clock speeds up to 3.2GHz, resulting in a 30% increase in CPU performance. GPU performance has also increased by 10%. The new processors also offer better CPU and GPU efficiency, resulting in longer battery life.

Battery

The battery is one of the departments where the Samsung Galaxy Z Flip 4 gets a major upgrade. The Z Flip 4 houses a 3,700mAh battery, which isn’t huge, but 400mAh larger than the 3,300mAh battery in the Z Flip 3. The larger battery, coupled with the optimizations of the Snapdragon 8 Plus Gen 1, should deliver better battery life than before.

More storage options

Compared to the Samsung Galaxy Z Flip 3, which was capped at 256GB, the new Samsung Galaxy Z Flip 4 will be available in more storage configurations: 128GB, 256GB, and 512GB. The new 512GB version could be a good choice for those who love photography and store a lot of media files on the device. It’s worth noting, however, that the device still only has 8GB of LPDDR5 RAM.

>>>>>>>>>>>>>Samsung battery

Samsung Galaxy Watch 5 Pro: Everything you need to know

 The Samsung Galaxy Watch 5 Pro is Samsung’s largest and most powerful watch yet. Those specs are more impressive than any Galaxy Watch so far, with greater durability, a better sensor array, GPS capabilities, and improved sleep and activity tracking.

The Samsung Galaxy Watch 5 Pro was announced at Samsung Galaxy Unpacked on August 10 and will be officially released on August 26. Until then, the Watch 5 Pro will be available for pre-order. Let’s take a look at the specifications of the Samsung Galaxy Watch 5 Pro!

Measuring 45.4 x 45.4 x 10.5 mm and weighing 46 grams, the Samsung Galaxy Watch 5 Pro is both beautiful and lightweight considering the premium construction. The titanium case (available in black and grey) and sapphire glass ensure the watch is extremely durable: Samsung claims it’s twice as durable as its predecessor, the Galaxy Watch 4. Unlike the Watch 5’s traditional clasp, the 20mm strap features a hinged D-buckle.

The 450 x 450 pixel Super AMOLED display is always-on, so you can always check your wrist without having to do a “smartwatch flick”. A 590mAh battery is said to power the watch for 80 hours, while WPC-based wireless charging can ensure the watch reaches 45% in 30 minutes.

The Exynos W920 dual-core 1.18GHz chipset powers the intelligence of the watch, which runs Wear OS 3.5 and Samsung‘s OneUI Watch 4.5. The GPS connectivity is impressive, with multi-band Glonass, Beidou and Galileo. The watch comes with 1.5GB of RAM and 16GB of storage, enough to hold your favorite music.

On the sensor side, the Samsung Galaxy Watch 5 Pro can collect a lot of data using Samsung’s single BioActive sensor, which measures optical heart rate, electrical signals, and bioelectrical impedance analysis to measure body composition. It also has temperature sensors, accelerometers, barometers, gyroscope sensors, geomagnetic sensors, and light sensors.

SAMSUNG GALAXY WATCH 5 PRO: SMART FEATURES

All of this smart tech makes the Watch 5 Pro a true Wear OS watch, as much as a fitness watch. You can use Spotify, Soundcloud or Deezer independently of your phone, just use the Google Assistant to make your voice.

In addition to standard notifications from a variety of apps, whether you want to reply to emails, WhatsApp or other messages on the go, third-party app access continues as always with the Wear OS 3.5 Play Store. Answer and reject calls normally, or use Google Assistant voice commands.

One UI Watch 4.5 is said to offer a more complete typing experience, easier ways to call, and new accessibility features that make the Galaxy Watch more intuitive.

SAMSUNG GALAXY WATCH 5 PRO: FITNESS FEATURES

This watch allows you to gather tons of health insights. You can set body composition goals, such as losing fat mass or gaining muscle mass, and the Watch 5 Pro will send you reminders to regularly measure your body composition with BIA to help you improve your goals.

Likewise, the sleep function monitors your snoring, wake time, REM, light or deep sleep and is more accurate than ever thanks to the BioActive sensor.

The Watch’s BioActive sensors help collect data to monitor your exercise, sleep and stress levels, provide breathing exercise recommendations and suggested workouts and training plans for specific fitness goals. The Watch 5 Pro has the ability to measure blood pressure and skin temperature, although these features are not yet available in some regions.

New on the Watch 5 Pro is Route Workout, which allows you to download routes to the watch and get turn-by-turn navigation assistance with haptic feedback, and vibrations on your wrist that tell you when to turn right or left. The new TrackBack feature also guides you back to the start of the route.

>>>>>>>>>>>>>Samsung watch battery

This hidden iPhone feature lets you use a device with a cracked screen

 If you’re unfortunate enough to break your iPhone‘s screen or home button, knowing how to enable Assistive Touch on your iPhone can save the day.

After slamming a hammer on the iPhone SE and pressing the Home button, he couldn’t unlock or use the phone. The home function, which works with a swipe up on newer models and the home button on older models, is critical to using your iPhone, and without it you’ll find yourself unable to open your phone or switch apps. If your screen is broken or your home button is broken, there’s nothing your iPhone can do, right?

Hmm, wrong. One of the things that makes the iPhone the best phone around is that a lot of times when you have a problem, Apple has figured out how to fix it. And this case is no exception. What many people don’t realize is that you don’t need a swipe up gesture or button to use the Home function. Assistive Touch can help.

Assistive Touch is primarily an accessibility feature for those who have trouble touching the screen, and it can easily double as a broken lip balm. It won’t fix your phone not responding, nor will it help you if your screen is completely broken. But if you lose the swipe up or home button, it should at least allow you to use the phone’s basic functions, like calling and messaging.

How to Use Assistive Touch on iPhone

The first thing you need to do is unlock your iPhone. This will be a problem if you are no longer able to swipe or press the home button. Thankfully, unlocking is still possible.

1. Long press the side button to wake Siri, or say “Hey Siri” if your device is set to listen to the wake word.

2. Say “Activate Voice Control”. You should see the Voice Control banner at the top of the screen, now set to On. Your iPhone will now listen to you and allow you to control the device with voice commands.

3. Say “Open Settings.” Siri will tell you that your phone needs to be unlocked first.

4. Your lock screen will appear. Say “click X”, where X is the first digit or character of the password. Repeat this command for all numbers or characters until your phone is unlocked.

5. After the phone is unlocked, say “Turn on Assistive Touch”. A banner will appear at the top of the screen telling you that Assistive Touch is now on. Alternatively, go to Settings, then visit Accessibility and select Touch. Tap Assistive Touch and turn on Assistive Touch

6. You will now see a circular icon consisting of a grayscale ring on the screen. This is now your home button. Tap it to see a range of options, including Home features, Control Center, and Siri.

7. Tap Device to see more options, including screen lock, screen rotation, and volume control. Tap More to see more options, including Apple Pay and screenshots.

>>>>>>>>>>>iPhone battery

Thanks for reading, hope it helps!

Friendly reminder: If you need to replace the battery, this battery store will be a good choice: www.batteryforpc.co.uk

iOS 16 beta restores battery percentage. Here’s what you need to know

 With the release of iOS 16, a badly missed feature is coming back to the iPhone – you’ll once again be able to see your iPhone’s battery percentage in the status bar. After the release of the iPhone X and the introduction of notch, there wasn’t enough screen real estate to keep the battery percentage there, so Apple removed the feature for iOS.

Sure, you can swipe down from the top right corner of your iPhone to see the exact percentage in Control Center, but it’s just not the same. You can’t check the battery percentage from any app or the home screen. And it’s nearly impossible to gauge the exact percentage from just the battery icon, which isn’t great if your iPhone is dying.

Thankfully, the latest developer beta (version 5) and public beta (version 3) of iOS 16 have reintroduced the battery percentage number inside the existing battery icon in the status bar. Here’s what you need to know about the new features.

How to Restore Battery Percentage in Status Bar in iOS 16

To see your battery percentage in the status bar in iOS 16, all you need to do is use the latest iOS 16 public beta (version 3) or developer beta (version 5).

After the update, you should see the battery icon percentage in the upper right corner of the screen anywhere on your iPhone. That way, you can keep an eye on when your iPhone is fully charged or about to run out of battery, and when you should start charging it.

Although the setting is turned on by default, you can go to Settings > Battery and turn on the Battery Percentage option to make sure it works. When your device is charging, the battery icon will turn fully green to show you the percentage, and when in low power mode the battery icon will turn fully yellow but still display the percentage internally.

Unfortunately, the battery percentage option isn’t available on all iPhone models — currently, it’s not on the iPhone XR, iPhone 11, iPhone 12 Mini, and iPhone 13 Mini.

>>>>>>>>>>>iPhone battery

If you forget your Mac password, this method will still allow you to log back in

 We sometimes forget our passwords at some point. For online accounts, you just click a few links, enter your email address, and reset your password. But what happens when you forget your password to log into your Mac?

There are a few different methods you can use, and the way you unlock your Mac without a password may depend on whether you linked your Apple ID to a user account on your Mac during setup, or if you have one of the new M1 Max . If you didn’t link your Apple ID, that’s okay, there is another option to reset your account password. Here’s how to start regaining control of your Mac computer, let’s see!

Use your Apple ID to reset your Mac‘s password

Ideally, you’ll link your Apple ID to your user account on your Mac during initial setup, so you can reset your user password with just a few clicks.

After entering the wrong user password three times, you will be asked if you want to restart your computer to see password recovery options. After restarting, you will be asked to log in with your Apple ID, select the user account for which you want to reset the password, and enter the new user account password.

Unlock your Mac with another administrator account

If you share your Mac with a friend or family member and they forget their password, chances are you can reset the password for them. The key here is that you need access to an admin user account.

Usually, people setting up a Mac for the first time have an administrator account by default, but you can check by logging into your account and opening System Preferences > Users & Groups and looking at the list of user accounts on your Mac. Below the username will be the account type – if it says “Administrator”, you can reset the user’s password.

To do this, in the same Users and Groups screen, click the lock and enter your administrator name and password when prompted. Next, select the user whose password you need to reset, then click the button labeled “Reset Password” and follow the instructions.

recovery mode

If none of these methods work, you’ll need to boot your Mac into recovery mode to access the password reset tool.

The process of entering recovery mode will depend on the type of Mac you have. For Macs with Intel processors, press and hold the Command and R keys on the keyboard, then press the power button. Press and hold Command+R until you see a progress bar appear below the Apple logo. You can also enter Recovery Mode by restarting your Mac and trying to time the Command+R keyboard combination, but in my experience, starting with shutting down the Mac is the most reliable method.

For the recently released Macbook Air, MacBook Pro, and Mac Mini with the Apple M1 processor, you need to shut down the computer, then press and hold the power button until the options button appears. Click on it and select Restore.

Now that your Mac is in recovery mode, click Utilities in the menu bar, then click Terminal. A new window will appear, waiting for you to enter a command. Type ” resetpassword ” as a single word without the quotation marks and press Return.

Close the terminal window and there you will find the reset password tool. Follow the prompts, including logging in with your Apple ID, and selecting the user account for which you need to change your password.

If FileVault is enabled on your Mac, you can still

FileVault is an optional MacOS feature that encrypts your Mac’s hard drive and all data stored on it. It’s usually turned on during initial setup, or you can turn it on later in System Preferences.

If you have FileVault turned on, you have two additional options to reset your user password. You can wait up to a minute on the user login screen for a prompt to press the power button to restart the Mac into recovery mode. Follow the instructions to restart your computer, after which you should see the Reset Password window appear.

Another option is to use the recovery key that should be noted when FileVault is enabled. You can enter your recovery key after three failed login attempts. Be sure to use capital letters and enter hyphens – they are required.

You can prevent this from happening, you just need to be more proactive in storing your recovery key and remembering your password during setup. Here’s how to lock your Mac.

>>>>>>>>>>>>>>>Apple battery

Thanks for reading, hope it helps!

Friendly reminder: If you need to replace the battery of your device, this battery store will be a good choice: www.batteryforpc.co.uk