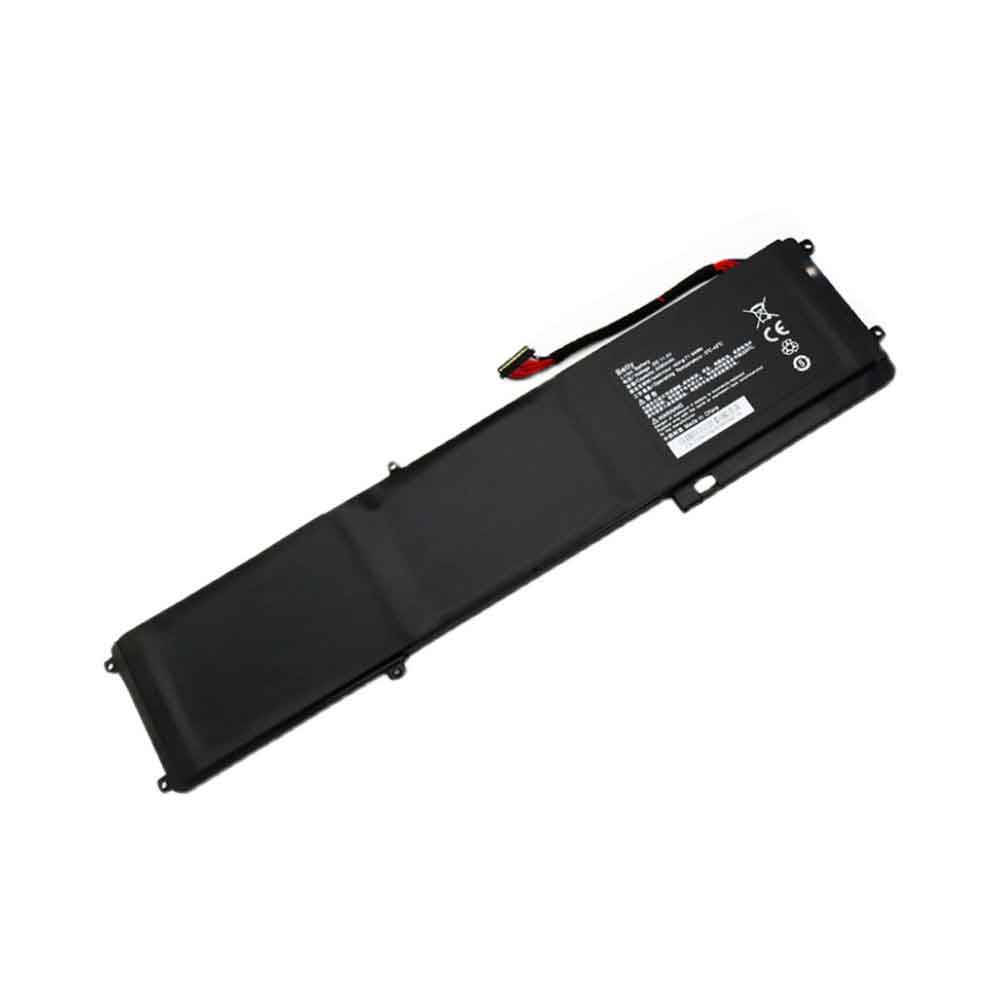
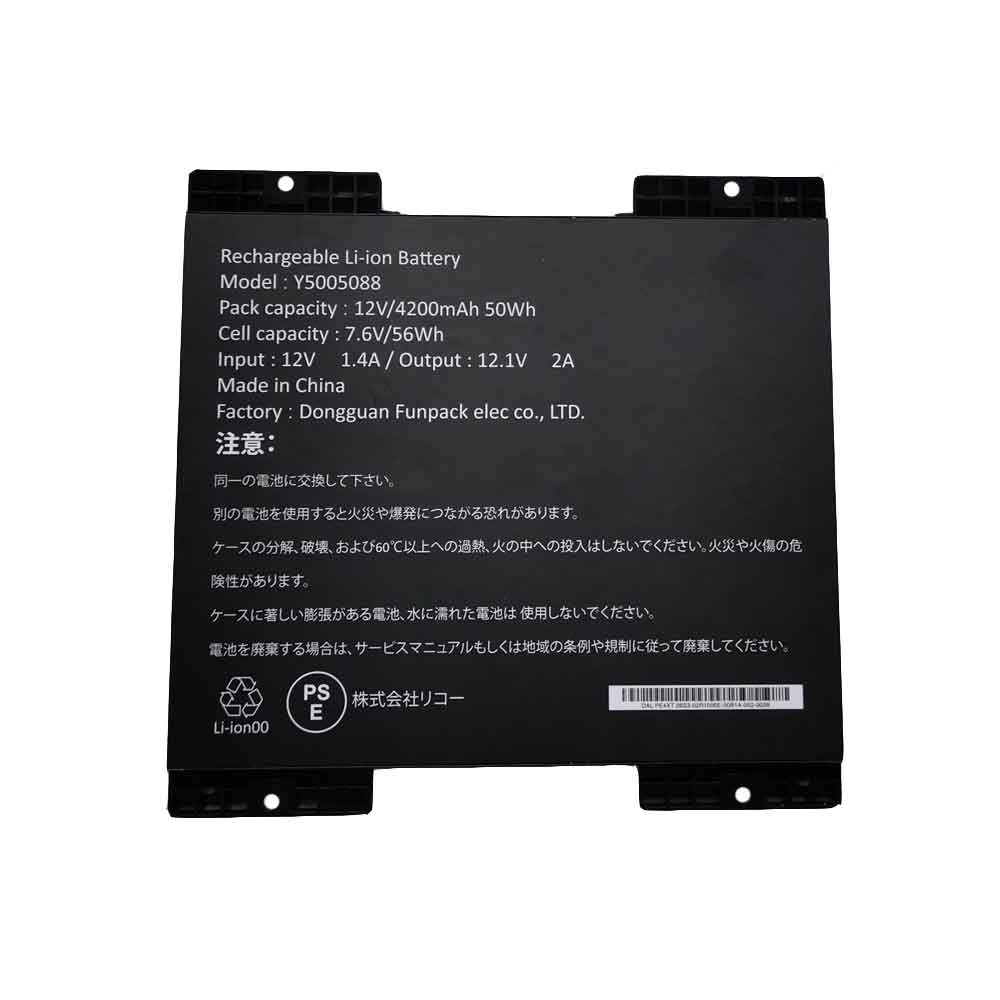
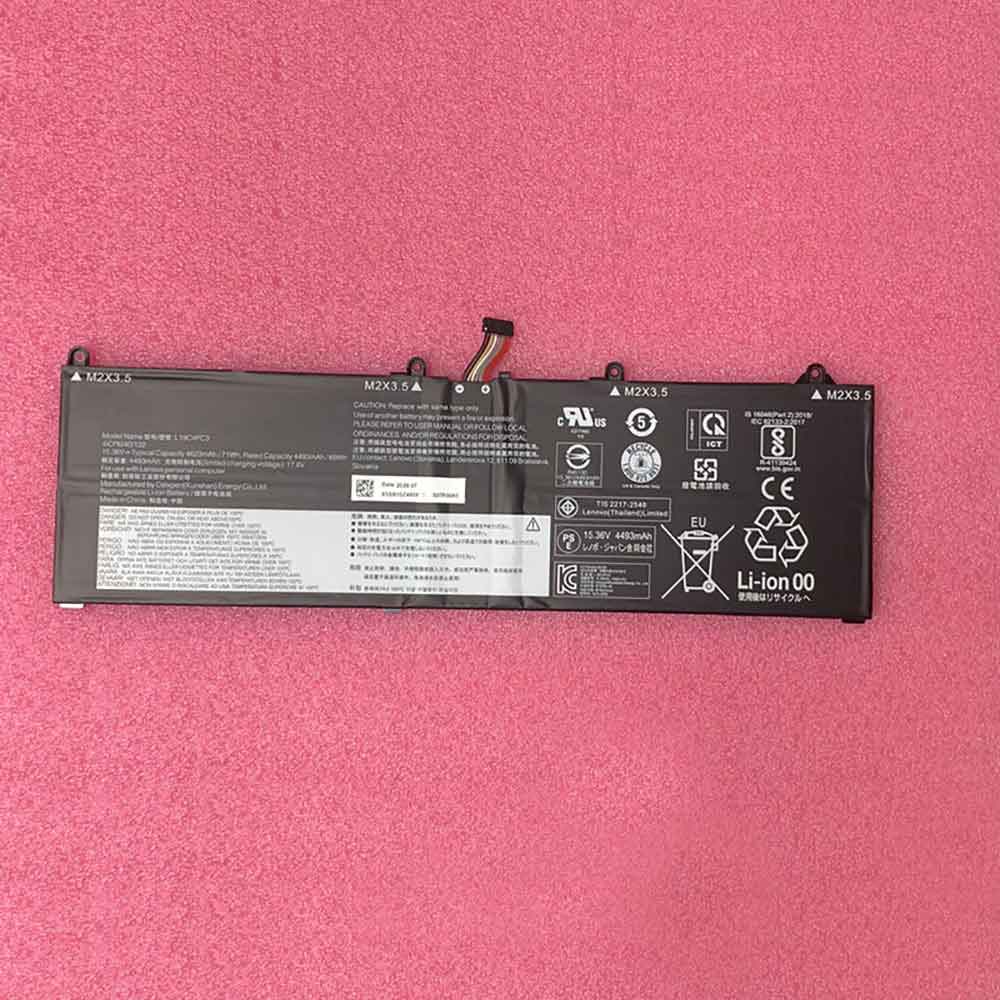
4200mAh 11.4V Acer AP18C4K Li-ion Battery for Acer Aspire A515-43 A515-43-R-19-L A515-43-R057

4200mAh 11.4V Acer AP18C4K Batteries for Acer Aspire A515-43 A515-43-R-19-L A515-43-R057, Acer AP18C4K Laptop battery is a brand new,100% Compatible original and replacement Laptop battery,Purchase wholesale and retail AP18C4K with high quality and low price!

Find ou your original model number or part number(P/N), and move your eyes on the tag of battery

AP18C4K

Specifications

  • Brand:Acer
  • Capacity :4200mAh
  • Voltage :11.4V
  • Battery Cell Quality: Grade A
  • Descriptive: Replacement Battery – 1 Year Warranty
  • Description: Brand New, 1 Year Warranty! 30-Days Money Back! Fast Shipping!

How we test this Acer AP18C4K Battery
Step 1: Make sure customer bought the correct battery.
Step 2: Check battery’s appearance and interface.
Step 3: Test battery charger and recharger function.
Step 4: Charger the battery to 100% and recharger to 0% to get real battery capacity
Step 5: Use Ev2300 to check the voltage difference of each goroup cells.
Step 6: Charger battery power more than 30%.
Step 7: Package battery carefully and send out

Compatible Part Numbers:
AP18C4K

Compatible Model Numbers:
Acer Aspire 3 A315-42-R25U, 3 A315-42-R4BX, 3 A315-42-R4XX, 3 A315-42-R5P7, 3 A315-42-R6PT, 3 A315-42G, 3 A315-42G-R05V, 3 A315-42G-R1UF, 3 A315-54 3551, 3 A315-54-30LK,
Acer Aspire 3 A315-54-32QP, 3 A315-54-342S, 3 A315-54-34S5, 3 A315-54-367E, 3 A315-54-36KX, 3 A315-54-36X5, 3 A315-54-51H7, 3 A315-54-51ZQ, 3 A315-54-52SF, 3 A315-54-52VR,
Acer Aspire 3 A315-54-530D, 3 A315-54-53M1, 3 A315-54-54AA, 3 A315-54-54DW, 3 A315-54-54VL, 3 A315-54-55WY, 3 A315-54-561D, 3 A315-54-56KY, 3 A315-54-575J, 3 A315-54-57HA,
Acer Aspire 3 A315-54-57ZC, 3 A315-54-58JQ, 3 A315-54-A54D, 3 A315-54K, 3 A315-54K-31C4, 3 A315-54K-34G9, 3 A315-54K-397J, 3 A315-54K-57BP, 3(A315-42-R5LC), 3(A315-42-R6Y5),
Acer Aspire 3(A315-42-R7ZC), 3(A315-42-R8PY), 3(A315-42G-R3QW), 3(A315-42G-R7QB), 3(A315-54-34RS), 3(A315-54-54LR), 3(A315-54-55W8), 3(A315-54-56ZH), 3(A315-54-59VK), 3(A315-54K-31FP),
Acer Aspire 3(A315-54K-32YC), 3(A315-54K-36NA), 3(A315-54K-38QB)
Acer Aspire 5 515-54G-53GP, 5 A515-43, 5 A515-43-R17X, 5 A515-43-R1YQ, 5 A515-43-R3DZ, 5 A515-43-R3GE, 5 A515-43-R3J6,
Acer Aspire 5 A515-43-R4TQ, 5 A515-43-R4YY, 5 A515-43-R4Z2, 5 A515-43-R53N, 5 A515-43-R5HG, 5 A515-43-R5QW, 5 A515-43-R5RE, 5 A515-43-R61P, 5 A515-43-R6DE, 5 A515-43-R6F6,
Acer Aspire 5 A515-43-R6WW, 5 A515-43-R7B8, 5 A515-43-R7WA, 5 A515-43-R82V, 5 A515-43-R89G, 5 A515-43-R9B1, 5 A515-43-R9MG, 5 A515-43-R9TY, 5 A515-43-R9XL, 5 A515-43G-R01C,
Acer Aspire 5 A515-43G-R05T, 5 A515-43G-R0HD, 5 A515-43G-R1D6, 5 A515-43G-R2W2, 5 A515-43G-R4YU, 5 A515-43G-R5KP, 5 A515-43G-R613, 5 A515-43G-R8U3, 5 A515-43G-R996, 5 A515-43G-R9MJ,
Acer Aspire 5 A515-43G-R9TF, 5 A515-43G-R9VS, 5 A515-43G-R9ZW, 5 A515-44-R0BR, 5 A515-44-R0G2, 5 A515-44-R0KN, 5 A515-44-R0NR, 5 A515-44-R158, 5 A515-44-R1XZ, 5 A515-44-R2SA,
Acer Aspire 5 A515-44-R3M0, 5 A515-44-R3TG, 5 A515-44-R3YH, 5 A515-44-R42X, 5 A515-44-R4BC, 5 A515-44-R52A, 5 A515-44-R5K1, 5 A515-44-R6CL, 5 A515-44-R6MT, 5 A515-44-R6VG,
Acer Aspire 5 A515-44-R744, 5 A515-44-R7LG, 5 A515-44G-R0HR, 5 A515-44G-R0RS, 5 A515-44G-R1WW, 5 A515-44G-R23T, 5 A515-44G-R26L, 5 A515-44G-R2LJ, 5 A515-44G-R3MU, 5 A515-44G-R4S9,
Acer Aspire 5 A515-44G-R5F0, 5 A515-44G-R5ZA, 5 A515-44G-R67L, 5 A515-44G-R6Q3, 5 A515-44G-R6YK, 5 A515-44G-R7XL, 5 A515-44G-R895, 5 A515-44G-R8TD, 5 A515-44G-R9KE, 5 A515-44G-R9YM,
Acer Aspire 5 A515-54, 5 A515-54-30BQ, 5 A515-54-34B1, 5 A515-54-3571, 5 A515-54-371E, 5 A515-54-37U3, 5 A515-54-504D, 5 A515-54-50RS, 5 A515-54-50ZH, 5 A515-54-51JE,
Acer Aspire 5 A515-54-51VJ, 5 A515-54-528V, 5 A515-54-52KV, 5 A515-54-52SK, 5 A515-54-52VX, 5 A515-54-53RR, 5 A515-54-53Y8, 5 A515-54-53Z2, 5 A515-54-54XP, 5 A515-54-552P,
Acer Aspire 5 A515-54-553G, 5 A515-54-55AA, 5 A515-54-55ZD, 5 A515-54-5649, 5 A515-54-568B, 5 A515-54-56DT, 5 A515-54-5725, 5 A515-54-57BU, 5 A515-54-57MX, 5 A515-54-58WW,
Acer Aspire 5 A515-54-596V, 5 A515-54-597W, 5 A515-54-59F7, 5 A515-54-59R0, 5 A515-54-59SC, 5 A515-54-59W2, 5 A515-54-70WZ, 5 A515-54-717S, 5 A515-54-71QB, 5 A515-54-71SK,
Acer Aspire 5 A515-54-71ST, 5 A515-54-71TG, 5 A515-54-72A8, 5 A515-54-73GE, 5 A515-54-73WM, 5 A515-54-7551, 5 A515-54-75VH, 5 A515-54-76TA, 5 A515-54-7724, 5 A515-54-776L,
Acer Aspire 5 A515-54-77SO, 5 A515-54-78WW, 5 A515-54-79Q3, 5 A515-54G-301X, 5 A515-54G-30S3, 5 A515-54G-33K6, 5 A515-54G-33P3, 5 A515-54G-34DM, 5 A515-54G-36CU, 5 A515-54G-37CE,
Acer Aspire 5 A515-54G-37YR, 5 A515-54G-3825, 5 A515-54G-38MG, 5 A515-54G-5071, 5 A515-54G-50LM, 5 A515-54G-50QX, 5 A515-54G-50SG, 5 A515-54G-50T2, 5 A515-54G-50ZJ, 5 A515-54G-50ZY,
Acer Aspire 5 A515-54G-5141, 5 A515-54G-514C, 5 A515-54G-517L, 5 A515-54G-518Y, 5 A515-54G-51BQ, 5 A515-54G-51H, 5 A515-54G-51QB, 5 A515-54G-51QF, 5 A515-54G-51UA, 5 A515-54G-52CL,
Acer Aspire 5 A515-54G-52F4, 5 A515-54G-52HW, 5 A515-54G-52YD, 5 A515-54G-52ZP, 5 A515-54G-531V, 5 A515-54G-53GT, 5 A515-54G-53NB, 5 A515-54G-542A, 5 A515-54G-54AE, 5 A515-54G-54KW,
Acer Aspire 5 A515-54G-54QQ, 5 A515-54G-552T, 5 A515-54G-55D8, 5 A515-54G-55G2, 5 A515-54G-55Z8, 5 A515-54G-56DC, 5 A515-54G-56QR, 5 A515-54G-573C, 5 A515-54G-575Z, 5 A515-54G-5764,
Acer Aspire 5 A515-54G-576M, 5 A515-54G-57GK, 5 A515-54G-586Z, 5 A515-54G-58KG, 5 A515-54G-58XT, 5 A515-54G-58Z6, 5 A515-54G-5928, 5 A515-54G-5972, 5 A515-54G-597f, 5 A515-54G-59A3,
Acer Aspire 5 A515-54G-59C0, 5 A515-54G-59CL, 5 A515-54G-59L2, 5 A515-54G-59S0, 5 A515-54G-59S7, 5 A515-54G-59WR, 5 A515-54G-59WU, 5 A515-54G-704H, 5 A515-54G-70SQ, 5 A515-54G-70TZ,
Acer Aspire 5 A515-54G-70Y9, 5 A515-54G-711H, 5 A515-54G-7140, 5 A515-54G-715Y, 5 A515-54G-71LK, 5 A515-54G-71SW, 5 A515-54G-71WP, 5 A515-54G-72B6, 5 A515-54G-72J5, 5 A515-54G-72V2,
Acer Aspire 5 A515-54G-72WM, 5 A515-54G-7341, 5 A515-54G-73Q2, 5 A515-54G-73U9, 5 A515-54G-73VG, 5 A515-54G-73XU, 5 A515-54G-74DU, 5 A515-54G-7513, 5 A515-54G-755T, 5 A515-54G-75AH,
Acer Aspire 5 A515-54G-75DL, 5 A515-54G-75EF, 5 A515-54G-75L9, 5 A515-54G-75W2, 5 A515-54G-75WF, 5 A515-54G-76PK, 5 A515-54G-772F, 5 A515-54G-774N, 5 A515-54G-77CW, 5 A515-54G-77HG,
Acer Aspire 5 A515-54G-77N1, 5 A515-54G-77XN, 5 A515-54G-781V, 5 A515-54g-788g, 5 A515-54G-7895, 5 A515-54G-78AJ, 5 A515-54G-792B, 5 A515-54G-797L, 5 A515-54G-798V, 5 A515-54G-79ZJ,
Acer Aspire 5(A515-43-R4A1), 5(A515-43G-R4ZA),
Acer Spin 3 SP314 54N-38RV,
Acer Spin 3 SP314-54N,
Acer Spin 3 SP314-54N-311V,
Acer Spin 3 SP314-54N-3683,
Acer Spin 3 SP314-54N-36EL,
Acer Spin 3 SP314-54N-50JD,
Acer Spin 3 SP314-54N-51AU,
Acer Spin 3 SP314-54N-524Z,
Acer Spin 3 SP314-54N-52G8,
Acer Spin 3 SP314-54N-52QQ,
Acer Spin 3 SP314-54N-54FB,
Acer Spin 3 SP314-54N-55SG,
Acer Spin 3 SP314-54N-56NU,
Acer Spin 3 SP314-54N-56S5,
Acer Spin 3 SP314-54N-57QU,
Acer Spin 3 SP314-54N-57VR,
Acer Spin 3 SP314-54N-58HA,
Acer Spin 3 SP314-54N-58Q7,
Acer Spin 3 SP314-54N-59QV,
Acer Spin 3 SP314-54N-724Q,
Acer Spin SP314-54N-30TM,
Acer Swift 3 S40-51,
Acer Swift 3 S40-51-53M8,
Acer Swift 3 S40-51-54WR

How much do you know about how to run laptop well as any place? The follow Tips cut way back on protecting battery life.


1). Please recharge or change your Laptop battery when battery power low.
2). Using Li-Ion Replacement Acer AP18C4K Laptop Battery for your notebook which can work longer time than Non Li-ion one.
3). It is better to defragmentation regularly for your Laptop battery life.
4). In order to reduce the laptop power consumpition, you can use some optical drive spin-down and hard drive in your Laptop .
5). Please keep your laptop in sleep or standby model without long time using, which both save the Replacement Acer AP18C4K Laptop Battery power and extend battery using life.
6). Leave your battery in a dry and cool condition when without using.
7). When you rarely or generally plugged in fixed power using, Please take down your battery to avoid hurting battery life.

Hot Products

6000mAh LEICA GEB222 for Leica TS02 TS06 TS09 TPS1200 T3180mAh/47WH LENOVO 45N1704 for Lenovo Thinkpad 12.5″ S1 Yoga2100mAh HBC BA225000 for HBC crane crane pump truck rem220mAh ZEBRA BT000296A01 for Zebra HS3100 BTRY-HS3100-HS1-03430MAH ULEFONE S11 for Ulefone S11 Note 72000mAh/9.60Wh IKUSI BT24IK for IKUSI TM70/3 TM70/8 T70/3 Irib5050mAh/19.44WH NOKIA WT340 for Nokia G205050mAh/19.44WH NOKIA WT340 for Nokia G205250mAh/19.43Wh PAX IS900 for PAX A920 A920C7000mAh/27WH LENOVO L16D2P31 for Lenovo TAB4 PLUS TB-X704F

5350mAh 15.36V Lenovo L19M4PC1 Li-ion Battery for Lenovo Legion 5P-15IMH05 5P-15IMH05H 5P-15ARH05H

5350mAh 15.36V Lenovo L19M4PC1 Batteries for Lenovo Legion 5P-15IMH05 5P-15IMH05H 5P-15ARH05H, Lenovo L19M4PC1 Laptop battery is a brand new,100% Compatible original and replacement Laptop battery,Purchase wholesale and retail L19M4PC1 with high quality and low price!

Find ou your original model number or part number(P/N), and move your eyes on the tag of battery

L19M4PC1

Specifications

  • Brand:Lenovo
  • Capacity :5350mAh
  • Voltage :15.36V
  • Type :Li-ion
  • Battery Cell Quality: Grade A
  • Descriptive: Replacement Battery – 1 Year Warranty
  • Description: Brand New, 1 Year Warranty! 30-Days Money Back! Fast Shipping!

How we test this Lenovo L19M4PC1 Battery
Step 1: Make sure customer bought the correct battery.
Step 2: Check battery’s appearance and interface.
Step 3: Test battery charger and recharger function.
Step 4: Charger the battery to 100% and recharger to 0% to get real battery capacity
Step 5: Use Ev2300 to check the voltage difference of each goroup cells.
Step 6: Charger battery power more than 30%.
Step 7: Package battery carefully and send out

Compatible Part Numbers:
L19M4PC1
L19C4PC1
5B10W86192
5B10W86188
SB10W86198
SB10W86193
5B10W86194

Compatible Model Numbers:
Lenovo Legion 5P-15IMH05 5P-15IMH05H 5P-15ARH05H Series
Lenovo Legion 5-15IMH05 5-15IMH05H 5-15ARH05 5-15ARH05H Series
Lenovo Y7000 2020 year
Lenovo Legion 7 15IMH05 81YT004YPB
Lenovo Legion 7 15IMH05 81YT000VGE
Lenovo Legion 5 17IMH05-82B3CTO1WW
Lenovo Legion 5 15IMH05H
Lenovo Legion 7 15IMH05 81YT0020MX
Lenovo Legion 7 15IMH05 81YT000QUS
Lenovo Legion 7 15IMH05 81YT005AMH.
Lenovo Legion 7 15IMHg05-81YU002DAU
Lenovo Legion 7 15IMH05 81YT000PUS
Lenovo Legion 7 15IMH05 81YU001RUK
Lenovo Legion 7 15IMHg05-81YU004KAU R7000 2020
Lenovo Legion 7 15IMH05 81YT000RUS
Lenovo Legion 7 15IMH05 81YT000SGE
Lenovo Legion 7 15IMHg05-81YUCTO1WW Y7000P 2020 year
Lenovo Legion 7 15IMH05 81YT005DRU
Lenovo Legion 7 15IMH05 81YU001SUK R7000P 2020 year
Lenovo Legion 7 15IMH05 81YT001UGE
Lenovo Legion 7 15IMH05 81YT005TUS
Lenovo Legion 7 15IMH05 81YT000UGE
Lenovo Legion 7 15IMHg0-81YU0047AU
Lenovo Legion 5 15ARH05
Lenovo Legion 7 15IMH05 81YT0003US
Lenovo Legion 7 15IMH05 81YU005EMB
Lenovo Legion 7 15IMHg05-81YU004LAU

How much do you know about how to run laptop well as any place? The follow Tips cut way back on protecting battery life.


1). Please recharge or change your Laptop battery when battery power low.
2). Using Li-Ion Replacement Lenovo L19M4PC1 Laptop Battery for your notebook which can work longer time than Non Li-ion one.
3). It is better to defragmentation regularly for your Laptop battery life.
4). In order to reduce the laptop power consumpition, you can use some optical drive spin-down and hard drive in your Laptop .
5). Please keep your laptop in sleep or standby model without long time using, which both save the Replacement Lenovo L19M4PC1 Laptop Battery power and extend battery using life.
6). Leave your battery in a dry and cool condition when without using.
7). When you rarely or generally plugged in fixed power using, Please take down your battery to avoid hurting battery life.

Hot Products

2100mAh HBC BA225000 for HBC crane crane pump truck rem220mAh ZEBRA BT000296A01 for Zebra HS3100 BTRY-HS3100-HS1-03430MAH ULEFONE S11 for Ulefone S11 Note 72000mAh/9.60Wh IKUSI BT24IK for IKUSI TM70/3 TM70/8 T70/3 Irib5050mAh/19.44WH NOKIA WT340 for Nokia G205050mAh/19.44WH NOKIA WT340 for Nokia G205250mAh/19.43Wh PAX IS900 for PAX A920 A920C7000mAh/27WH LENOVO L16D2P31 for Lenovo TAB4 PLUS TB-X704F3900mAh 15.015WH KOOBEE BL-A3CT for Koobee K7004150mAh /15.77Wh CUBOT note_S for CUBOT note S smartphone Mobile

How to install MacOS apps that Apple doesn’t want you to install

 Apple takes privacy and protection very seriously, which has always included keeping malware and viruses away from MacOS desktops and laptops. Installing apps from Apple’s own Mac App Store is one way to minimize risk, but not everything you might want is available there. It’s also easy to install software downloaded directly from one of Apple’s “identified” developers, though there’s also a settings menu to turn the feature off and on.

But you may come across an app that Apple doesn’t think is from an identified developer, and you want to install on your Mac. This is where it gets tricky. MacOS comes with a feature called Gatekeeper. It helps protect your Mac from applications that can adversely affect system stability. Gatekeeper verifies downloaded applications before allowing them to run. By default, if you try to install an application that Gatekeeper does not recognize, it will not install.

Before MacOS Monterrey, there used to be an option in settings that would let you bypass Gatekeeper and install unrecognized apps. In addition to allowing apps from the App Store and identified developers, the third option is Anywhere, which is exactly what it means. Install any compatible software online from anywhere and take the chance.

But since MacOS Monterrey, the Anywhere option is gone. You can still do this, but it requires a few unobvious extra steps.

Start by opening System Preferences > Security & Privacy > General. Click the lock icon at the bottom left of the page (it reads: “Click the lock to make changes”). You must enter your system password. If not already checked, check the boxes that say App Store and identify the developer.

Now, if you install a downloaded app and get a message: “[This program] cannot be opened because the developer could not be verified”, this is what you do. Go back to System Preferences > Security & Privacy > General. You will now see a new option on the page asking if you want to open the app anyway. Click that, and you’re ready to download.

The steps for MacOS Ventura’s new settings interface are slightly different. However, if you have upgraded to Ventura from MacOS Monterey and this setting is enabled, it will still be in Ventura.

Click the Apple logo in the upper left corner and select System Settings.

Next click on Privacy and Security. Scroll down to the safety section. From there, select the App Store and identified developer.

You must enter your Mac‘s login password, or, if you have one, you can use your Apple Watch to unlock settings and continue.

When launching an unrecognized app, you get a message that it cannot be opened because the developer could not be verified. There will be two options, Move to Trash or Cancel.

Select Cancel, then go to the Settings > Privacy & Security > Security section and you will now see an option for the App Store and identify the developer with the app you are trying to install and an option to open it anyway button.

When installing third-party applications, you may compromise the stability of your system. Having said that, the click still opens. You will get a warning message with the option to open. Click Open and you’re done.

>>>>>>>>>>>>>Apple battery

Thanks for reading, hope it helps!

Friendly reminder: If you need to replace the battery, this battery store will be a good choice: www.batteryforpc.co.uk

Windows 11 vs Windows 10: What’s really different?

 Considering upgrading to Windows 11? Microsoft’s latest operating system completed a phased rollout earlier this year and is now available on compatible devices. While the two operating systems share many similarities, there are some major differences between Windows 10 and Windows 11. Newer versions offer a more Mac-like aesthetic and more productivity features—plus the chance to finally use Android apps on Windows-equipped computers.

Let’s take a look at Windows 10 vs. Windows 11: All the big differences in the new operating system!

Design and Interface

Windows 11 brings a new, more Mac-like interface to the operating system. It features a clean design with rounded corners and pastel tones. The iconic Start menu has also been moved to the center of the screen along with the taskbar. However, if you want, you can move them back to the left, where they were in Windows 10.

Android app integration

The Android app is now available for Windows 11 through the Microsoft Store and Amazon Appstore. (There are several ways to access Android apps on Windows 10, including if you have a Samsung Galaxy phone, but this will make it a native app.) It’s something Windows users have been waiting for for years, marking a move toward a merger Another step forward for mobile and laptop devices.

Better virtual desktop support

Windows 11 allows you to set up virtual desktops in a similar way to a Mac. It allows you to switch between multiple desktops at once for personal, work, school or gaming. In Windows 10, this feature is more difficult to set up and use.

Easier transition from monitor to laptop

The new operating system includes features called Snap Groups and Snap Layouts—collections of the apps you’re using that sit in the taskbar and can appear simultaneously or minimized for easy task switching. They also allow you to easily plug and unplug from the monitor without losing where your open windows are.

Add Microsoft Teams to the taskbar

Teams has had a makeover and is now integrated directly into the Windows 11 taskbar, making it more accessible. You can access Teams from Windows, Mac, Android, or iOS.

Small parts

While they’ve been around for a while, including in the recent Windows 10 update, you can now access widgets directly from the taskbar and personalize them to see whatever you like.

Enhanced touchscreen, voice and pen support

For tablets, Microsoft is aiming to improve the touch experience, with more space between icons on the taskbar and support for gestures. Windows 11 also adds haptics to your digital pen, so you can hear and feel vibrations when you use it to take notes or draw. Finally, the operating system introduced voice input and commands throughout the system.

Xbox technology that improves gaming

Windows 11 will get some of the features found in the Xbox console, like Auto HDR and DirectStorage, to improve gaming on Windows PCs. This marks another step for Microsoft to integrate PC and Xbox consoles.

>>>>>>>>>>>>>Computer battery

How to turn an old MacBook into an emergency Wi-Fi hotspot

 The whole point of a Wi-Fi hotspot is to turn on your cellular data connection to other devices. It allows you to control when the connection is active and who can connect, but if you have any online activity, any online activity will count towards your data plan limit.

Why you should use your MacBook as a Wi-Fi hotspot

Turning your MacBook into a Wi-Fi hotspot isn’t quite the same as using your phone. Since MacBooks don’t currently offer cellular connectivity, the only way you can connect them to the internet is to already have an internet connection available. But in some cases, setting up a MacBook Wi-Fi hotspot can be useful.

This feature is handy if, for example, you’re in a location that doesn’t typically have Wi-Fi but does offer a physical Ethernet connection. Most pocket devices that can connect to the internet (i.e. smartphones) can’t just plug in an ethernet cable, and if you need to connect multiple ethernet-capable devices, a single connection won’t cut it. By plugging in your old MacBook and setting it up to share Wi-Fi, you’re essentially making it a makeshift wireless router to which your other devices can connect.

What you need to use your MacBook as a Wi-Fi hotspot

Turning a MacBook into a Wi-Fi hotspot isn’t very difficult, but it’s more than just the click of a button. Your MacBook needs to be running at least macOS 10.6 Snow Leopard, because that’s when Apple started including internet sharing options. You’ll also need to make sure your MacBook has access to an available internet connection, whether that means having the necessary ethernet connection or knowing the access password. After all, this feature won’t do you much good if you can’t get online in the first place.

Finally, you may need to take additional steps to secure your connection. If you wish to send or receive sensitive information, consider setting up a VPN to better protect your online privacy. At the very least, it is strongly recommended that you choose a more secure option when setting up a shared Internet connection.

How to Set Up a MacBook Wi-Fi Hotspot

The first step in setting up your MacBook as a Wi-Fi hotspot is to enable Internet Sharing in macOS. The process may vary slightly depending on the version of macOS you’re using, but in most cases it’s like this:

1. Open System Preferences.

2. Select Sharing > Internet Sharing.

3. Select the correct source device under “Share your connection from”.

4. Select how you want to share in the “Computer used” section.

Things get more nuanced when you decide how to share your connection. If you plan to share over Wi-Fi, when you go to step 3, you will need to select Ethernet, then Wi-Fi for step 4. Then open the Wi-Fi options to set your connection details, and select Start to start sharing your connection.

If you are using a Wi-Fi adapter, you need to configure it first, then select the Wi-Fi adapter in step 3. The rest of the process is the same as for regular Wi-Fi setup.

What about Bluetooth?

It’s possible to share a MacBook’s internet connection wirelessly via Bluetooth, but it’s not ideal, mainly because Bluetooth internet connections aren’t as fast as Wi-Fi and have more limited range. However, it will work in a pinch, so if that’s your only option, it will still get the job done. First, make sure that both your MacBook and the device you’re connecting to are available and have Bluetooth enabled.

1. Open System Preferences on your MacBook.

2. Select Sharing > Internet Sharing.

3. Select the correct source device under “Share your connection from”.

4. Select Bluetooth PAN as the sharing method.

5. Select Internet Sharing > Start to start sharing.

Keep in mind that not all MacBooks support Bluetooth PAN, especially newer models, since Wi-Fi has become so common. If your MacBook doesn’t offer a Bluetooth PAN, you’ll have to choose Wi-Fi, and if your device can’t connect to Wi-Fi, you may need to find another way to fully transfer the necessary material to your MacBook.

>>>>>>>>>>Apple battery

Thanks for reading, hope it helps!

Friendly reminder: If you need to replace the battery, this battery store will be a good choice: www.batteryforpc.co.uk

If you forget your Mac password, this method will still allow you to log back in

 We sometimes forget our passwords at some point. For online accounts, you just click a few links, enter your email address, and reset your password. But what happens when you forget your password to log into your Mac?

There are a few different methods you can use, and the way you unlock your Mac without a password may depend on whether you linked your Apple ID to a user account on your Mac during setup, or if you have one of the new M1 Max . If you didn’t link your Apple ID, that’s okay, there is another option to reset your account password. Here’s how to start regaining control of your Mac computer, let’s see!

Use your Apple ID to reset your Mac‘s password

Ideally, you’ll link your Apple ID to your user account on your Mac during initial setup, so you can reset your user password with just a few clicks.

After entering the wrong user password three times, you will be asked if you want to restart your computer to see password recovery options. After restarting, you will be asked to log in with your Apple ID, select the user account for which you want to reset the password, and enter the new user account password.

Unlock your Mac with another administrator account

If you share your Mac with a friend or family member and they forget their password, chances are you can reset the password for them. The key here is that you need access to an admin user account.

Usually, people setting up a Mac for the first time have an administrator account by default, but you can check by logging into your account and opening System Preferences > Users & Groups and looking at the list of user accounts on your Mac. Below the username will be the account type – if it says “Administrator”, you can reset the user’s password.

To do this, in the same Users and Groups screen, click the lock and enter your administrator name and password when prompted. Next, select the user whose password you need to reset, then click the button labeled “Reset Password” and follow the instructions.

recovery mode

If none of these methods work, you’ll need to boot your Mac into recovery mode to access the password reset tool.

The process of entering recovery mode will depend on the type of Mac you have. For Macs with Intel processors, press and hold the Command and R keys on the keyboard, then press the power button. Press and hold Command+R until you see a progress bar appear below the Apple logo. You can also enter Recovery Mode by restarting your Mac and trying to time the Command+R keyboard combination, but in my experience, starting with shutting down the Mac is the most reliable method.

For the recently released Macbook Air, MacBook Pro, and Mac Mini with the Apple M1 processor, you need to shut down the computer, then press and hold the power button until the options button appears. Click on it and select Restore.

Now that your Mac is in recovery mode, click Utilities in the menu bar, then click Terminal. A new window will appear, waiting for you to enter a command. Type ” resetpassword ” as a single word without the quotation marks and press Return.

Close the terminal window and there you will find the reset password tool. Follow the prompts, including logging in with your Apple ID, and selecting the user account for which you need to change your password.

If FileVault is enabled on your Mac, you can still

FileVault is an optional MacOS feature that encrypts your Mac’s hard drive and all data stored on it. It’s usually turned on during initial setup, or you can turn it on later in System Preferences.

If you have FileVault turned on, you have two additional options to reset your user password. You can wait up to a minute on the user login screen for a prompt to press the power button to restart the Mac into recovery mode. Follow the instructions to restart your computer, after which you should see the Reset Password window appear.

Another option is to use the recovery key that should be noted when FileVault is enabled. You can enter your recovery key after three failed login attempts. Be sure to use capital letters and enter hyphens – they are required.

You can prevent this from happening, you just need to be more proactive in storing your recovery key and remembering your password during setup. Here’s how to lock your Mac.

>>>>>>>>>>>>>>>Apple battery

Thanks for reading, hope it helps!

Friendly reminder: If you need to replace the battery of your device, this battery store will be a good choice: www.batteryforpc.co.uk

There’s a new way to factory reset M1 and M2 Macs

 If you’ve bought a new MacBook Air, MacBook Pro iMac, Mac Studio, or Mac Mini within the past few years, it’s almost certainly using Apple’s own processor, the Apple Silicon M1 or Apple Silicon M2, rather than an Intel chip. In your day-to-day use, you probably won’t notice any difference in operation, which is a good thing. But when it’s time to reset a new Mac, whether it’s because you sold it, handed it over, or troubleshoot it, there are completely new steps to completely wipe out M1 and M2-based models.

More specifically, the steps to access Recovery Mode (the tool you need to reset your Mac) have changed. I’ll walk you through how to get into recovery mode and use all the options, and provide some workarounds for the issues I’m having. Let’s take a look below!

How to Access MacOS Recovery on Apple Silicon Macs

Click the Apple icon and shut down your Mac. After the computer shuts down completely, press and hold the power button. When the Apple logo first appears, you’ll see text below it, letting you know to keep pressing it to access startup options. Press it until the text switches to “Loading Boot Options,” which takes about five seconds. Next, click Options > Continue. Select a user with administrator privileges and enter the account password when asked.

New recovery tool gives you some options

After logging into your user account, you will see a list of apps available in recovery.

Restore from Time Machine: Use this option if you want to restore your Mac from a previous Time Machine backup. This is helpful if you’ve lost a lot of files, changed settings, or installed an application that’s causing serious problems with your Mac.

Reinstall MacOS Monterey: If you are having trouble with MacOS, you can try to reinstall the latest version of MacOS using this option without deleting any files or losing any data.

Safari: You can use Apple’s browser to search and resolve how to fix your Mac.

Disk Utility: Tools for repairing, troubleshooting, or erasing hard drives.

In the menu bar at the top of the screen, you can also access other applications and tools, such as Terminal, Shared Disk, and Boot Security Utility.

Erase the hard drive, reinstall MacOS

To completely remove all information from the hard drive and reinstall MacOS, open Disk Utility and select the internal disk labeled Macintosh HD. Check the box if there is an option called Erase Volume Group. Otherwise, click Erase and follow the prompts. The volume name and format are reserved, but for reference, the name is usually “Macintosh HD” and the format should use AFPS.

After a few seconds, the hard drive will be completely wiped, taking away all your files, user accounts, and applications. When done, close Disk Utility and select Reinstall MacOS from the list of options. You’ll be asked to choose where to install, which should be Macintosh HD (or whatever the name of the hard drive is if you decide to change it).

Your Mac will then download the latest version of MacOS, install it, and when it’s done, it’s like it’s never been set up.

If you are unable to create a new user account

I can’t create a new user account after reinstalling MacOS: My MacBook Pro freezes when I try to create a default user account. Basically, it’s because MacOS is looking for account information in a place that doesn’t exist anymore.

If the system doesn’t freeze, try rebooting again into recovery mode, launch Terminal, type “resetpassword” in the command line, select the reset password option, then launch Recovery Assistant from the menu bar and select Erase Mac or Erase with Disk Utility Data partition, as described in the previous comment.

If it freezes, you need to try accessing it from a second device. You can connect it to another Mac and follow the process described in this StackExchange thread or follow the instructions in this Reddit comment to remove the partition from your iPhone.

>>>>>>>>>>>Apple battery

Thanks for reading, hope it helps!

Friendly reminder: If you need to replace the battery of your device, this battery store will be a good choice: www.batteryforpc.co.uk

The world’s lightest laptop is lighter than the Apple iPad Pro without a keyboard

 Fujitsu has quietly launched the world’s lightest laptop, but it’s currently limited to Japan. The WU-X/G2, part of the company’s Lifebook lineup, weighs just 634 grams without a charger, just under 1.4 pounds.

That means this business laptop is lighter than the Apple iPad Pro 12.9 tablet at 682 grams. Size wise, it doesn’t try any tricks; at 307 x 197 x 15.5mm, it’s relatively large, allowing for a bigger screen, more connectivity, and, dare we say it, a better keyboard , the touchpad has a large Enter key and physical buttons.

Small battery capacity, big battery life?

Laptops come with 12th Gen Intel Core processors (1235U or 1255U) and 8GB, 16GB or 32GB of LPDDR4x memory (dual channel and soldered onboard. Onboard storage ranges from 256GB to 2TB, and there is even an option for an external optical drive, which in Japan is still Very common.

The display is a massive 13.3-inch full HD matte display topped with an HD webcam and a privacy shutter. Wireless connectivity is achieved through the Intel AX201 chipset which provides Bluetooth 5.1 and WiFi-6.

Despite its weight, the WU-X/G2 has a full array of ports that can dwarf laptops that weigh two to three times the weight. There’s a card reader, three USB ports, a full-size HDMI port, and even a Gigabit Ethernet port, plus the power button doubles as a fingerprint reader. No need for a laptop docking station. Sadly, Fujitsu didn’t use any magic to save weight, instead using carbon fiber as the primary material for its chassis.

One corner has been clipped, however, and disappointingly, it’s the battery capacity. At 25WHr, it’s about a quarter the size of some heavier competitors, but that’s perfectly acceptable, since in theory you should be able to trickle-charge it with a phone charger or even an emergency power bank. Surprisingly, the manufacturer quotes an estimated battery life of 11 hours.

An unexpected freebie is a three-year warranty and a three-year subscription to McAfee Livesafe security software. This makes the rather high price (around £1950, $2400, AU$3400) of its top model (Core i7, 32GB RAM, 2TB SSD, Windows 11 Pro) even more prohibitive.

>>>>>>>>>>>>Laptop battery

How to Remote Desktop on Mac

 There are many reasons to wonder how to remote desktop on a Mac. For starters, if you have multiple computers, you may need to access some files or applications on another Mac. Or, if you know someone who needs help with a Mac problem, it’s easier to use their computer directly, even if you’re far away. Here’s how you want to know, let’s take a look!

With screen sharing, remote access to your desktop is easy. You just need to know the Apple ID or hostname of the other Mac. From then on, just accept the method on another computer and decide what level of access you want. However, this means that someone has to have access to the other Mac.

To summarize, these are the steps:

1. Launch the screen sharing app

2. Enter the hostname or Apple ID

3. Accept incoming requests on another Mac

4. Tap Control My Screen

5. Close the window end

How to use screen sharing on Mac

1. Launch the screen sharing application on the Mac you want to use. You can do this via Spotlight Search if you press Command and Space on your keyboard – just type Screen Sharing.

2. Enter the hostname or Apple ID associated with the other Mac. In other words, the Apple ID of the computer you want to access. Click Connect.

You will now be told that you need to respond on another machine.

3. A message will appear on the Mac you want to connect to. To establish a connection, the person using the computer will need to click Options and select Accept.

4. A Mac is fully controllable. To do this, someone has to click “Control My Screen” on the Mac that will be accessed. Clicking Watch My Screen will not allow any applications to be opened or changes to be made to files.

5. You will now have remote access to the other Mac, which will appear in its own window. Simply close the window to stop access.

>>>>>>>>>>>>>Apple battery

Thanks for reading, hope it helps!

Friendly reminder: If you need to replace the battery of your device, this battery store will be a good choice: www.batteryforpc.co.uk

4 Ways to Damage Your Laptop Battery

 Do you take good care of the battery in your laptop? While chips are getting more efficient and battery life is increasing, avoiding a few mistakes can help extend a laptop’s battery health in the long run. Here are 4 ways to damage your laptop battery, let’s take a look!

keep charging

The idea of ​​keeping a laptop plugged in all the time is “bad” stems from the myth of overcharging, but laptops and other gadgets that use such batteries switch to trickle charging as they approach capacity. Your laptop won’t explode or “overcharge” if you keep it plugged in.

With that in mind, the lithium-ion battery inside a laptop will last longer if it doesn’t maintain a high voltage level for an extended period of time. If we’re talking about battery health, you can extend battery life by not keeping it at 100% all the time. This means using the battery by unplugging it during the day, rather than keeping it plugged in.

make it too hot or too cold

Nothing kills a battery like exposing it to extreme temperatures. We all know that extreme heat is bad for lithium-ion batteries, but so is extreme cold.

Leaving a laptop in a car exposed to sub-zero temperatures can cause irreversible damage to the battery. Some electric vehicles (EVs) that use lithium-ion batteries implement temperature management systems in the car to limit damage in particularly cold weather and for better performance on cold mornings.

Your laptop doesn’t contain such a system, which is why you should be extra careful. If the worst happens and your laptop is exposed to cold, it’s a good idea to let the battery warm up before trying to use it.

Heat is another cause of laptop battery damage, and it’s a problem you can run into at any time of the year. Leaving your laptop out in the sun for hours is a recipe for disaster, as it gets so hot that the safety mechanism kicks in causing the power to shut down.

You can prevent this from happening by placing the laptop in a room that isn’t hot enough without adequate airflow. Be extra careful when using your laptop on a bed or other fabric surface, as many have vents on the sides and back of the lid that can easily get clogged by soft furniture.

No shallow discharge

When lithium-ion batteries are kept at around 40-80% of their maximum capacity, they will last longer. Over-discharging a battery can shorten its lifespan, as can staying above 80% for extended periods of time. Many manufacturers now offer a battery-save “long life” mode to help with this, as summarized by Battery University:

Some laptops allow you to limit the charge percentage to around 80% to extend battery life. This feature is supported by specific manufacturers that use their own apps, such as MyASUS for Asus users and the Battery Restricted Mode setting for Microsoft Surface users. Other users can try the freeware Battery Limiter application for Windows.

On macOS, you can use AlDente to set charging limits or use Apple’s built-in optimized charging feature. Optimized Charging learns from your schedule, keeping your laptop at a lower capacity until you need it. If macOS recognizes that you turn off your laptop to go to work every day at 8am, it won’t charge 100% in the morning, even if you’ve plugged it in the night before.

No discharge once a month

This might sound contradictory, considering we’ve already said that letting the battery fully discharge is bad news. But never allowing the battery to fully discharge can cause it to become inaccurate in reporting its current charge level.

First, you may not know how much battery you have left and you may run out of battery. Many other good practices, such as keeping your battery above 40%, or limiting it to around 80%, rely on knowing your true charge level.

This is especially true if you use an app like AlDente or Battery Limiter to limit your battery below 100%. This type of use may require more frequent battery recalibration, so we recommend a full discharge once a month.

>>>>>>>>>>>>>Laptop battery

Thanks for reading, hope it helps!

Friendly reminder: If you need to replace the battery of your device, this battery store will be a good choice: www.batteryforpc.co.uk