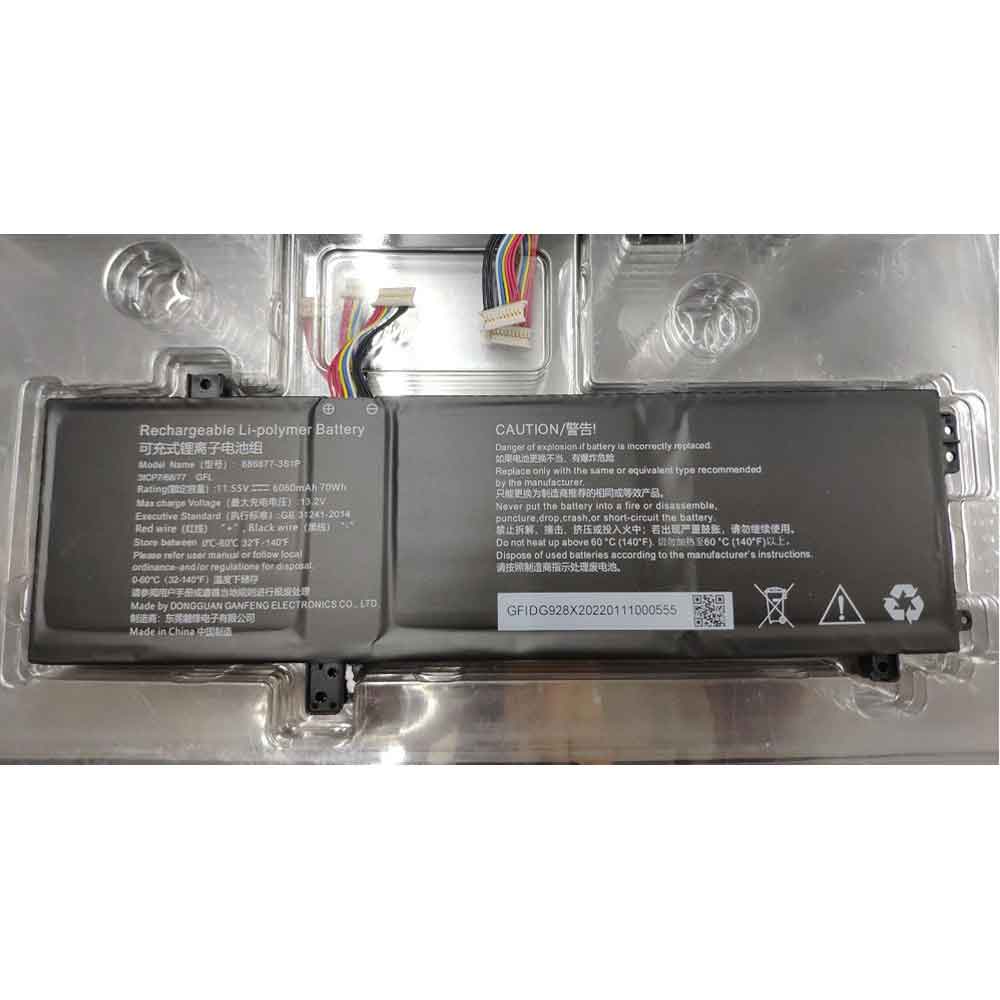
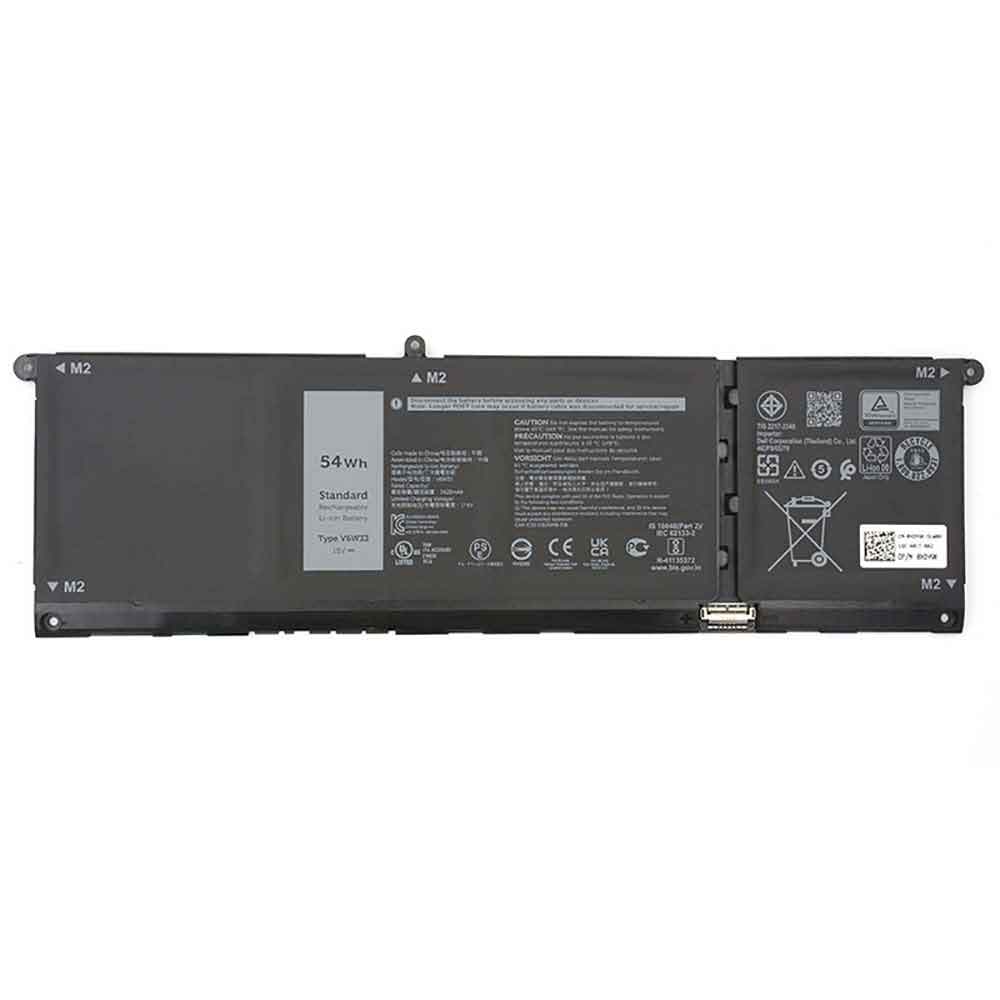
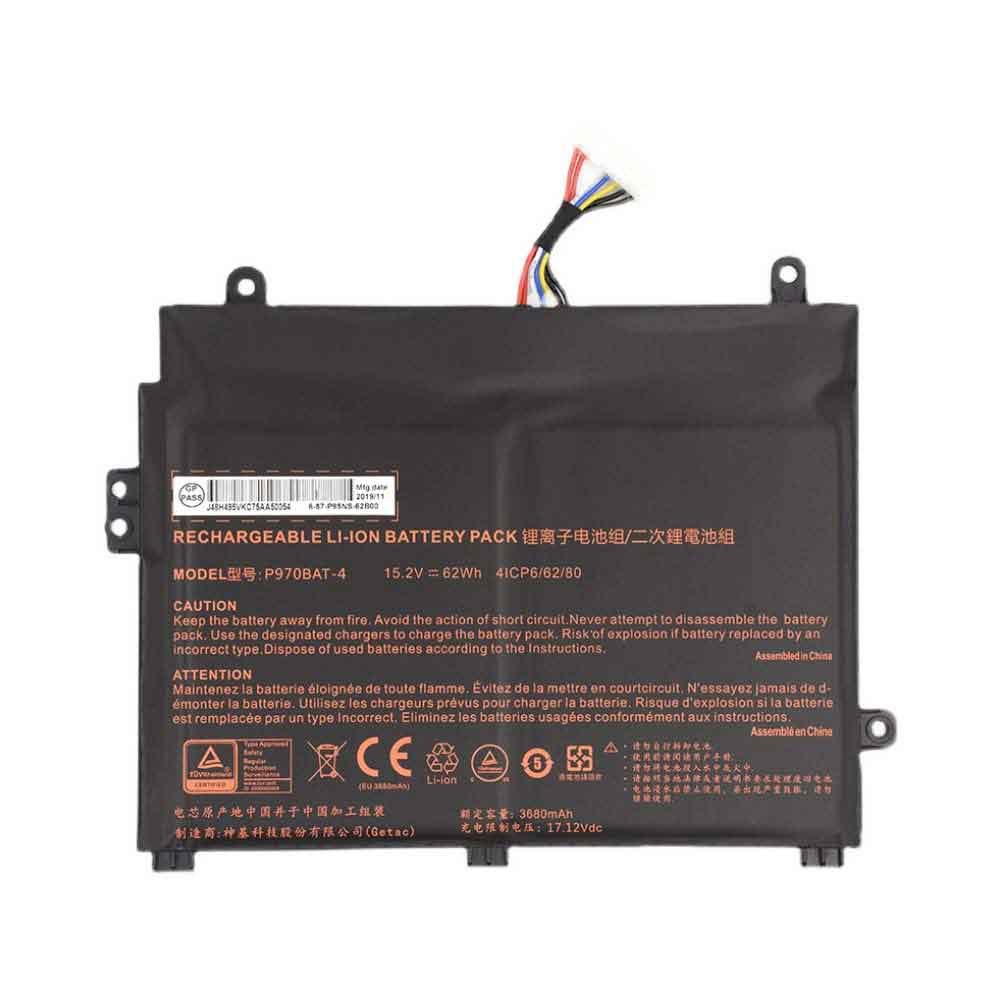
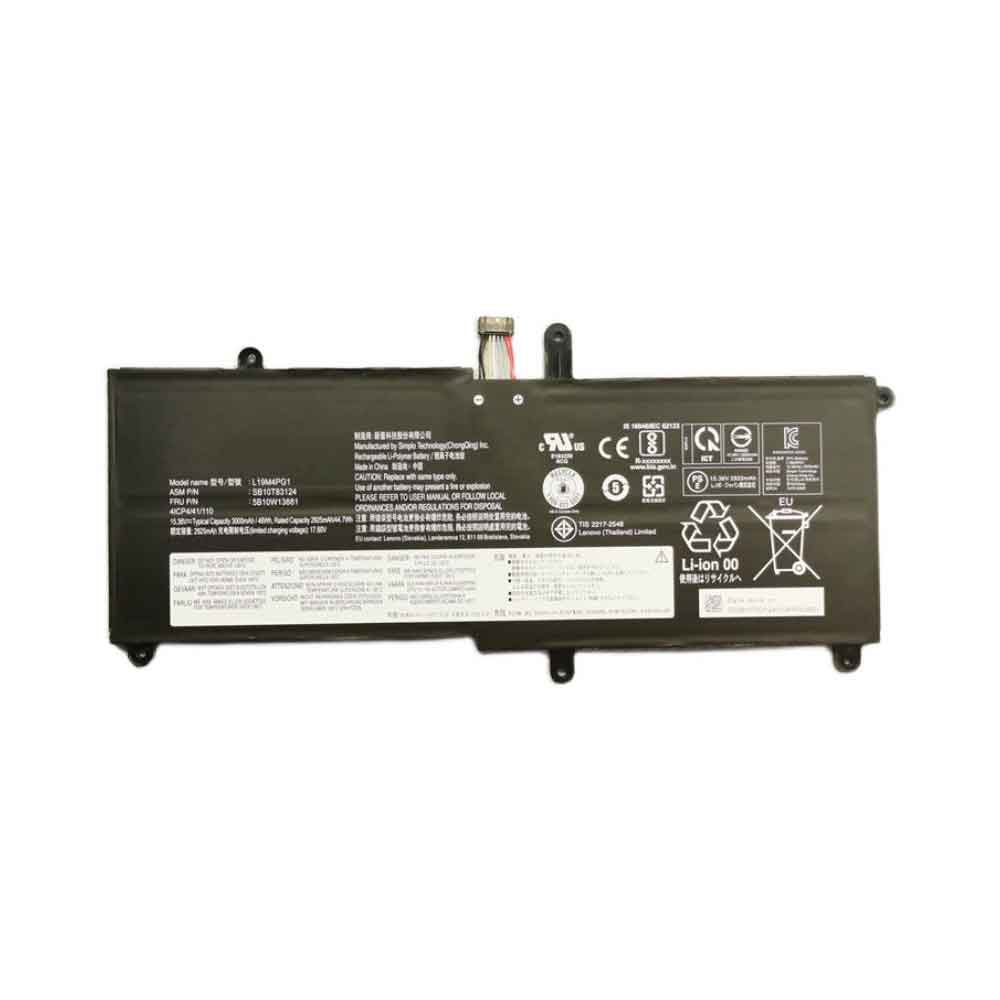
49Wh 15.2V Clevo NV40BAT-4-49 Li-ion Battery for Clevo NV40BAT-4-49

49Wh 15.2V Clevo NV40BAT-4-49 Batteries for Clevo NV40BAT-4-49, Clevo NV40BAT-4-49 Laptop battery is a brand new,100% Compatible original and replacement Laptop battery,Purchase wholesale and retail NV40BAT-4-49 with high quality and low price!

Find ou your original model number or part number(P/N), and move your eyes on the tag of battery

NV40BAT-4-49

Specifications

  • Brand:Clevo
  • Capacity :49Wh
  • Voltage :15.2V
  • Type :Li-ion Polymer
  • Battery Cell Quality: Grade A
  • Descriptive: Replacement Battery – 1 Year Warranty
  • Description: Brand New, 1 Year Warranty! 30-Days Money Back! Fast Shipping!

How we test this Clevo NV40BAT-4-49 Battery
Step 1: Make sure customer bought the correct battery.
Step 2: Check battery’s appearance and interface.
Step 3: Test battery charger and recharger function.
Step 4: Charger the battery to 100% and recharger to 0% to get real battery capacity
Step 5: Use Ev2300 to check the voltage difference of each goroup cells.
Step 6: Charger battery power more than 30%.
Step 7: Package battery carefully and send out

Compatible Part Numbers:
NV40BAT-4-49

Compatible Model Numbers:
Clevo NV40BAT-4-49

How much do you know about how to run laptop well as any place? The follow Tips cut way back on protecting battery life.


1). Please recharge or change your Laptop battery when battery power low.
2). Using Li-Ion Replacement Clevo NV40BAT-4-49 Laptop Battery for your notebook which can work longer time than Non Li-ion one.
3). It is better to defragmentation regularly for your Laptop battery life.
4). In order to reduce the laptop power consumpition, you can use some optical drive spin-down and hard drive in your Laptop .
5). Please keep your laptop in sleep or standby model without long time using, which both save the Replacement Clevo NV40BAT-4-49 Laptop Battery power and extend battery using life.
6). Leave your battery in a dry and cool condition when without using.
7). When you rarely or generally plugged in fixed power using, Please take down your battery to avoid hurting battery life.

Hot Products

1500mAh/5.7WH AMAZON 58-000271 for Amazon Kindle Paperwhite 4 2016080mAh/48Wh LENOVO L16C4PB1 for Lenovo YOGA 720-13IKB Series2000mAh/7.6WH MOTOROLA JE30 for Motorola E5 play go76Wh ASUS C41N1716 for ASUS ROG Strix GL703GM S7BS8755040mAh/19.78WH NETGEAR W-10A for Netgear NightHawk Router/Modem5920mAh MEDION 4588105 for Medion CW140 Akoya S4403 S440130Wh/3968mAh 2-Cells LENOVO L16L2PB2(8Pin) for Lenovo IdeaPad 320-14IAP2500mAh PANASONIC CGA-DU21 for Panasonic GS158 GS120 GS120K G430mAh/1.63Wh GARMIN 361-00098-00 for GARMIN Fenix 5X Running2220MAH/8.4WH NOKIA BV-T5A for Nokia Lumia 550 730 735 738 Su

How do I make my laptop battery last longer?

 To extend your laptop’s battery life, change your power profile to Power Saver, lower the screen brightness, and turn off the keyboard backlighting. If you’re not using your laptop, turn it off, or set it to hibernate after a short period of inactivity.

Turn the Brightness Down

Reduce monitor brightness. A bright monitor will lap up your battery. Reduce screen brightness as much as possible without straining your eyes. There are two ways you can do this. First, keep the brightness level low unless you really need it.

Go to your settings and also turn off the keyboard lights. This will save you plenty of power and prolong your battery runtime.

Turn of Unnecessary Background Apps

Open your task manager and you will find a lot of programs running that you do not need. These programs take up memory space and slow down your laptop. They also cause excessive use of power and you find yourself at zero percent charge in no time. So, close these apps before it does any harm. 

Avoid working on multiple programs. While you might be tempted to work efficiently and multitask on your Excel sheets, Powerpoint and Adobe Photoshop, this can put a strain on your battery. Graphic intense applications drain batteries even faster. To increase lifespan, work simultaneously on one or two programs, max.

Disable unused devices and ports. External devices such as a mouse, Wi-Fi, external speakers and Bluetooth can drain your battery. When these are not in use, turn them off. 

Use the Windows Performance Power Slider

This is a recent feature introduced by Microsoft. It allows you to regulate just how much of your battery power will be used. You can slide the bar to different settings.

I recommend you keep it on “battery saver” during downtime. And unless you are pushing your pc, keep it on balanced mode for most of the time.

Customize the Power and Sleep Settings

Sometimes we can forget to turn the laptop off and it keeps running in the background. This consumes a lot of power. To fix this, go to settings > systems > power & sleep. Here, you can customize your laptop’s power consumption when you are not using it.

You can set it so that it turns off after a certain period of inactivity. Other times, you can have the screen turn off to save you power.

Prevent Overheating

Overheating is a reliable way of damaging any PC hardware. So, ensure that there is proper ventilation for the heat inside the laptop to come out. If you can, clean the cooling fans and other parts periodically so that dust build-up does not happen. Excessive heat can damage your laptop’s battery. Avoid leaving it in the car during summer and test your laptop’s temperature while you work. 

>>>>>>>>>>>>>>Laptop battery

Dell XPS 13 Plus vs Apple MacBook Air M1

 The Dell XPS 13 Plus represents half of the new 13-inch XPS lineup, offering higher performance and a more innovative machine than the more affordable XPS 13. Both are among the best laptops on the market. Apple’s MacBook Air M1 is an old-school option with an affordable design that’s been refined over the years to become one of the best MacBooks you can buy.

While the XPS 13 Plus is more expensive than the MacBook Air M1, the difference isn’t huge. So if you’re looking for portable power supplies, you might have them both on your shortlist. But which is better?

Price and configuration

The MacBook Air M1 is the lowest-priced MacBook you can buy, starting at $1,000 for an 8-core CPU/7-core GPU M1 processor, 8GB of RAM, and a 256GB SSD. You can spend up to $2,000 for the same CPU with 16GB of RAM and a 2TB SSD.

The XPS 13 Plus is a more expensive machine, starting at $1,300 in an entry-level configuration with a Core i5-1240P, 8GB of RAM, a 512GB SSD, and a Full HD+ non-touch IPS display. The most expensive model with a Core i7-1280P, 32GB RAM, 2TB SSD, and a 3.5K OLED or UHD+ IPS panel is $2,400.

While the MacBook Air M1 is still a high-end laptop, it’s less expensive overall.

Design

The design of the MacBook Air M1 is impeccable, as its tapered chassis started the trend for thin and light laptops. The new MacBook Air M2 takes the blocky look of the latest MacBook Pro, but without any issues with the original aluminum machine. And the build quality is second to none. The XPS 13 Plus looks a lot like previous XPS 13 models, with a streamlined aluminum chassis and dual-anodized chrome edges. Open it up, though, and Dell‘s latest looks futuristic with a bezel-less keyboard, LED function keys, and a glossy glass palm rest with a hidden touchpad. It’s also very well-made, and choosing between the designs of these two laptops comes down to very personal taste.

Speaking of the keyboard, the XPS 13 Plus has large keycaps and a comfortable layout with switches that aren’t very deep, but offer quick, precise responses. However, the MacBook Air M1 features Apple’s Magic Keyboard, and it’s the best. The switches are also shallow, but offer a more precise feel and excellent feedback. You can type quickly and accurately on both keyboards, but the MacBook is better. Both laptops also have tactile touchpads, with Dell’s version responsive across the entire surface and mimicking physical buttons. Thanks to Apple’s years of technical experience, the Force Touchpad for the MacBook Air is even better. The XPS 13 Plus has LED function keys that don’t offer any advantage to the user, but are there to keep the chassis slim.

Both laptops are limited to two USB-C ports with Thunderbolt 4, but the MacBook Air M1 retains the 3.5mm audio jack that the XPS 13 Plus ditched. Meanwhile, the Dell has more advanced wireless connectivity. One advantage of the XPS 13 Plus is its ability to natively drive two external displays, while the MacBook Air M1 is limited to just one.

Finally, both machines feature 720p webcams, while the XPS 13 Plus has an IR camera that enables passwordless Windows 11 Hello logins via facial recognition. The MacBook Air M1 uses the Touch ID fingerprint reader on the power button. Both methods are fast and reliable for logging in.

Display and Audio

The MacBook Air M1 features a 13.3-inch 16:10 Liquid Retina IPS display with a resolution of 2,560 x 1600. It’s great for productivity work, with adequate brightness and contrast, and decent colors. However, the XPS 13 Plus’ 13.4-inch 3456 x 2160 OLED touch panel is spectacular. It’s just as bright, but with incredibly broad and accurate colors and strong contrast with jet blacks.

The XPS 13 Plus also has a choice of Full HD+ non-touch and touch IPS displays and UHD+ touch IPS displays. However, there is no doubt that OLED displays have advantages in terms of productivity, creativity and media streaming needs. Both laptops have dual speakers that deliver clean sound with adequate volume.

Portability

The XPS 13 Plus is smaller in all dimensions than the MacBook Air M1, and a little lighter. Where the MacBook wins out is the efficiency of Apple’s M1 processor. In our web browsing and local video battery tests, the MacBook Air M1 lasted nearly twice as long as the XPS 13 Plus and lasted more than a day of work, while the Dell didn’t.

The MacBook Air M1 is simpler but cheaper

You can get several of the XPS 13 Plus’ innovations for a higher price, especially its beautiful OLED display, and its better productivity performance. However, you’re paying more, and the MacBook Air M1 has better battery life and just as good build quality.

If you’re choosing between these two laptops and just want a solid productivity machine for the least amount of money, the MacBook Air M1 is the better choice.

>>>>>>>>>>>Laptop battery

6600mAh 10.8V Siemens SP303 Li-ion Battery for Siemens Simatic Field PG M3

6600mAh 10.8V Siemens SP303 Batteries for Siemens Simatic Field PG M3, Siemens SP303 Laptop battery is a brand new,100% Compatible original and replacement Laptop battery,Purchase wholesale and retail SP303 with high quality and low price!

Find ou your original model number or part number(P/N), and move your eyes on the tag of battery

SP303

Specifications

  • Brand:Siemens
  • Capacity :6600mAh
  • Voltage :10.8V
  • Type :Li-ion
  • Battery Cell Quality: Grade A
  • Descriptive: Replacement Battery – 1 Year Warranty
  • Description: Brand New, 1 Year Warranty! 30-Days Money Back! Fast Shipping!

How we test this Siemens SP303 Battery
Step 1: Make sure customer bought the correct battery.
Step 2: Check battery’s appearance and interface.
Step 3: Test battery charger and recharger function.
Step 4: Charger the battery to 100% and recharger to 0% to get real battery capacity
Step 5: Use Ev2300 to check the voltage difference of each goroup cells.
Step 6: Charger battery power more than 30%.
Step 7: Package battery carefully and send out

Compatible Part Numbers:
SP303

Compatible Model Numbers:
Siemens Simatic Field PG M3

How much do you know about how to run laptop well as any place? The follow Tips cut way back on protecting battery life.


1). Please recharge or change your Laptop battery when battery power low.
2). Using Li-Ion Replacement Siemens SP303 Laptop Battery for your notebook which can work longer time than Non Li-ion one.
3). It is better to defragmentation regularly for your Laptop battery life.
4). In order to reduce the laptop power consumpition, you can use some optical drive spin-down and hard drive in your Laptop .
5). Please keep your laptop in sleep or standby model without long time using, which both save the Replacement Siemens SP303 Laptop Battery power and extend battery using life.
6). Leave your battery in a dry and cool condition when without using.
7). When you rarely or generally plugged in fixed power using, Please take down your battery to avoid hurting battery life.

Hot Products

7800mAh PANASONIC CF-VZSU46 for Panasonic Toughbook CF-30 CF-34650mAh/17.7WH HUAWEI HB3080G1EBC for Huawei Mediapad T3 103470mAh/13.18WH PPTV EF168 for PPTV King7 King7S PP60004500mAh/17.1WH ACER PR-2874E9G for Acer A6001 Iconia One 8 B1-8502200mAh OPPO BLP821 for OPPO BLP8215250mAh/19.43Wh PAX IS900 for PAX A920 A920C3200Mah /12.16Wh AMAZON MC-308695 for Amazon Kindle 58-000255 MC-3081500MAH/5.7Wh HUAWEI HB434666RBC for Huawei E5573 E5573S-852/853/8571Wh ASUS C42N1846 for Asus ZenBook Pro Duo UX581GV UAMAZON Shipping for

Split Screen on Mac: The Easiest Way to Multitask

 Sometimes you need multiple windows. But switching between multiple fullscreen windows is not very efficient. Instead, it’s easier to split the screen so you can have two windows open at the same time. Split-screen mode is great when you need to view report data, keep chat windows open while doing other things, or just play video on one side of the screen when multitasking.

Fortunately, Macs offer a split-screen mode that allows you to stick two apps on different sides of the display. This way, you can navigate between windows without navigating with the mouse or pressing Command + Tab. Let’s take a look below!

How to Enter Split View on Mac

1. Make sure both windows you want to use are not in fullscreen mode.

2. In one of the windows you want to use, place the cursor on the green button in the upper left corner. Instead of clicking to maximize the window, hover over until you see the drop-down menu.

3. Select the tile on the left side of the screen or the tile on the right side of the screen. Your Mac will automatically enter split screen mode.

4. From there, other open windows will appear on the other side of the screen. Click on the desired window on the rest of the screen and it will fill the remaining half.

5. If you want to resize the window, use the slider in the center of the screen.

In split view, you will be able to view two windows at the same time. Multitask away!

How to Exit Split Screen on Mac

If you’re done with the split screen layout, here’s how to get rid of it:

1. Move the cursor to the top of the screen until you see the resize buttons at the top left of each window.

2. Click the red button to close the window or the green button to exit split screen.

3. Don’t panic! Your other window is still open, it’s just hidden in fullscreen mode. To access it again, press the Mission Control button ( F3 ) on the top row of the keyboard.

4. You should see two options at the top of the screen: the desktop and any windows you have in split screen mode. Click on another window, and if you want to exit full screen mode, use the green resize button in the upper left corner.

If you’re the type of person who might need to have more than two windows open, you can always manually resize the windows to fit three or four on the screen at a time. The experience won’t be as visually clean as using tiled windows.

What are the shortcut keys for split screen on Mac?

There are many handy Mac keyboard shortcuts, including one for split screen. First use control + command + F to enter full screen mode. From there you can press F3 to pull up Mission Control and drag another app onto your currently full screen app. Click to go back to the newly tiled app and you’ll be in split view.

If the steps are still too many, you can create your own keyboard shortcuts. Go to System Preferences > Keyboard > Shortcuts > Application Shortcuts. You can click the + button to add a command called “Tile window to left side of screen” with the desired shortcut. After activating the shortcut, your active window will be tiled on the left side of the screen, and you can simply select a second window to add to the split screen.

Why can’t my Mac split screen?

First, make sure you’re not currently in fullscreen mode. Split screen only works with normal windowed views. If that’s not the problem, go to System Preferences > Mission Control and check if the monitor has separate spaces enabled. If not, enable it.

If you don’t see this option in the Mission Control menu, make sure you’ve updated to MacOS 10.11 or later. You can check your current OS version by clicking the Apple icon in the upper left menu and selecting About this Mac. If you are using an earlier version, you must update by clicking the “Software Update” button on this screen.

Keep in mind that not all apps support split screen. If you’ve tried everything else and the app still doesn’t tile in split-screen mode, the app probably doesn’t offer split-screen mode.

How to split screen on Mac without full screen?

The official split screen feature on the Mac (called “Split View”) automatically splits two windows in full screen. If you don’t want a full screen view (perhaps because you want to be able to quickly navigate between browser tabs), you can manually drag the window to fit the required space. This option gives you more customization than Split View.

>>>>>>>>>>>>>Mac battery

Use your iPad as a second monitor for your Mac. Here is how to set it up

 No matter how big your computer display is, sometimes a single screen isn’t enough. That’s why so many people need a second monitor, as another screen helps with gaming, streaming, multitasking, communication, organization, and overall efficiency. Having dual monitors is important for productivity — but that doesn’t necessarily mean you need to spend more to get it.

As long as you have a compatible Mac and iPad, you can quickly and easily connect two Apple devices and use your iPad as an additional display for your Mac computer. Using Sidecar built into supported devices, you can extend your MacOS desktop or mirror it to an iPad with touchscreen controls, seamlessly using both devices at the same time. Here’s what you need to know.

Requirements for using an iPad as a second monitor

As mentioned above, both of your devices need to support Sidecar, a feature that lets you use your iPad as a second display for your Mac. For your Mac, you must be running MacOS Catalina or later, and it must be one of the following models:

MacBook Pro (2016 or later), MacBook (2016 or later), MacBook Air (2018 or later), Mac (2017 or later and Retina 5K, 27-inch, Late 2015) , Mac Pro, Mac Mini (2018 or later), Mac Pro (2019 or later)

For your iPad, it must be running iPadOS 13 or later and be one of the following models: iPad Pro, iPad (6th generation or later), iPad Mini (5th generation or later), iPad Air ( 3rd generation or newer models) it is best to update your device to the latest software available to avoid any issues. Additionally, both devices must be signed into the same Apple ID account using two-factor authentication.

If you plan to use wireless, the two devices must be within 30 feet of each other. You can also connect two devices using USB, which has the advantage of charging the iPad while it’s being used as a second monitor.

Share your entire Mac desktop to iPad

Sharing your computer desktop to your tablet may vary depending on the software update on your computer. If you’re running MacOS Big Sur or later, click the Display icon in the upper-right menu bar. In the menu that appears, select your iPad.

If you’re using MacOS Catalina, you’ll instead click the AirPlay icon in the menu bar and select your iPad. If for some reason you don’t see the AirPlay icon, click the Apple menu in the upper right corner, then go to System Preferences > Displays, and check the Display Mirroring option in the menu bar.

Once your Mac and iPad are connected, you can choose from several options in the Display/AirPlay menu:

Mirror built-in Retina display: Mirror your exact desktop to your iPad. This will make your computer desktop look more like your iPad.

Use as a separate display: Use your iPad as an extension of your desktop. To use the iPad display, drag any window or file from your Mac computer to the right side of the screen, which takes you to the tablet. To get back to your computer, just drag the cursor back to where you were.

Share only one Mac window with the iPad

Or, you can quickly share a window instead of dragging it onto your iPad. To do this, just hover your mouse cursor over the green fullscreen button in the upper left corner of most windows. After hovering for a second, you should see an option that says “Move to iPad” and it will share the window to your tablet. You can share multiple windows to your iPad in succession.

Use sidebar controls, gestures, and the Touch Bar on iPad

After you share your screen to your iPad, a set of controls will appear on the left side of your iPad, these are the sidebar controls you’d typically see on a Mac. This includes, from top to bottom:

Menu Bar: Show or hide the menu bar when full screen

Dock : Show or hide the Dock

Command: Double-click the lock key

Option: Double tap lock key

Control: Double tap to lock key

Shift : double-click the lock key

Undo: Undo the last action

Keyboard: Show or hide the keyboard

Disconnect: Disconnect iPad from Mac

In addition to these Mac controls, you can also use some swipe gestures to control certain things on the second monitor. This includes two-finger swipe to scroll, three-finger pinch to copy, three-finger swipe left to undo, and more.

Finally, if the app on your iPad is compatible, you can also use the Touch Bar. You can also get rid of the Sidebar or Touch Bar controls if you don’t want to use them. On a Mac, click the Display icon in the menu bar, and under the connected iPad, you should see the Hide SideBar and Hide Touch Bar. Click one or both of the options to hide the controls in the iPad.

Use iPad when connected to Mac

Even if you’re using your iPad as a second display, you can still swipe up to exit the Sidecar app and use your iPad as usual. In your dock, you’ll see a blue icon with two monitors – this is the Sidecar. To return to using the iPad as a second display, tap the Sidecar app icon in the Dock.

>>>>>>>>>iPad battery

How long does your laptop battery last on average and what affects laptop battery life?

 Your battery will become unusable eventually but you can delay that inevitability. By taking proper care you can ensure that you get the maximum from the battery before it dies.

Laptops are best used when it has a functional battery. Take proper care of it and it will give you solid service for multiple years. Then when the time comes, change it with a proper replacement and you will be good to go.

How Long Does the Average Laptop Battery Last?

The average lifespan of a laptop battery is generally regarded as about 1,000 charge cycles. That number can vary depending on the laptop’s brand and battery, as well as how it’s used. It’s also important to note that performance can still degrade over time.

It’s difficult to say how long one charge cycle lasts on a laptop as it depends on multiple factors. Some laptops have batteries that can last tens of hours, while others (particularly gaming laptops) tend to only last 4-5 hours at most. If you’re concerned about how long your laptop battery lasts, check the manufacturer’s site to see how long the average charge should last. 

What Affects Your Laptop Battery’s Life?

Several different factors affect your laptop’s battery life, both temporarily and permanently. Here’s a look at the key factors.

Using the laptop. Using your laptop while it’s running on a battery charge is the main thing to affect your laptop’s battery life, both temporarily and potentially permanently, if you do so regularly. Your laptop battery can cope with a certain number of charge cycles before it starts to degrade. 

Heat. When your laptop runs hot or is exposed to hot conditions, the battery runs down faster, and it can put all the laptop components under excessive strain. Try to avoid using your laptop in hot conditions. 

Leaving your laptop unused for long periods. If you leave your laptop unused for a long time, such as weeks, it can affect the quality of the laptop’s battery life. It’s best to either fully drain the battery beforehand or leave it at 50% rather than fully charged before you put it into storage.

>>>>>>>>>>Laptop battery

Thanks for reading, hope it helps!

Friendly reminder: If you need to replace the battery of your device, this battery store will be a good choice: www.batteryforpc.co.uk

Four reasons why you haven’t updated to Windows 11

 When Microsoft releases Windows 11 in 2021, the company describes it as “the next generation of Windows.” Plenty of visual changes help make this clear, but hardly anyone seems interested in having a new version of the OS.

According to Statcounter, in October 2022, more than 15% of Windows devices were running Microsoft‘s latest operating system. That’s a slight increase from a month ago, but more than 70% of devices are still using Windows 10. But why are so few people making changes? There are many reasons, but here are four main ones.

1. Windows 11 is just not necessary (yet)

Microsoft has focused most of its time on Windows 11, but hasn’t given up on Windows 10 entirely. Updates for Windows 10 will run until October 2025—nearly three years from now. However, if the 22H2 update is to take place, the OS won’t get any notable new features.

Support overlap is important to ensure a smooth transition to Windows 11, but it means many Windows 10 users don’t need an update at all right now. This is especially true if your device only meets new hardware requirements.

There’s also no guarantee that Windows 11 will be a more reliable experience, as several bugs over the past year have proven. Why take the risk if your budget laptop runs fine on Windows 10?

2. Many Windows 10 devices do not meet the requirements

The hardware requirements of Windows 11 are much stricter than Windows 10, which means that many older devices are not compatible. Most commonly, they don’t have the necessary TPM 2.0 chip, while others don’t support secure boot or have at least 4GB of RAM. If you don’t check all three boxes, your PC or laptop won’t get the update.

Officially, that means you’re stuck on Windows 10 whether you like it or not. There’s a workaround that lets you install Windows 11, but it’s not supported by Microsoft and puts your computer at risk for bugs and other security issues, which is probably why no one is keen to try that particular route.

3. Windows 11 doesn’t add many meaningful features

Windows 11 may have a different look and feel than Windows 10, but behind the scenes it’s the very same operating system. At launch, several key features of Windows 10 have actually been removed.

Features like drag-and-drop support for the taskbar have been restored, but many of the missing features will never make it to Windows 11. If you’re a fan of Live Tiles in the Start menu, or viewing your history timeline across all your devices, there’s no incentive to “level up.”

However, the main problem is those quotes. It’s hard to think of Windows 11 as a true upgrade to Windows 10. So, why even install it? Windows 11 simply doesn’t have the killer feature that people want to upgrade.

4. Windows 11 is a big visual makeover

Usually, people don’t like change. They certainly don’t like it when the app updates and makes everything suddenly unfamiliar. Unfortunately, this is exactly what happens after installing Windows 11. The Start Menu, Action Center, and many stock apps look completely different, and there are new ways to search and multitask.

Most people use Windows for simple productivity tasks. Why let people learn a new method when they don’t need it? Beyond the new features, there’s relatively little Microsoft can do to avoid these problems. The huge Windows 10 user base has always taken a while to get to Windows 11, but now there is a risk that Windows 12 will be released before the masses migrate to Windows 11.

>>>>>>>>>>>>Microsoft Battery

MacBook Air vs Pro: Which should you buy?

 Choosing between the Apple MacBook Air and Pro can be difficult, as both are excellent laptops, and both are better than ever thanks to Apple chips. Comparing laptops is difficult but important because you need to know exactly what each laptop does when deciding which one is right for you.

When choosing between MacBook Air and Pro, here’s everything you need to know to find the best MacBook for you.

MacBook Air vs Pro: Design

The M1 MacBook Air and Pro share a machined aluminum casing, come in silver and space gray, and both have a small lip on the front of the base to easily open the screen. The Air, as always, has a tapered wedge shape.

The new MacBook Pro offers slim bezels and ditches the Touch Bar in favor of a dedicated feature row. The 1080p webcam has a notch at the top, but it’s not a distraction. The design of the M2 MacBook Air 2022 is more similar to the 2021 MacBook Pro, ditching the tapered design. It also has thinner bezels and a notch for the camera. The design of the M2 MacBook Pro is identical to its M1 predecessor.

In terms of portability, the 2.7-pound MacBook Air 2022 is the lightest, followed by the 3-pound 13-inch MacBook Pro. But at 3.5 pounds, the 14-inch MacBook Pro is still fairly portable. Unfortunately, the new MacBook Pro is limited to silver and space gray.

MacBook Air vs MacBook Pro: Ports

If you want a lot of ports, the MacBook Air isn’t the best choice. It only offers two Thunderbolt 3 ports. The M1-powered 13-inch MacBook Pro also has only two Thunderbolt 3/USB-C ports. M2 powered machines share the same number of ports.

The new 14-inch and 16-inch MacBook Pros offer the most ports, including three Thunderbolt 4 ports, an HDMI port, and SD card slot. Plus, there’s MagSafe charging.

MacBook Air vs MacBook Pro: Display

The Retina displays in the MacBook Air and 13-inch MacBook Pro are sharp and colorful, and while they’re so close, there’s a reason to choose the Pro: Brightness.

The MacBook Air (M1) has a maximum brightness of 365.8 nits, while the M1 MacBook Pro (13-inch: 434.8 nits) is even brighter. The standard brightness of the M2 MacBook Pro is 474.6 nits, while the standard brightness of the MacBook Air 2022 is 489 nits.

In terms of color output, though, the M1 laptops are more similar. The Air (M1) earned an sRGB rating of 114.3% from our colorimeter, slightly higher than the 110.6% rating we got from the M1 13-inch Pro.

MacBook Air vs Pro: Performance

In the Handbrake video transcoding test, which converts 4K video to 1080p, the M1 MacBook Pro’s time of 7:44 beats the Air’s 9:15. The 2021 MacBook Pro beats both, with the 14-inch MacBook Pro transcoding time At 4 minutes 51 seconds, the 16-inch laptop’s transcoding time was 4 minutes and 48 seconds. The M2 MacBook Pro transcoded the video at 6:51 with impressive results. The MacBook Air 2022 was slightly behind, with a time of 7:52.

The SSD on the M1 Pro (13-inch) was impressive, with a BlackMagic Disk Speed ​​Test read rate of 2,824.9 MBps, beating the M1 Air’s 2,692 MBps and the 16-inch Pro’s 2,540 MBps. However (should be unsurprising at this point), the new MacBook Pro beat the 14-inch and 16-inch models with scores of 5,321 and 5,314, respectively. The M2-powered MacBook Pro’s score of 2,794 sits between the old and new M1 chips.

MacBook Air vs Pro: Battery Life

Battery life is another area where Apple turned to its own M1 processor for a big win. The M1 MacBook Air lasted 14 hours and 41 minutes on the battery test, while the M1 Pro (16:32) lasted longer. Left the 16-inch MacBook Pro (10:55) in the dust both times.

MacBook Air and Pro: Audio

While the MacBook Air and 13-inch MacBook Pro offer excellent stereo sound (the latter has more dynamic range), the new MacBook Pro is on another level.

That’s because the 14-inch and 16-inch MacBook Pros offer a six-speaker setup. Now you get more bass as well as lower octaves for a more powerful audio profile. Additionally, the new MacBook Pro supports Dolby Atmos in the speakers, not just the headphones.

MacBook Air vs Pro: Value and Price

The MacBook Air with the M1 remains the value leader, starting at $999, and it’s arguably a better deal than the 13-inch MacBook Pro in terms of performance. Both the new and old 13-inch Pros have better battery life, but that’s probably not enough to justify the $1,299 price.

The 14-inch MacBook Pro costs a lot more than the 13-inch, but at $1,999 you get a lot. That includes a faster M1 Pro chip, a bigger, better 14-inch mini-LED display with a 120Hz refresh rate, a more sculpted 1080p webcam, and more ports. However, you may have to take on a heavy workload to experience all these benefits.

>>>>>>>>>>>MacBook battery

iPad Pro 2022 vs MacBook Air 2022: Is a Tablet or Laptop Right for You?

 Last year, Apple announced a number of new hardware, including new additions to the iPad Pro and MacBook Air lineup. Some of the most anticipated improvements are the iPad Pro lineup, which came this year in the form of the iPad Pro M2. The MacBook Air lineup has also been upgraded with the M2 chipset, and the two devices are on par when it comes to processors.

Before we begin, it’s important to note that we haven’t been able to review the iPad Pro 2022, so we won’t make any definitive comments on its performance. However, we’ve been able to review the MacBook Air 2022, so we can make some educated guesses about which device is best for you. Let’s take a look below!

Design and Display

Starting with the iPad Pro, it comes with a 12.9-inch Liquid Retina XDR mini-LED backlit display. The resolution is 2732×2048, and Apple claims it can hit 600 points of brightness in normal use, 1,000 nits at maximum brightness, and 1,600 nits when playing HDR content. It also includes support for ProMotion, which means you’ll get a 120Hz refresh rate during intensive tasks like editing or scrolling, which drops off when it’s no longer needed to save battery.

It supports the second-generation Apple Pencil and, in terms of ports, has USB-C Thunderbolt 4 as well as a Nano-SIM tray on the cellular model. The Wi-Fi model weighs just 682 grams, while the cellular version is slightly heavier at 684 grams.

The iPad itself is available in two colors: silver and space gray. It has rounded edges and thin bezels, with few design changes compared to its predecessor, the iPad Pro (2021). There are four speakers, an integrated microphone and the usual volume switch and a top lock button.

The rear camera module is square and consists of wide-angle and ultra-wide-angle cameras, the former is 12MP at f/1,8 aperture, and the former is 10MP at f/2.4 aperture, with a field of view of 125 degrees.

The MacBook Air, meanwhile, is available in four colors: Silver, Starlight, Space Gray, and Midnight. We think it looks very similar to the MacBook Pro (2021) 14- and 16-inch models. This gives it a boxier look without the wedge-shaped design, and our review pointed out that it feels very portable thanks to its 1.24kg weight.

It comes with two Thunderbolt 3-capable USB-C ports, as well as a MagSafe 3 charging port and a 3.5mm audio jack, which is absent on the iPad Pro. The inclusion of MagSafe means you can charge your laptop without using any of the USB-C ports, but you’ll need to have a MagSafe charger handy.

According to Apple, the screen is 13.6 inches and features an LED-backlit display with a resolution of 2560×1664 and a brightness of up to 500 nits. We’re disappointed that the MacBook Air doesn’t feature ProMotion technology, sticking with a 60Hz refresh rate, which means on-screen motion may not be as smooth as the iPad Pro.

The screen has a notch since Apple thinned the top screen bezel, which we don’t really mind. We did note, however, that the notch would be more welcome if Apple decided to upgrade its 1080p front-facing webcam.

Glasses

Both the iPad Pro and MacBook Air are equipped with the M2 chipset. iPad Pro features an 8-core CPU, 10-core GPU, and 16-core Neural Engine. The MacBook Air comes in two variants, the first is the same as the iPad Pro, and the second has an 8-core CPU, 8-core GPU, and a 16-core Neural Engine.

Also, since the iPad model has the same features as the base MacBook Air, we think the iPad Pro is more than adequate for browsing and may be suitable for creative professionals who want to draw and edit on a tablet.

The iPad Pro does support USB-C Thunderbolt 4, which means it can easily connect to an external display and transfer files very quickly. The MacBook Air opts for Thunderbolt 3 technology, which still enables fast transfers.

Since we haven’t been able to review the iPad Pro, we can’t definitively claim which is more powerful, however, since they have the same processor configuration, we expect them to have similar performance. The real difference is in the interface, as the iPad runs on iPad OS 16 and is a dedicated tablet, while the MacBook Air is a laptop that runs on macOS and will support macOS Ventura.

Users who want a powerful tablet can also equip the iPad Pro with a compatible keyboard from Apple or third-party retailers and use it as a 2-in-1 device, making it more versatile than the MacBook Air.

>>>>>>>>>>>Apple battery